Lattice Seed Stitch Knitting Pattern for Beginners
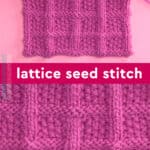
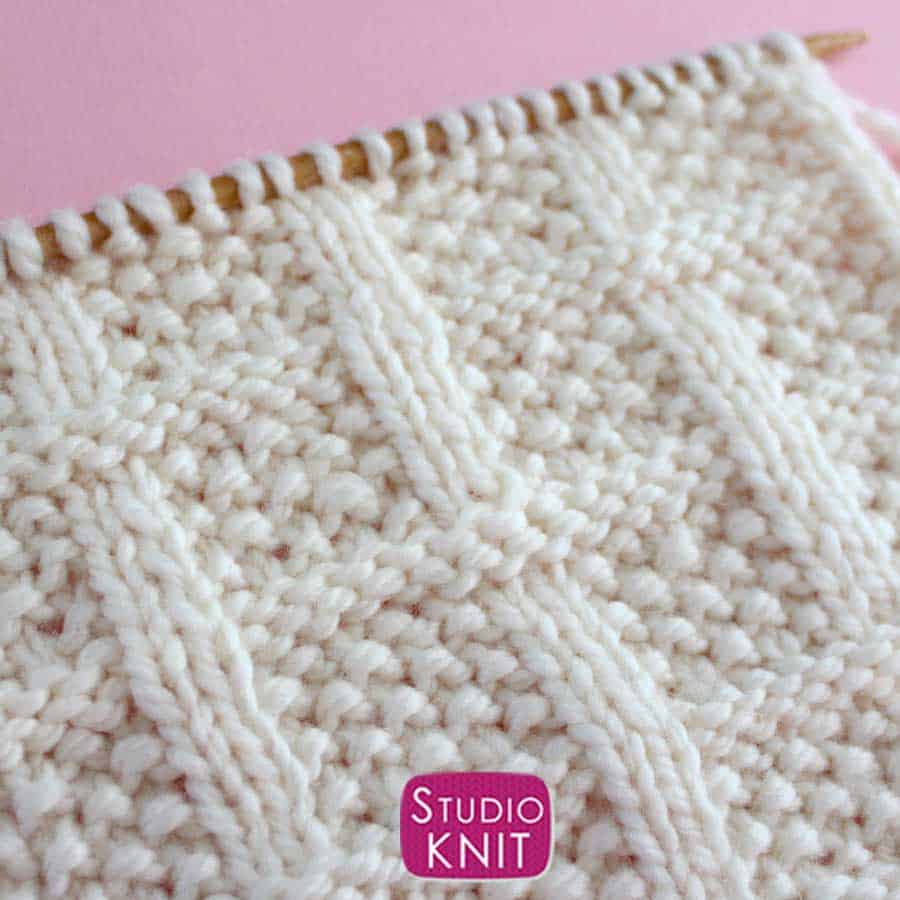
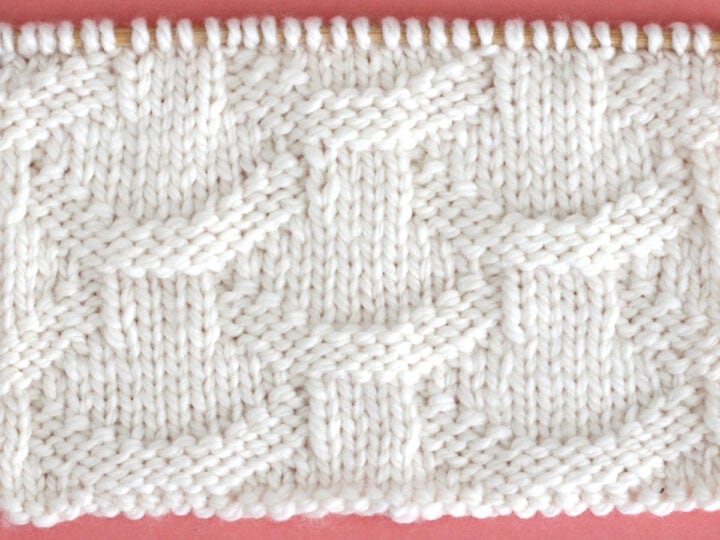
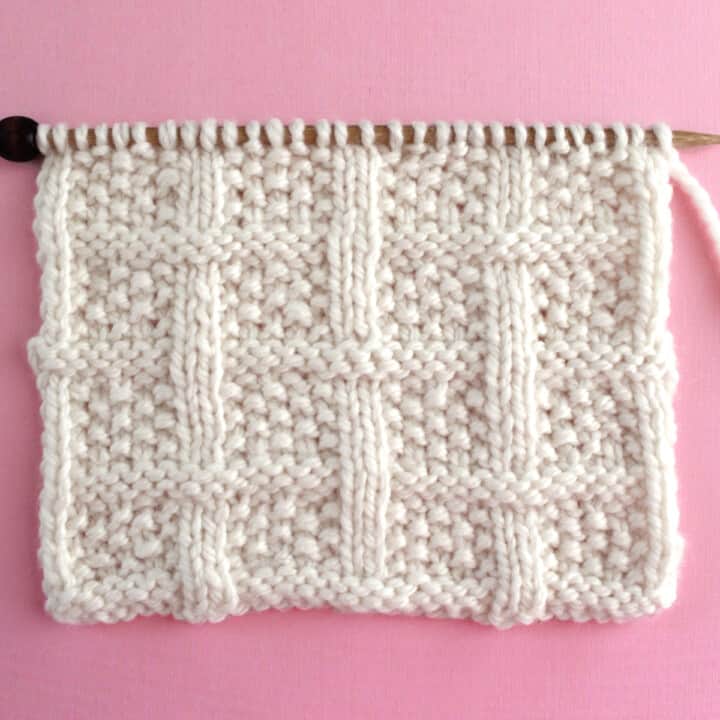
The Lattice Seed Stitch Knitting Pattern creates a wide braided basketweave design woven atop a seeded background with a simple combination of knits and purls. It is an impressive texture that looks stunning knitted up as a blanket, scarf, or pillow.
Get your written pattern instructions below for both flat and in the round, along with my helpful video tutorial.
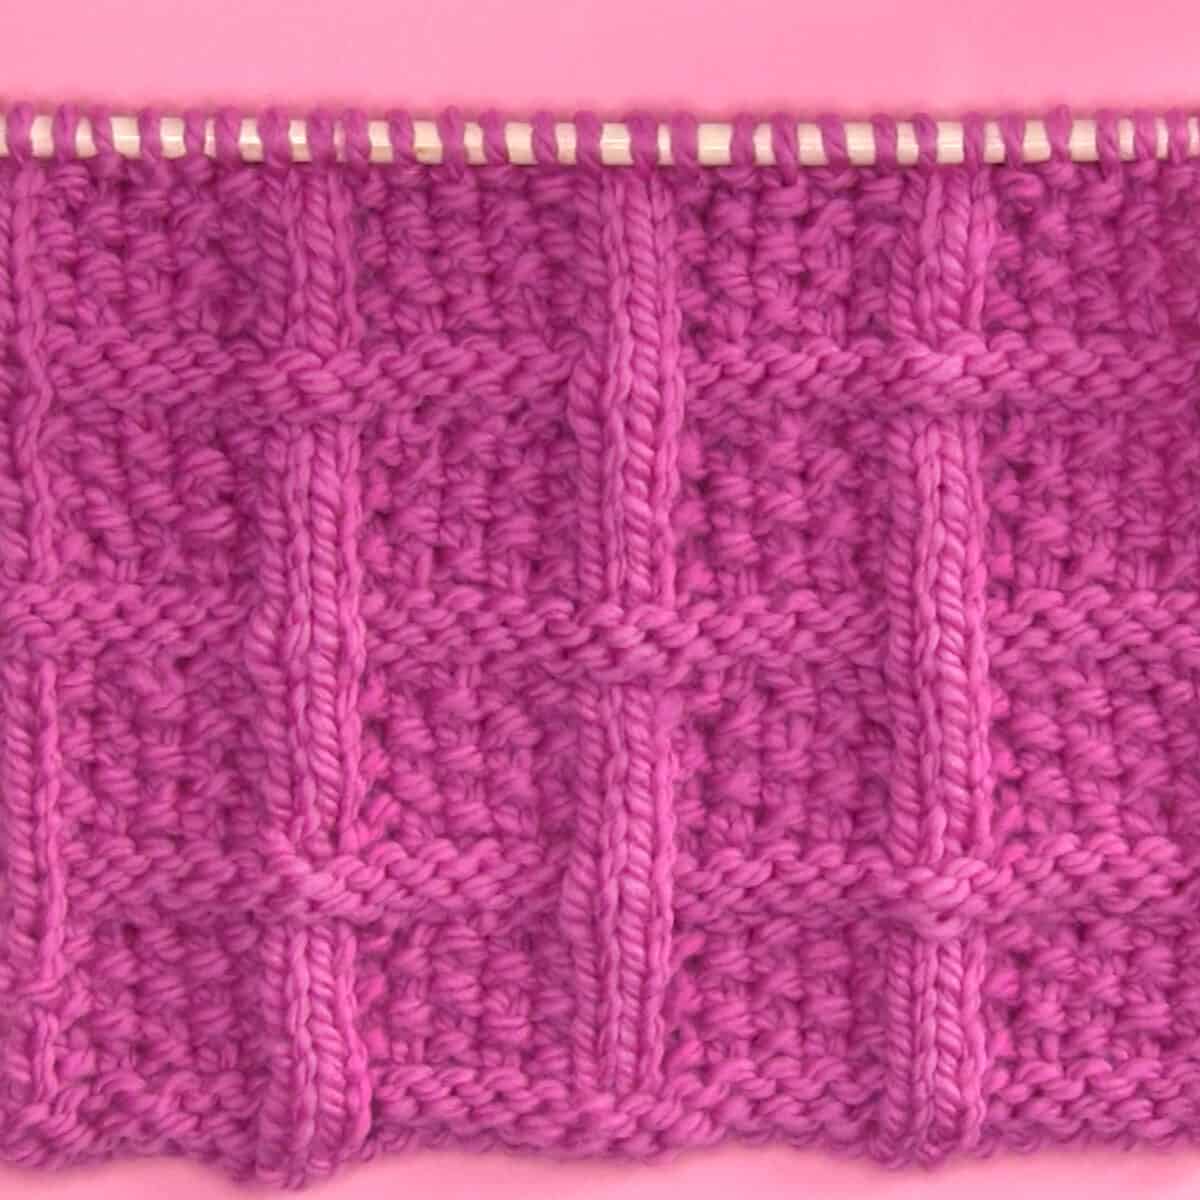
Table of Contents
About the Lattice Seed Stitch Pattern
Let’s take a close look at our Lattice Seed Stitch Pattern, seeing exactly how those knits and purls are knitted together to make this simple pattern.
Easy Knitting Techniques
This pattern is achieved with a simple combination of knits and purls.
Row Repeats
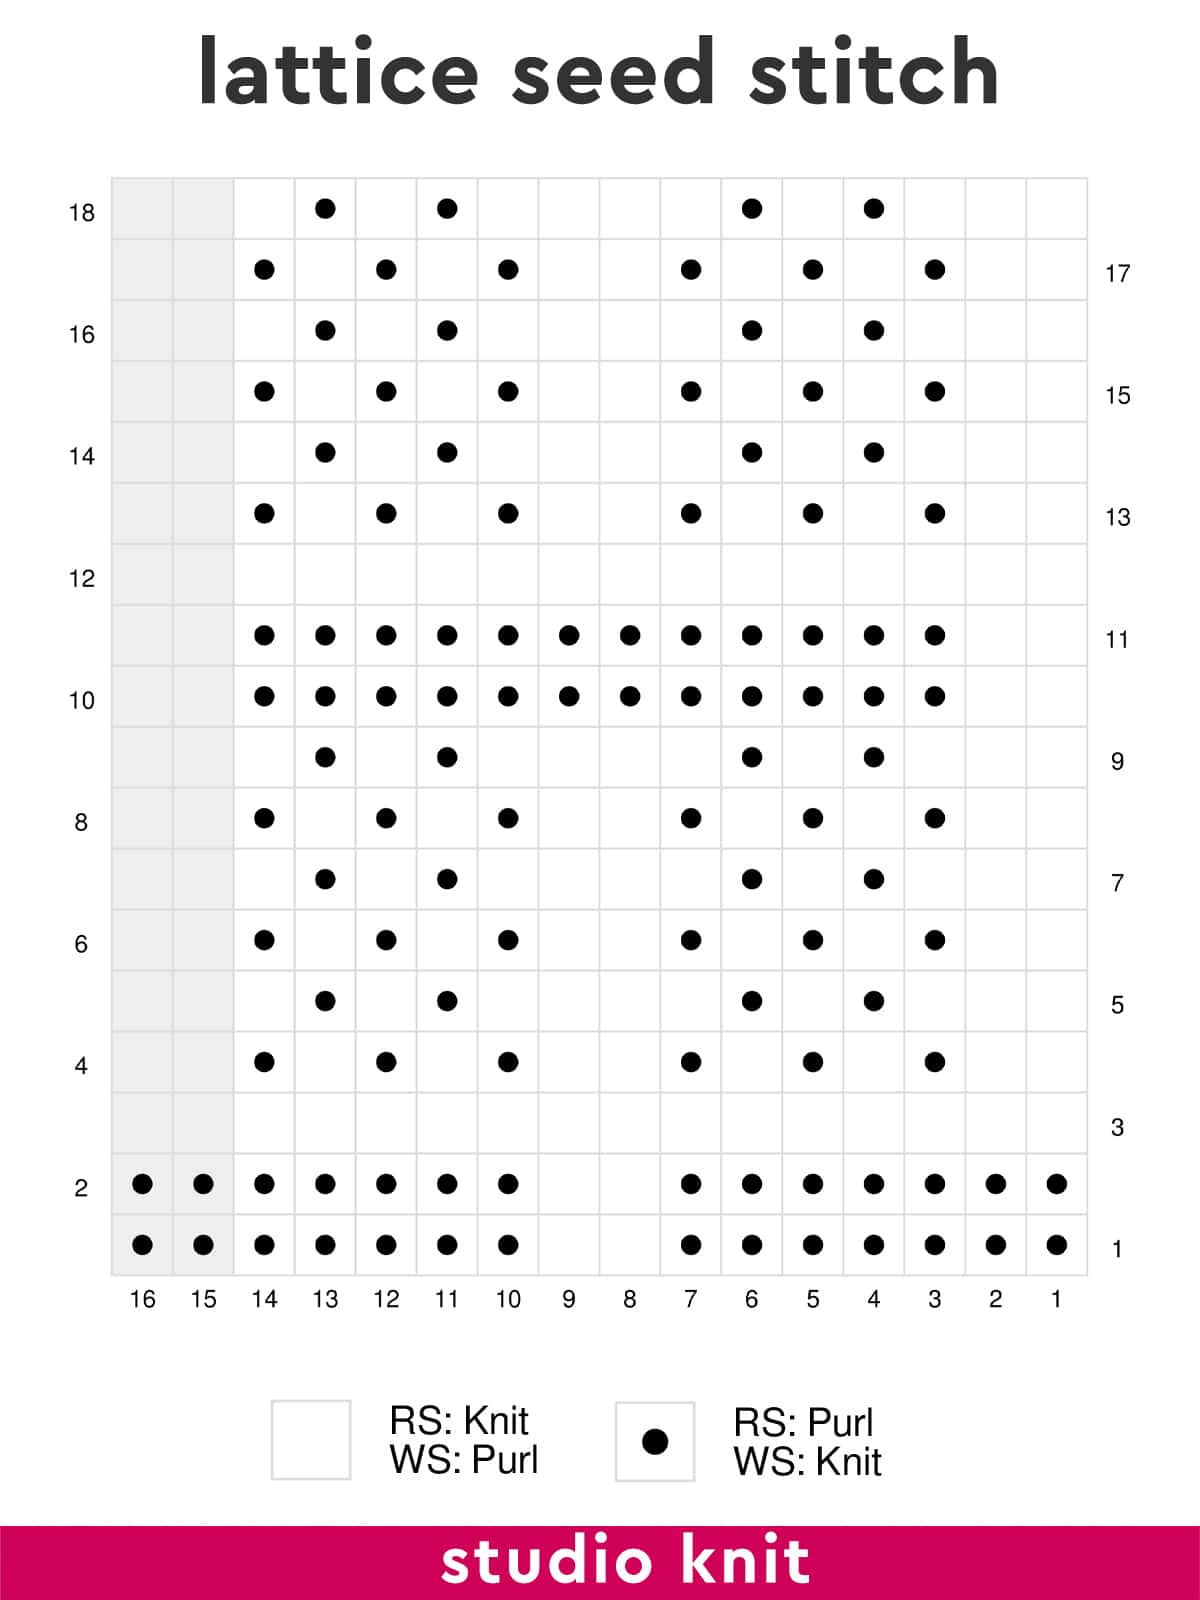
This 18-Row Repeat Knit Stitch Pattern looks like a complicated cabled design but is an easy beginner-level design.
Texture Construction
There are vertical stripes of Stockinette and horizontal stripes of Garter stitches that interweave to create this visually interesting design. The latticework is atop a background bed of the Seed Stitch.
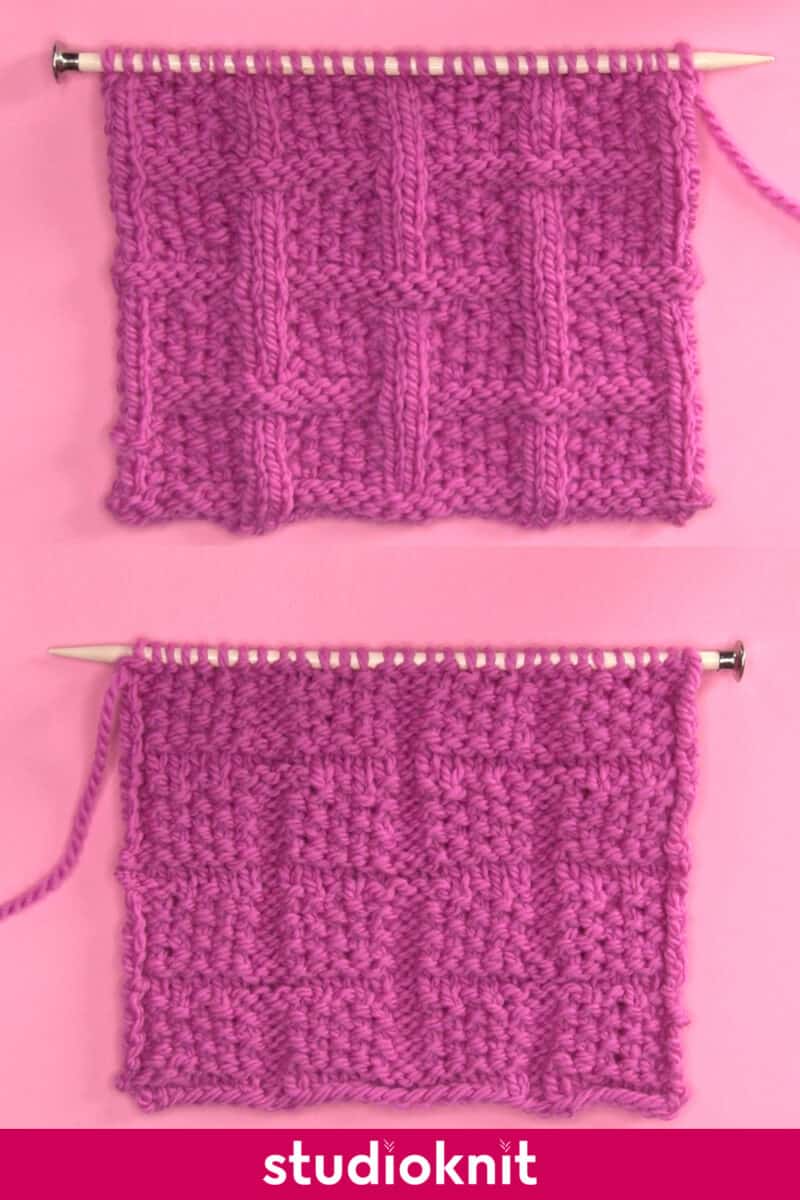
Is the Lattice Seed Stitch Reversible?
No, this is not a reversible pattern because the right side of the work displays the design while the wrong (back) side does not.
Knitting Project Ideas
This makes for a great pattern choice for knitted projects like scarves or blankets because it is bordered on all sides.

Knit Stitch Pattern Book
Love easy knitting? Get 50 stitch patterns from my Knit Stitch Pattern Book available in both digital and print formats.
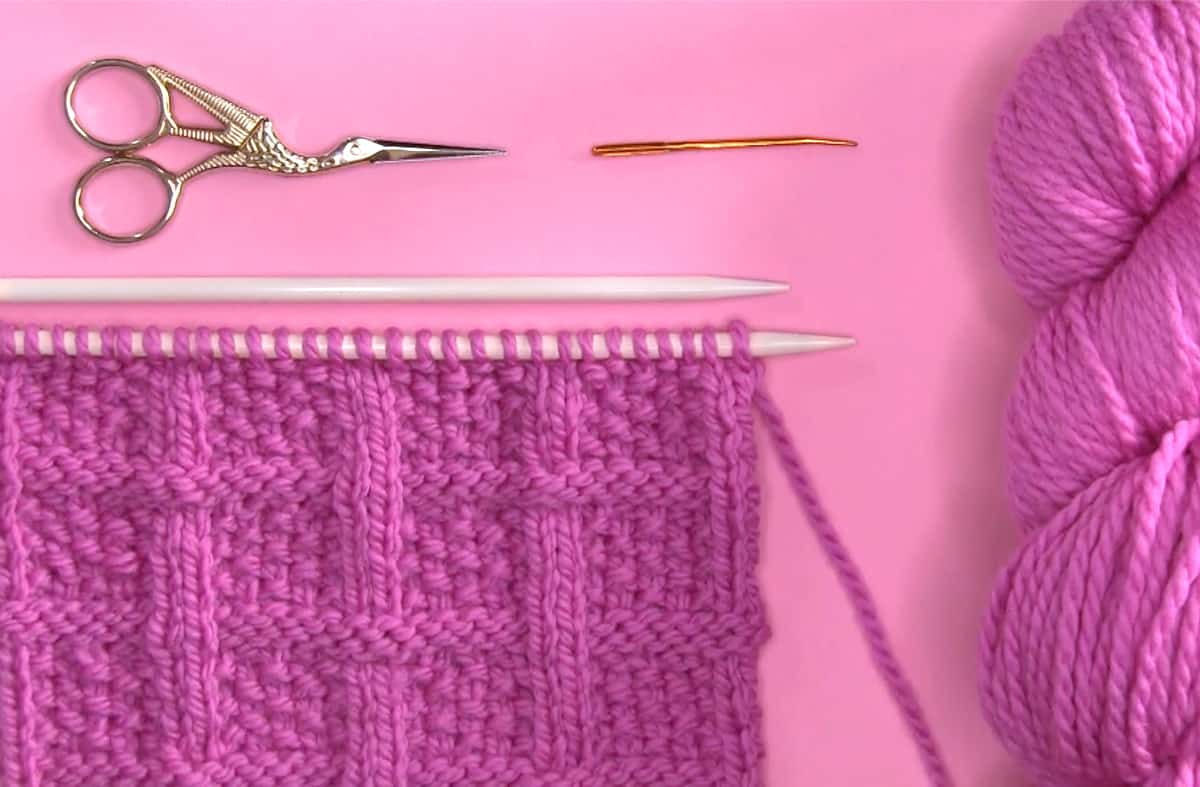
Knitting Supplies
Feel free to use any size yarn and needles for your creative project.
As an Amazon Associate, I earn from qualifying purchases.
Knitting Techniques
This pattern is an easy combination of simple knit and purl stitches. Find my entire library of Knitting Techniques to help knit up this project.
- How to Cast On Without a Slip Knot or Slip Knot
- Cast On
- K = Knit Stitch
- P = Purl Stitch
- Cast Off
- Weave-in Yarn Ends
Design Suggestion: The Slip Stitch Knitting technique is a favorite way to create smooth edges on the right and left sides of your project. If you’re knitting up a flat scarf, dishcloth, or blanket, you may wish to add selvedge stitches to create a more finished look.
Watch Video Tutorial

Knitting Instructions
Cast On in Multiples of 14 + 2 Stitches
Begin by casting your knitting stitches in multiples of fourteen plus two. For example, you may wish to cast on 14, 28, or 42 stitches, then add an additional two stitches onto your needle.
Row 1: (right side) * P7, K2, P5 *, P2
On the right side of your knitted work, begin with seven purl stitches and two knit stitches, and five purl stitches. Continue knitting this pattern between the asterisks of 14 stitches until you reach the end of your row, then purl the last two stitches.
Row 2: (wrong side) K2, * K5, P2, K7 *
On the wrong side of your knitted work, begin with two knit stitches, then begin the repeat pattern all the way down the row.
Row 3: Knit All
Knit all stitches all the way down the row. Doesn’t get any easier than this!
Rows 4, 6, and 8: P2, * K1, P1, K1, P1, K1, P2 *
Begin with two purl stitches, then knit the stitch repeat between the asterisks.
Rows 5, 7, and 9: * K3, P1, K1, P1, K4, P1, K1, P1, K1 *, K2
Knit the stitch repeat between the asterisks until you reach the last two stitches, then knit those last two stitches.
Row 10: P2, * K12, P2 *
Begin with two purl stitches, then knit the stitch repeat of knitting twelve and purling two between the asterisks.
Row 11: * K2, P12 *, K2
Knit the stitch repeat of two knits and twelve purls between the asterisks until you reach the last two stitches, then knit those last two stitches.
Row 12: Purl All
Purl all stitches down the row.
Rows 13, 15, and 17: * K2, P1, K1, P1, K1, P1 *, K2
Knit the stitch repeat between the asterisks until you reach the last two stitches, then knit those last two stitches.
Rows 14, 16, and 18: P2, * P1, K1, P1, K1, P4, K1, P1, K1, P3 *
Begin with two purl stitches, then knit the stitch repeat between the asterisks.
Continue Knitting the Lattice Seed Stitch Pattern
Continue knitting the pattern by repeating these 18 rows until your piece is the length you desire. The basketweave texture will continue to develop and build as you keep knitting bottom up!
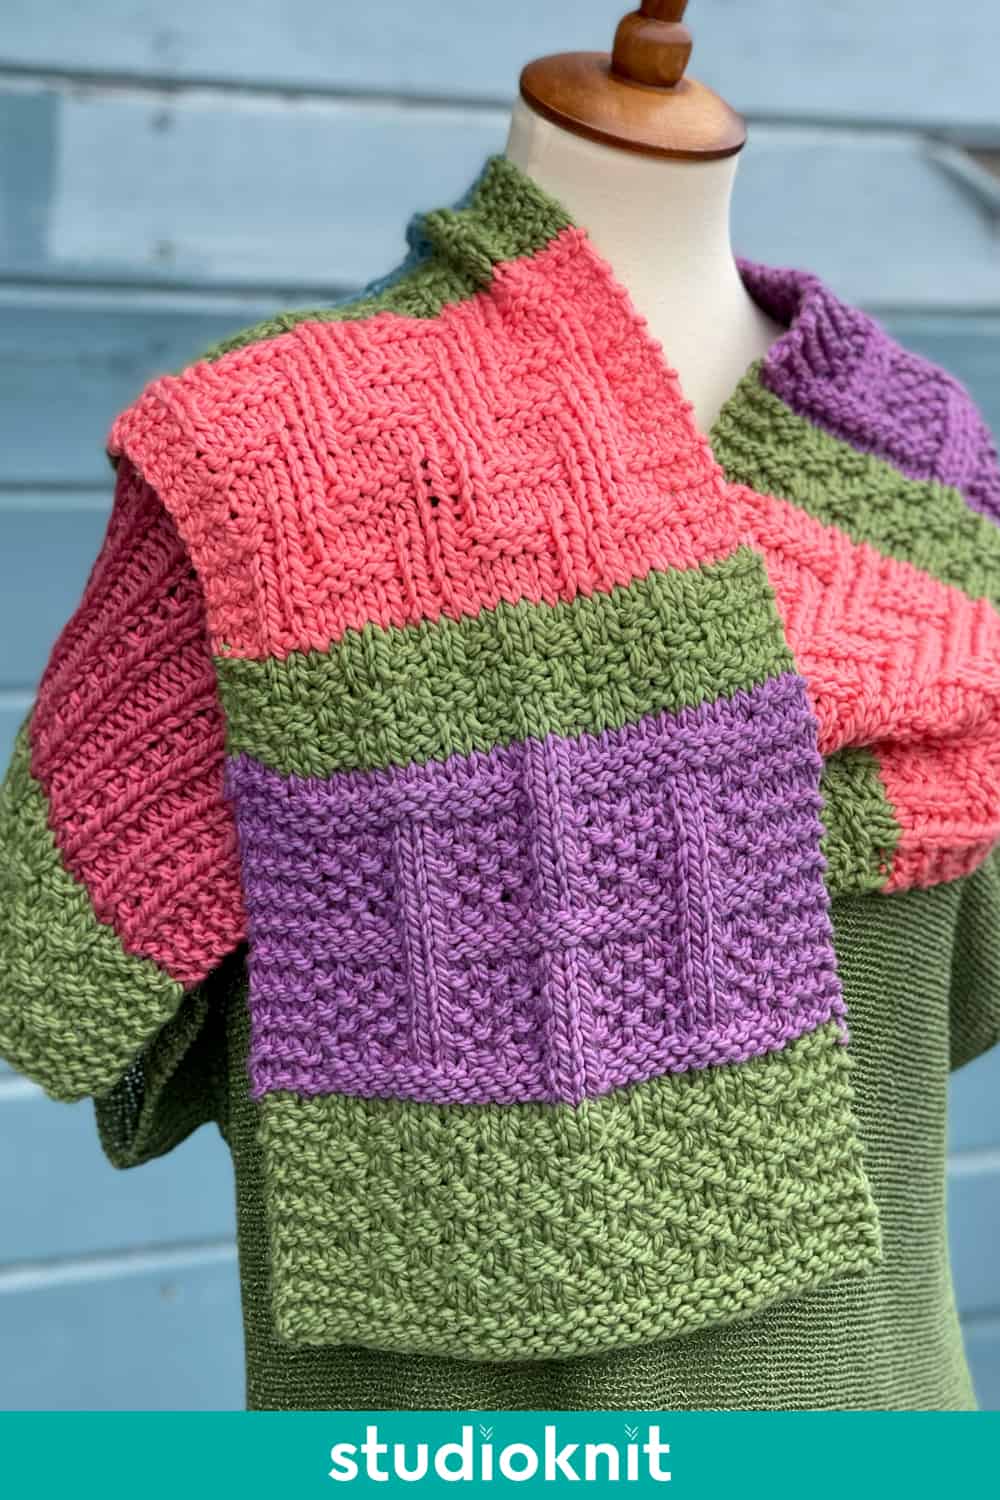
Color Block Knitted Scarf
Inspired by my Knit Stitch Pattern Book, this Color Block Knitted Scarf is an easy knit and purl design.
Enjoy knitting 5 textured patterns which include Beaded Rib, Double Moss, Tile Squares, Diagonal Zigzag, and Lattice Seed Stitch. Additionally, this scarf is edged in the simple Garter Stitch on every panel.
Printable Knitting Instructions
Printable Knitting Pattern
The Lattice Seed Stitch Pattern creates a wide braided basketweave design atop a seeded background using an 18-row repeat of knits and purls.
Materials
- Yarn - Any Gauge
Tools
- Knitting Needles - Appropriate Size for Yarn
- Tapestry Needle
- Scissors
Instructions
KNITTED FLAT ON STRAIGHT NEEDLES:
Cast On: Multiple of 14 + 2 Stitches
- Row 1 (Right Side): * P7, K2, P5 *, P2
- Row 2 (Wrong Side): K2, * K5, P2, K7 *
- Row 3: Knit All
- Row 4: P2, * K1, P1, K1, P1, K1, P2 *
- Row 5: * K3, P1, K1, P1, K4, P1, K1, P1, K1 *, K2
- Row 6: P2, * K1, P1, K1, P1, K1, P2 *
- Row 7: * K3, P1, K1, P1, K4, P1, K1, P1, K1 *, K2
- Row 8: P2, * K1, P1, K1, P1, K1, P2 *
- Row 9: * K3, P1, K1, P1, K4, P1, K1, P1, K1 *, K2
- Row 10: P2, * K12, P2 *
- Row 11: * K2, P12 *, K2
- Row 12: Purl All
- Row 13: * K2, P1, K1, P1, K1, P1 *, K2
- Row 14: P2, * P1, K1, P1, K1, P4, K1, P1, K1, P3 *
- Row 15: * K2, P1, K1, P1, K1, P1 *, K2
- Row 16: P2, * P1, K1, P1, K1, P4, K1, P1, K1, P3 *
- Row 17: * K2, P1, K1, P1, K1, P1 *, K2
- Row 18: P2, * P1, K1, P1, K1, P4, K1, P1, K1, P3 *
Repeat Rows 1 – 18 until your piece is the length you desire.
Then, Repeat Rows 1 and 2 to complete with top border.
or
IN THE ROUND ON CIRCULAR NEEDLES:
Cast On: Multiple of 14
- Row 1 (Right Side): * P7, K2, P5 *
- Row 2 (Wrong Side): * P7, K2, P5 *
- Row 3: Knit All
- Row 4: * K2, P1, K1, P1, K1, P1 *
- Row 5: * K3, P1, K1, P1, K4, P1, K1, P1, K1 *
- Row 6: * K2, P1, K1, P1, K1, P1 *
- Row 7: * K3, P1, K1, P1, K4, P1, K1, P1, K1 *
- Row 8: * K2, P1, K1, P1, K1, P1 *
- Row 9: * K3, P1, K1, P1, K4, P1, K1, P1, K1 *
- Row 10: * K2, P12 *
- Row 11: * K2, P12 *
- Row 12: Knit All
- Row 13: * K2, P1, K1, P1, K1, P1 *
- Row 14: * K3, P1, K1, P1, K4, P1, K1, P1, K1 *
- Row 15: * K2, P1, K1, P1, K1, P1 *
- Row 16: * K3, P1, K1, P1, K4, P1, K1, P1, K1 *
- Row 17: * K2, P1, K1, P1, K1, P1 *
- Row 18: * K3, P1, K1, P1, K4, P1, K1, P1, K1 *
Repeat Rows 1 – 18 until your piece is the length you desire.
Then, Repeat Rows 1 and 2 to complete with top border.
Notes
Repeat pattern between the * * asterisks
Reversible Knit Stitch Pattern
18-Row Repeat
_____
KNITTING TECHNIQUES
- Slip Knot
- CO = Cast On Long Tail Method
- K = Knit Stitch
- P = Purl Stitch
- BO = Bind Off
- Weave In Ends
_____
KNITTING CHART

Kristen McDonnell
Author • Designer • Teacher
Kristen from StudioKnit LLC produces knitting video lessons and pattern designs from her vibrant production studio on Half Moon Bay’s California coast.
Kristen McDonnell is the author of the highly acclaimed book Knit Stitch: 50 Knit + Purl Patterns featuring vintage and unique designs.