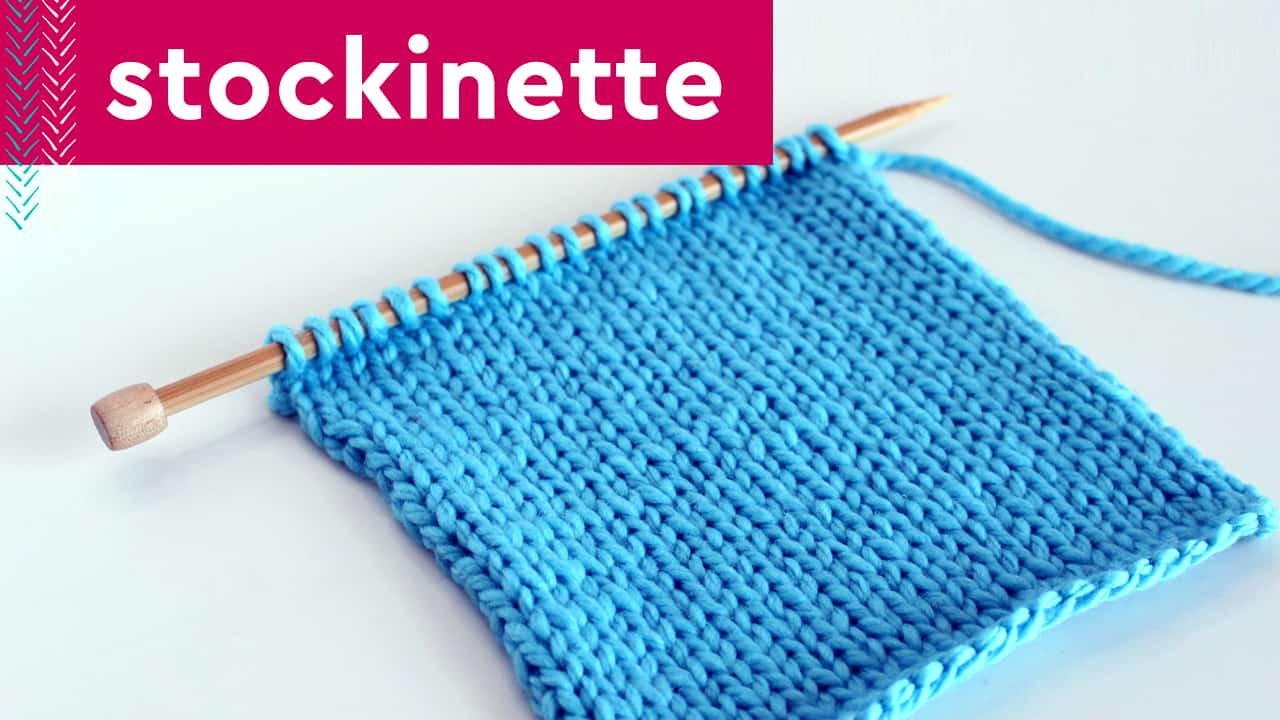
Stockinette Stitch Knitting Pattern for Beginners
The Stockinette Stitch is an easy knitting pattern that creates a smooth, classic texture. You simply alternate two types of knitting techniques. Knitted flat, simply knit the right side and then purl the wrong. It’s even simpler in the round by knitting all stitches on all rows.
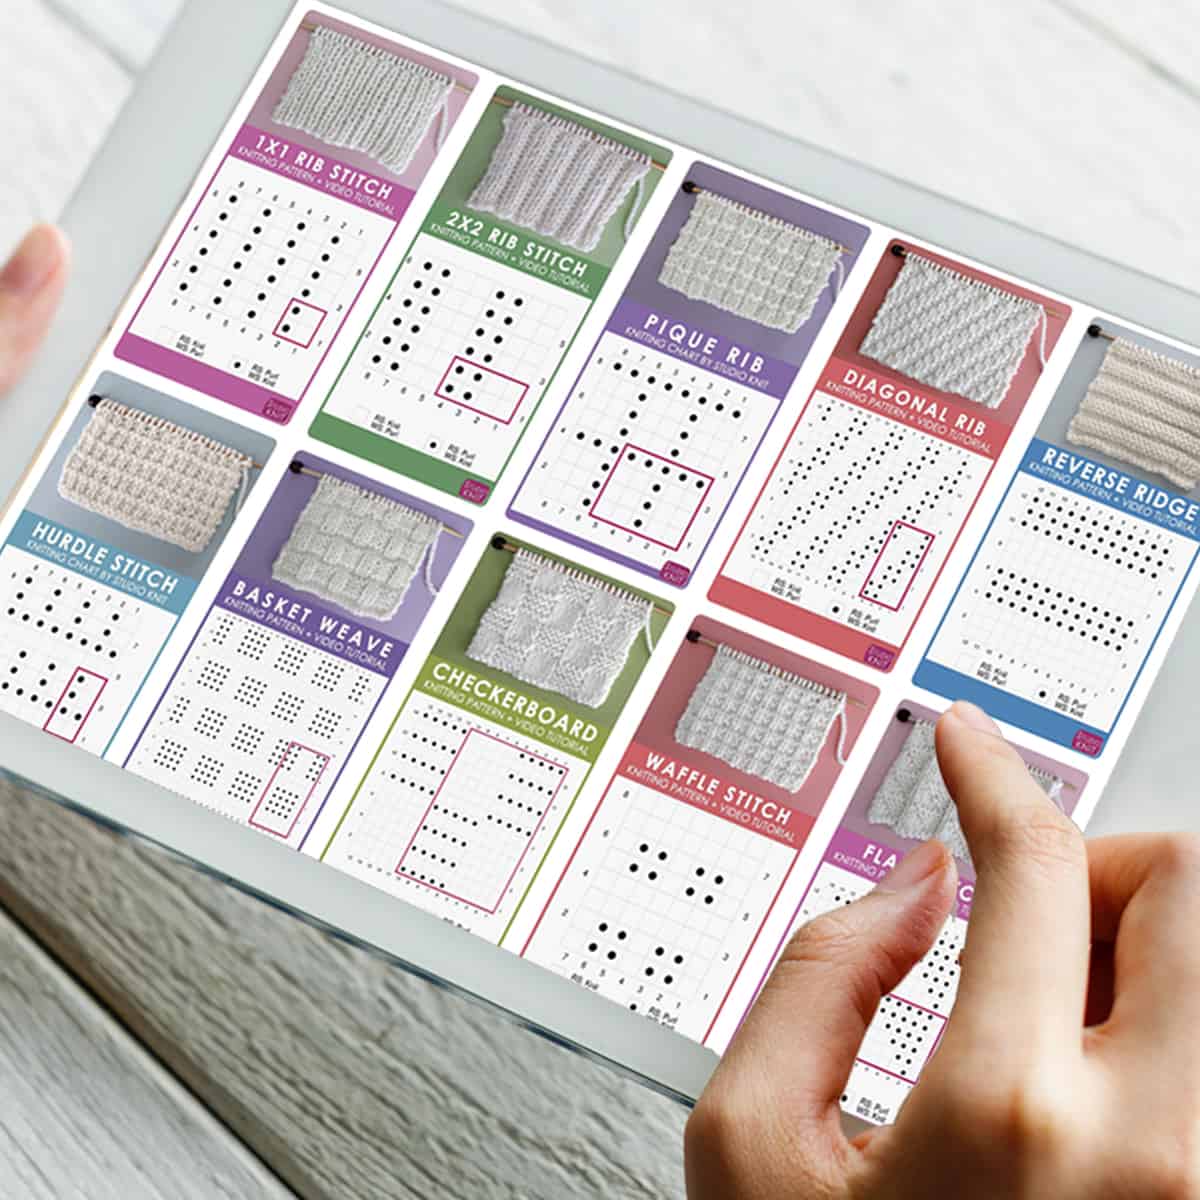
Get your written pattern instructions below for both flat and in the round pieces, along with a helpful knitting chart and video tutorial.
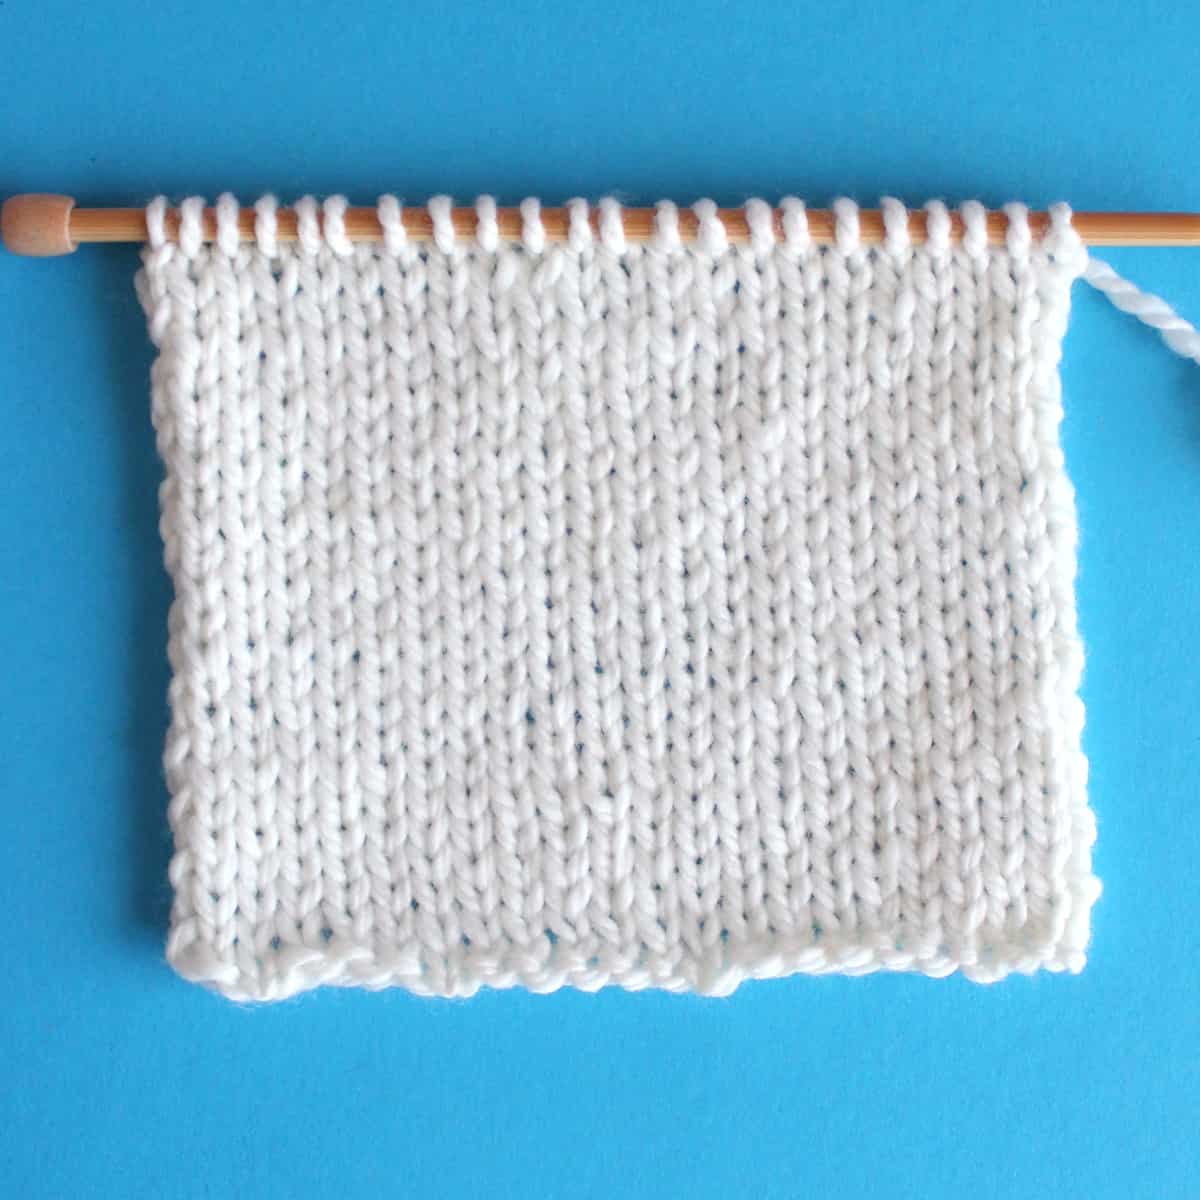
Table of Contents
Knitting Instructions
Stockinette Flat on Straight Needles
Cast On any number of stitches onto your straight knitting needle.
Row 1: Knit All Stitches.
The first row is the right side of your work, which is the side that will be visible once it is knitted up.
Row 2: Purl All Stitches.
The second row is all purling from the wrong side of the work.
Row Repeats: Continue knitting Rows 1 and 2 until your work is the length you desire, then bind off your stitches and weave in your ends.
Stockinette in the Round on Circular Needles
Cast On any number of stitches onto your circular knitting needle.
Row 1: Knit All Stitches.
Row 2: Knit All Stitches.
It’s so easy to knit this texture in the round on circular or double-pointed needles, since every row is simply the knit stitch.
Row Repeats: Knit all rows until your work is the length you desire, then bind off your stitches and weave in your ends.
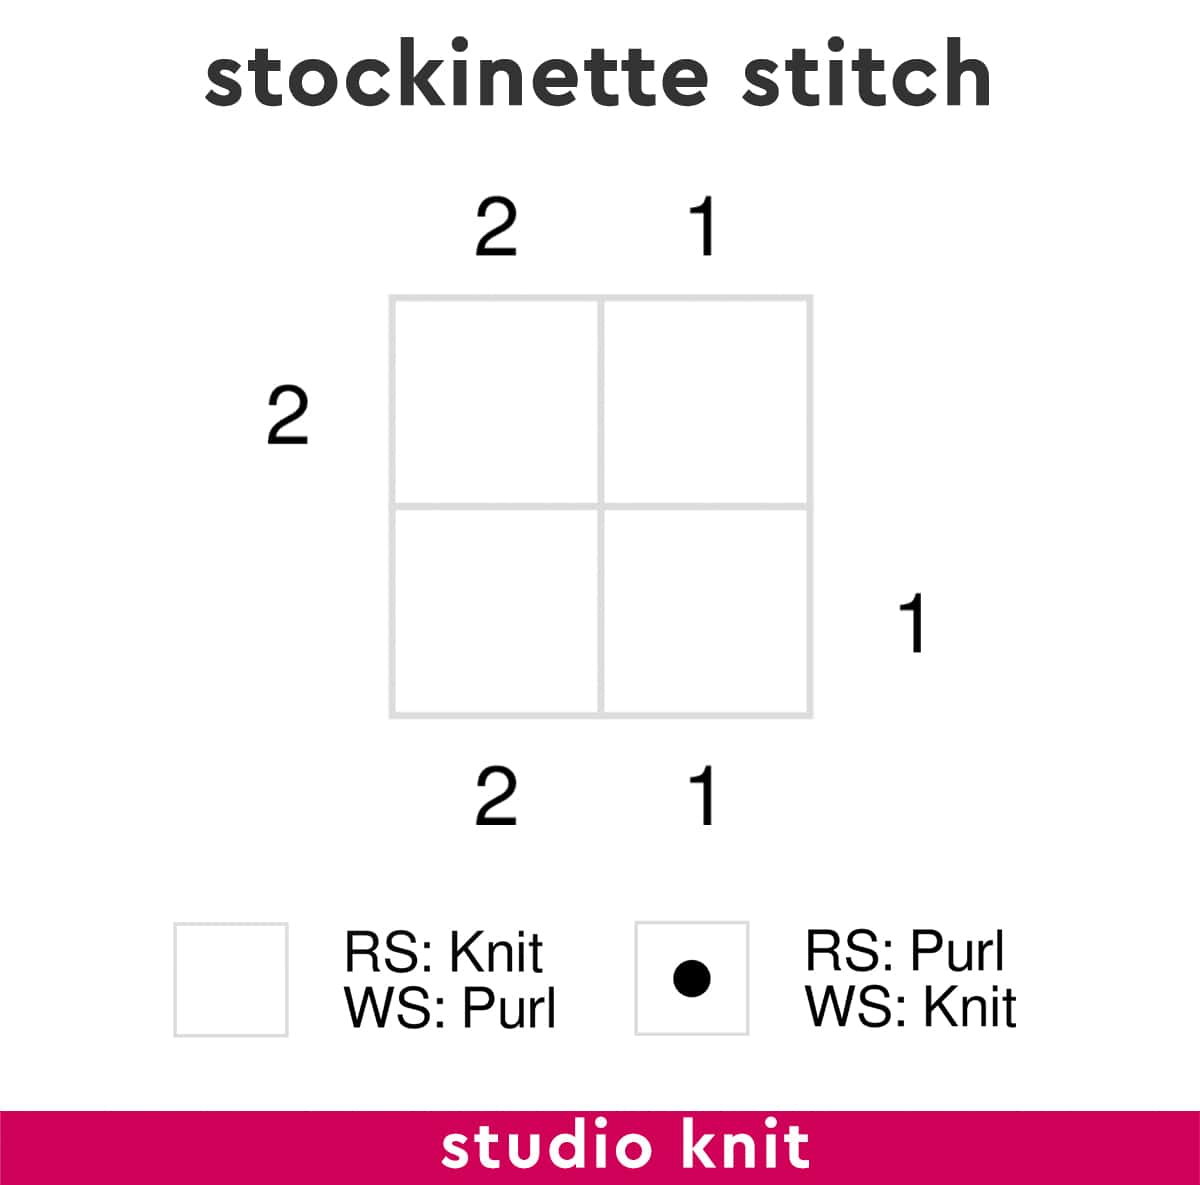
Knitting Chart
Find your printable knitting chart in the pattern card below. Here’s a helpful tutorial about how to read knitting charts for beginners >
Watch Video Tutorial

Knit Stitch Pattern Book
Love easy knitting? Get 50 stitch patterns from my Knit Stitch Pattern Book available in both digital and print formats.
About the Stockinette Stitch
Is the Knitted Stockinette Stitch Reversible?
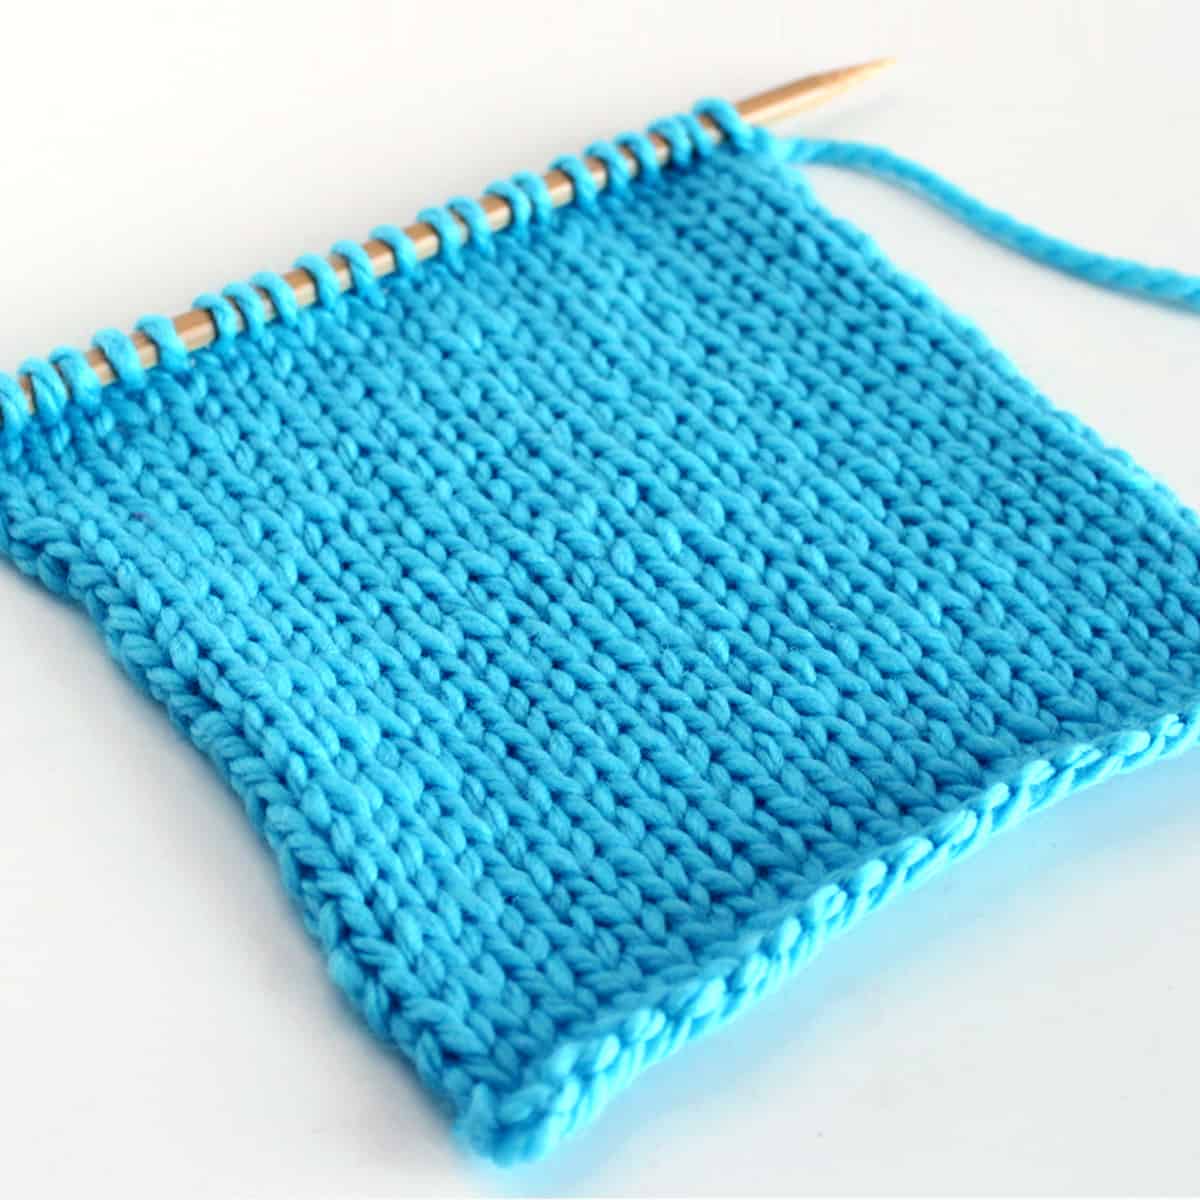
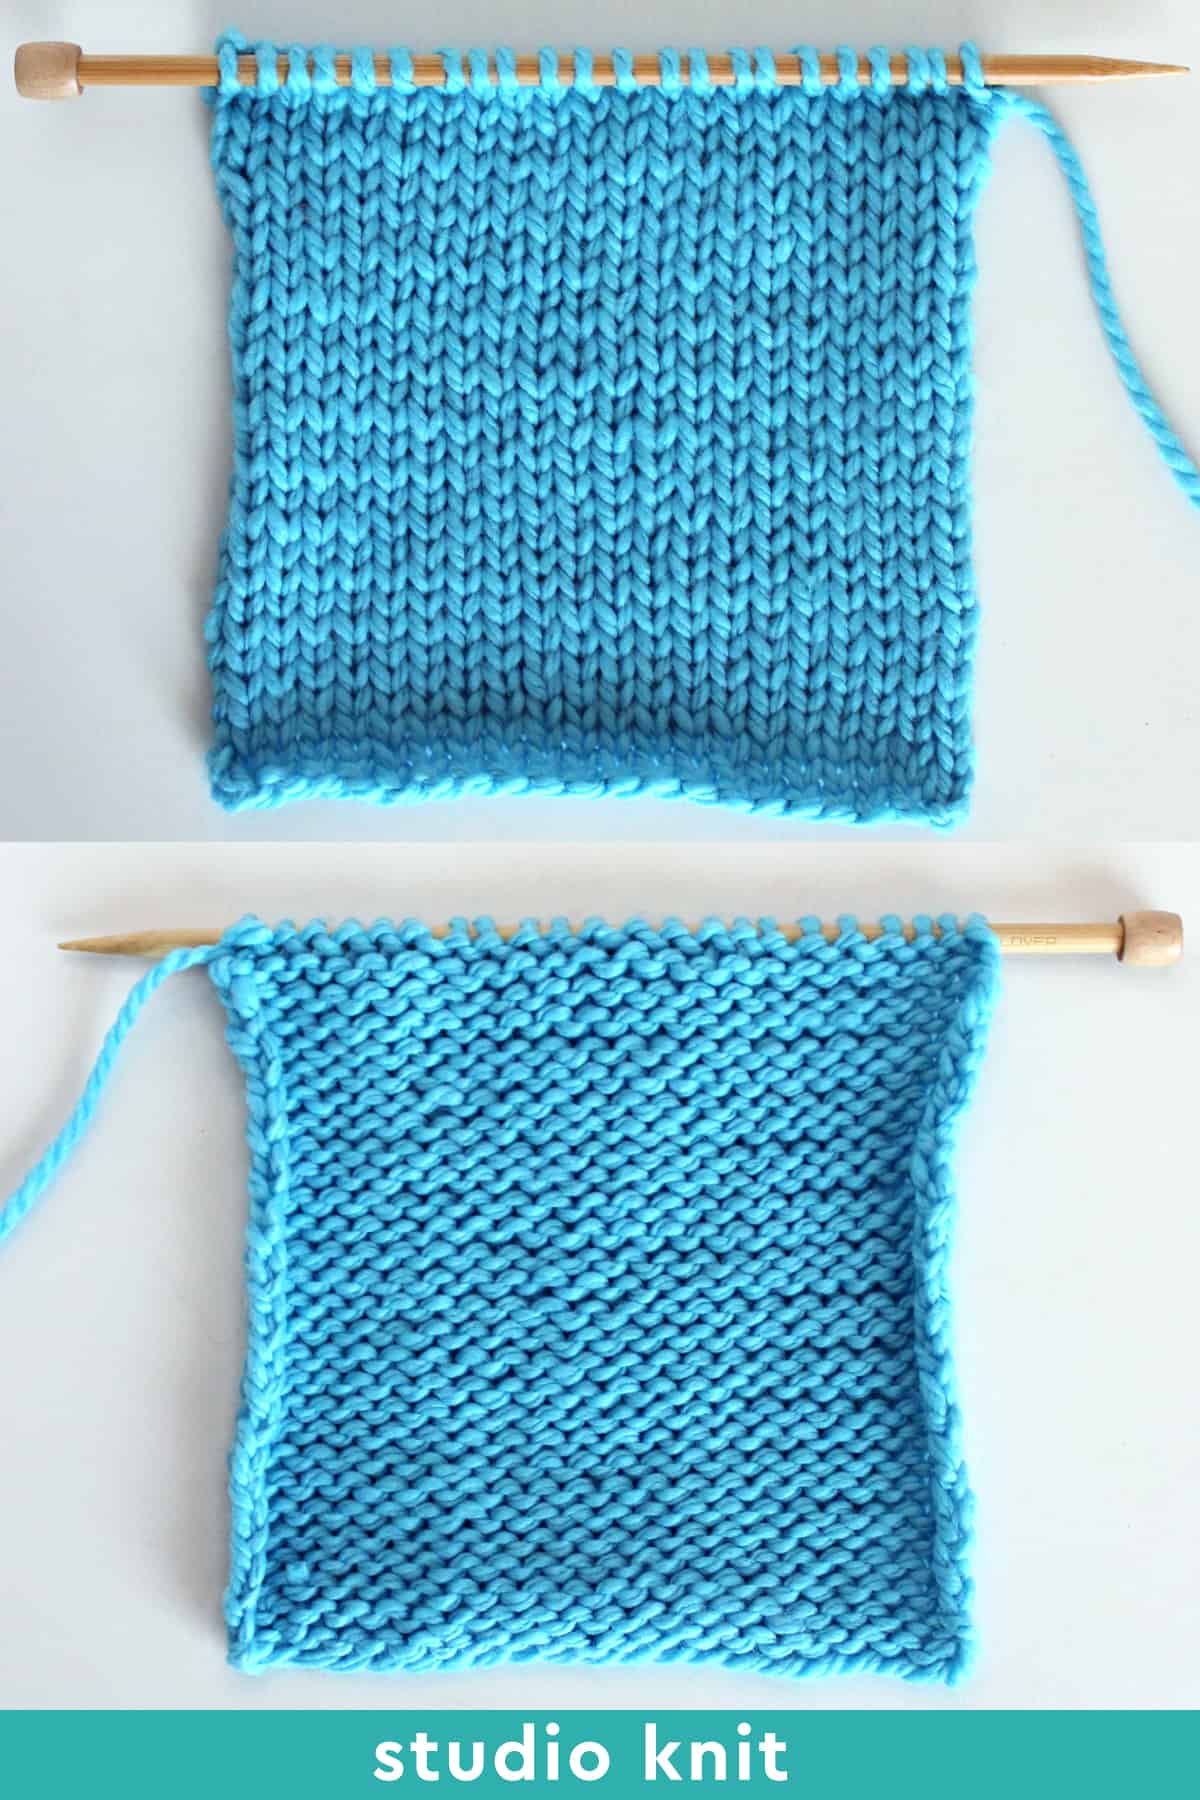
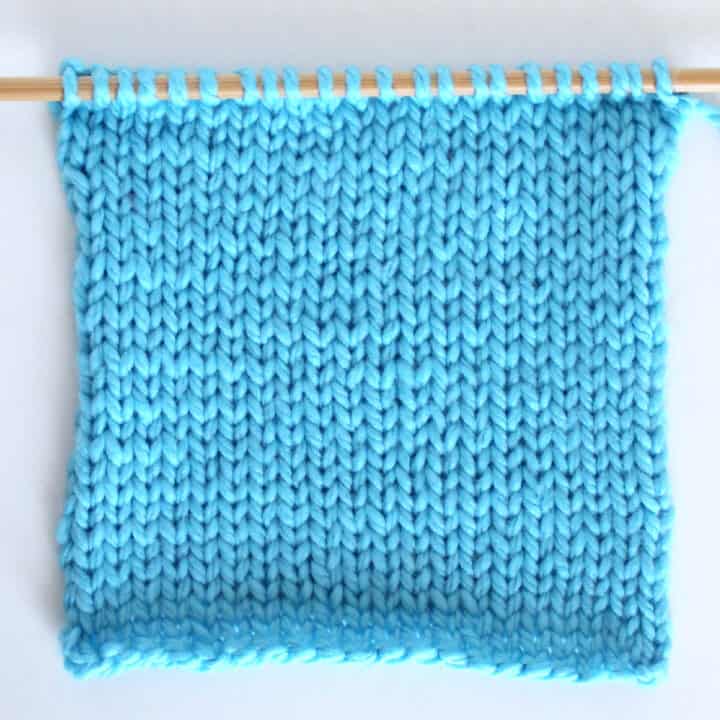
This is a 2-Row Repeat Knit Stitch Pattern is an easy-level project with a simple combination of knits and purls.
The Stockinette Stitch is not a reversible pattern because each side of your work, the Right and Wrong sides, look different. The right (or front) side has a smooth, classic knitted texture with its V-Stitches. The wrong (or back) side looks like little bumpy waves.
Design Suggestion: The Slip Stitch Knitting technique is a favorite way to create smooth edges on the right and left sides of your project. If you’re knitting up a flat scarf, dishcloth, or blanket, you may wish to add selvedge stitches to create a more finished look.
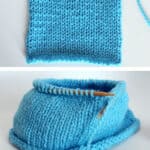
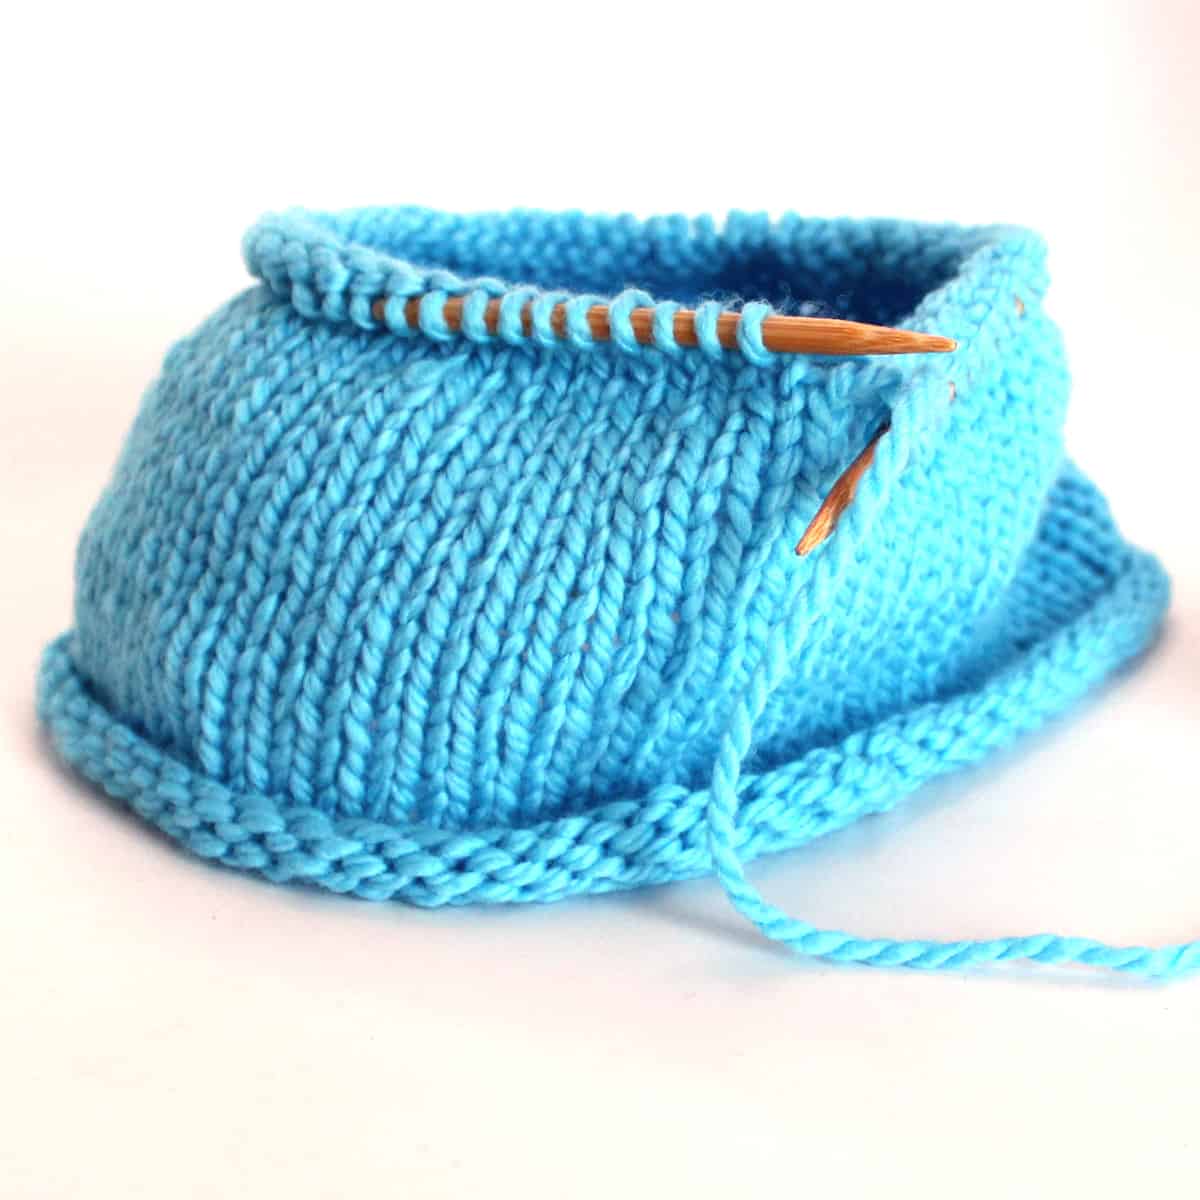
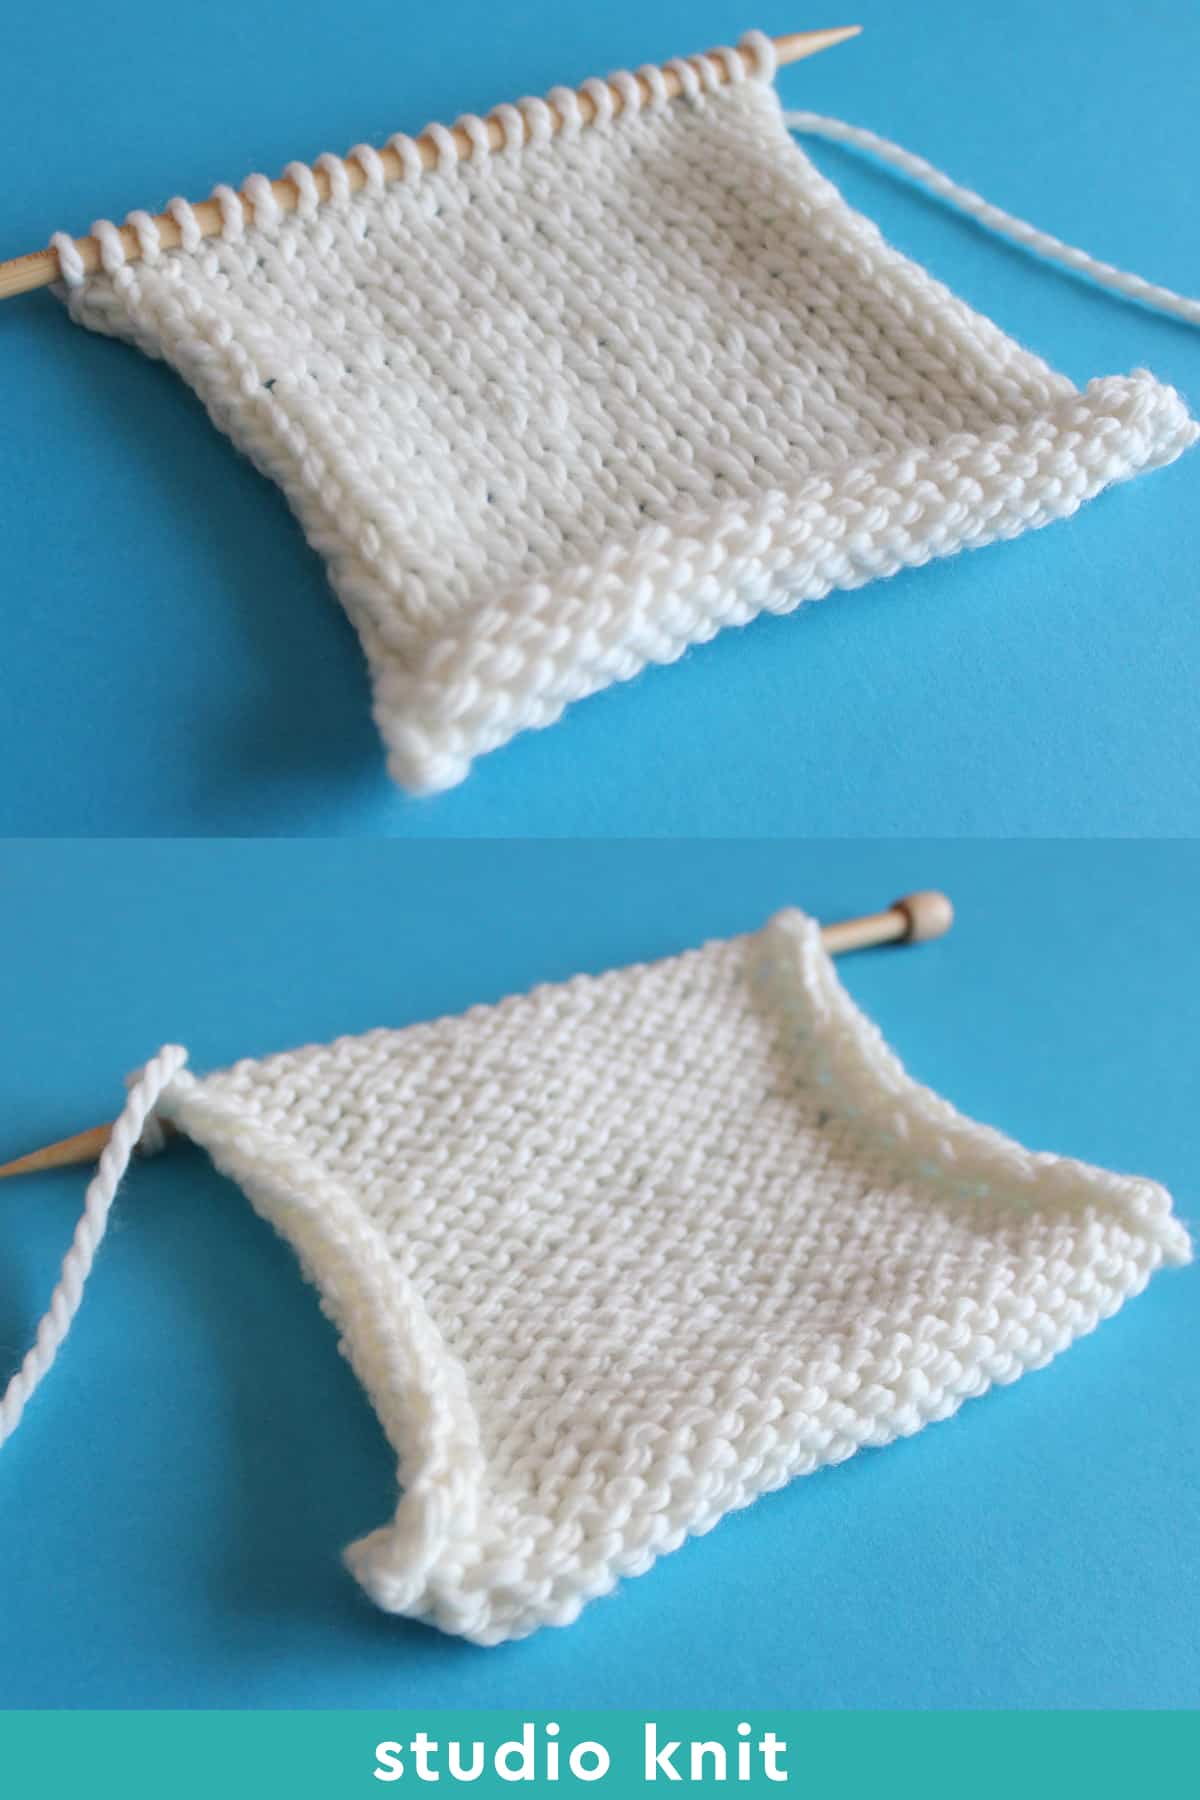
Why Does Stockinette Stitch Curl?
While knitting up your piece flat on straight needles, all four sides will curl up. The bottom and top edges curl inward, while the side edges curl to the back. My photo below shows the curling from both the right and wrong sides of your swatch.
The curling happens with the Stockinette Stitch because we are alternating between the knit and purl stitches on each row. This push and pull creates tension in your fabric causing it to warp.
While this can be frustrating, there is a solution, so let’s look at those options next.
How to Keep Stockinette Stitch from Curling
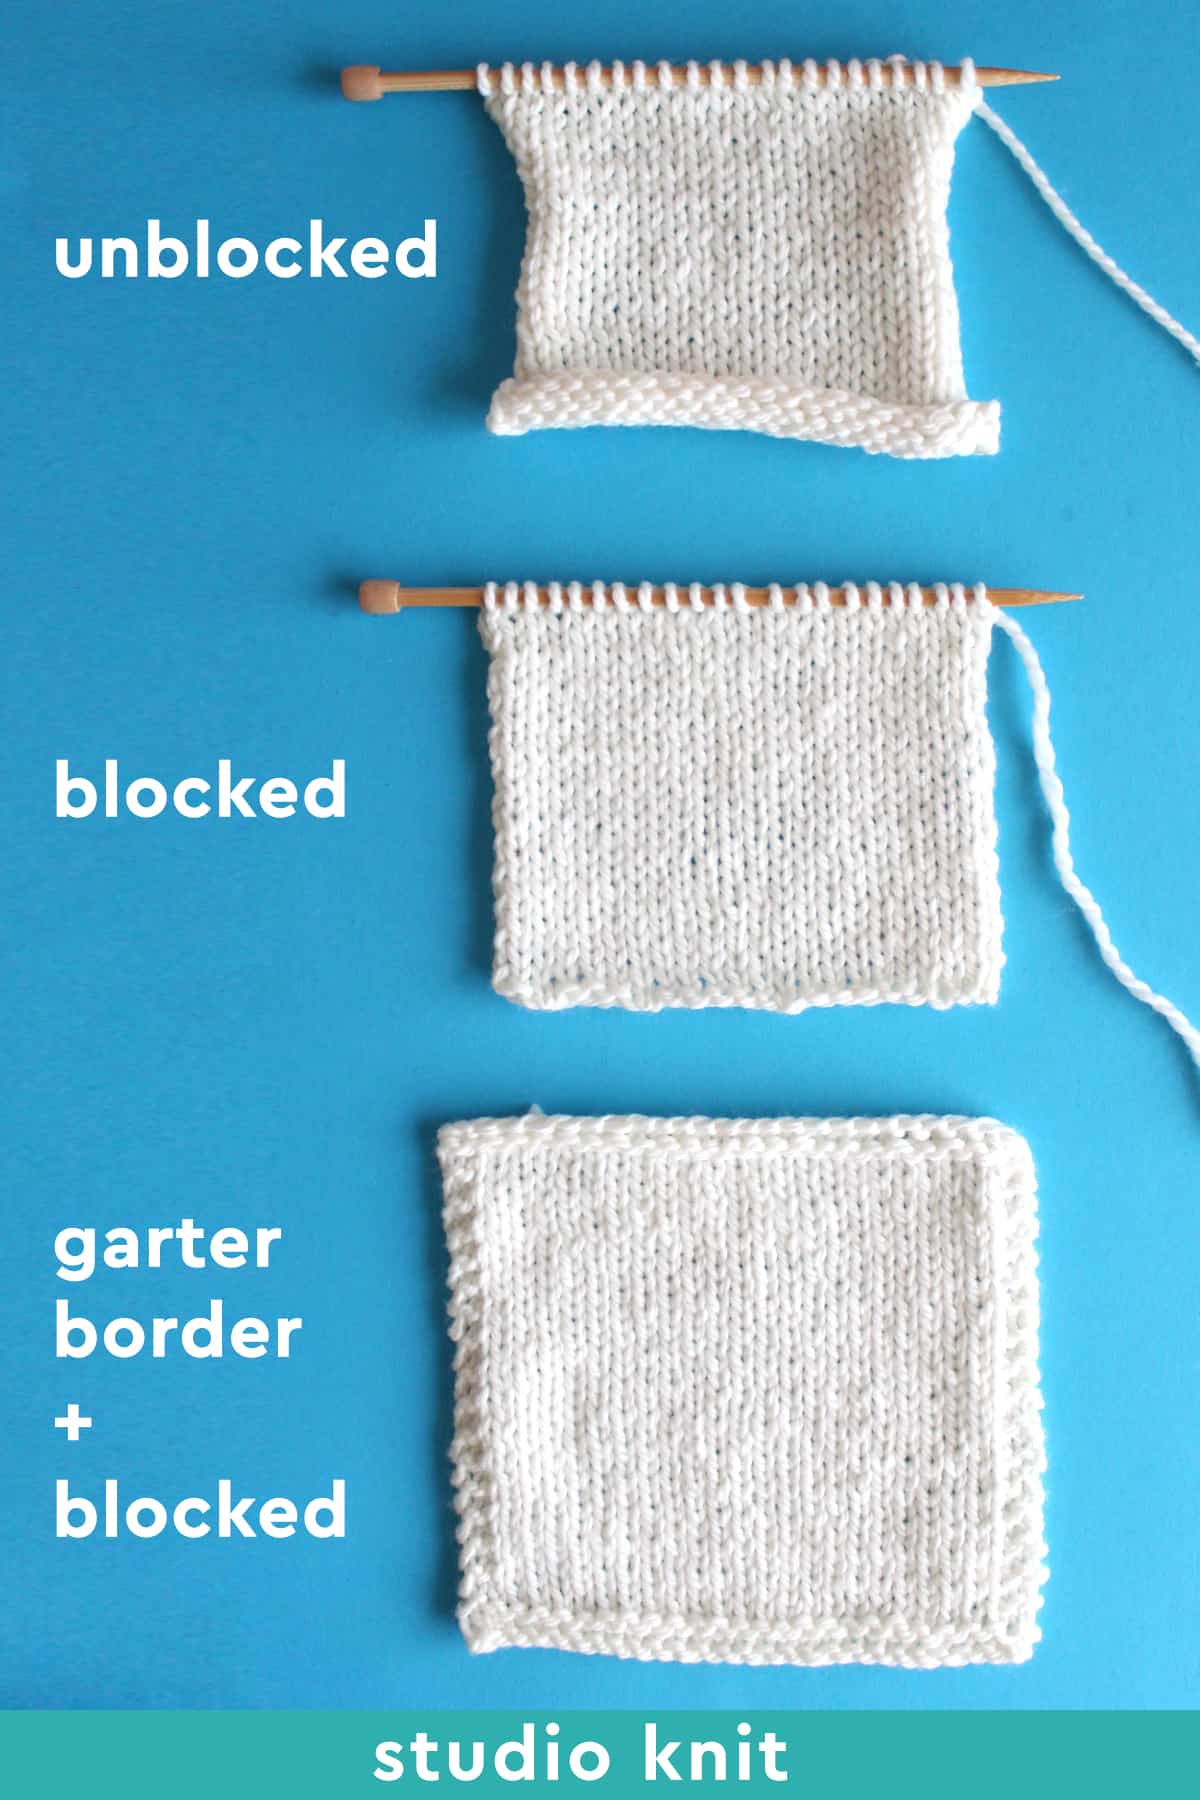
- Because all edges of the Stockinette Stitch curl up, it is helpful to block your piece.
- Adding a border another way to help it lay flat. My favorite border stitches are Garter and Seed stitches.
- Both adding a border and blocking your piece helps it lay flat the best!
- The Double Stockinette Stitch is a great alternative to creating a perfectly flat piece with the same smooth texture.
Knitting Techniques
Find my entire library of Knitting Techniques to help knit up this project.
- How to Cast On Without a Slip Knot or Slip Knot
- Cast On
- K = Knit Stitch
- P = Purl Stitch
- Cast Off
- Weave-in Yarn Ends
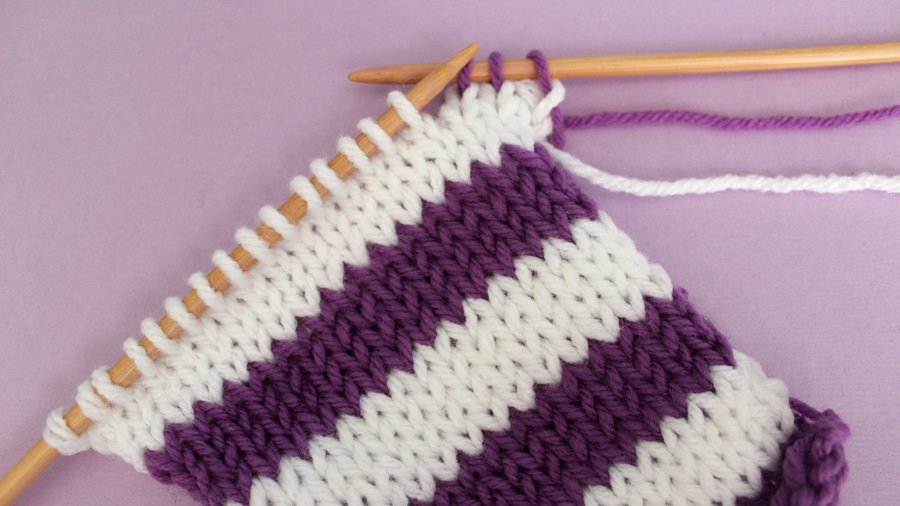
How to Change Yarn Colors in Stockinette Stitch
To avoid purl dash lines when knitting with two or more yarn colors, change yarn at the beginning of your knit row on the right side of your work.
I have a great trick on how to change yarn color when knitting stripes for more knit stitch patterns for you.
Printable Knitting Instructions
Printable Knitting Pattern
The Stockinette Stitch is an easy knitting pattern that creates a smooth, classic texture.
Materials
- Yarn - Any Gauge
Tools
- Knitting Needles - Appropriate Size for Yarn
- Tapestry Needle
- Scissors
Instructions
KNITTED FLAT ON STRAIGHT NEEDLES:
Cast On Any Number of Stitches
- Row 1 (Right Side): Knit All
- Row 2 (Wrong Side): Purl All
or
IN THE ROUND ON CIRCULAR NEEDLES:
Cast On Any Number of Stitches
- Row 1: Knit All
- Row 2: Knit All
Notes
Repeat Rows 1 and 2 until your piece is the length you desire.
Not a Reversible Knit Stitch Pattern
2-Row Repeat
Curls up, does not lay flat
_____
KNITTING TECHNIQUES
- Slip Knot
- CO = Cast On Long Tail Method
- K = Knit Stitch
- P = Purl Stitch
- BO = Bind Off
- Weave In Ends
_____
KNITTING CHART

Kristen McDonnell
Author • Designer • Teacher
Kristen from StudioKnit LLC produces knitting video lessons and pattern designs from her vibrant production studio on Half Moon Bay’s California coast.
Kristen McDonnell is the author of the highly acclaimed book Knit Stitch: 50 Knit + Purl Patterns featuring vintage and unique designs.