How to Purl Stitch Knitting Technique
Easily learn how to Purl Stitch Knitting Technique with my 4 basic steps.
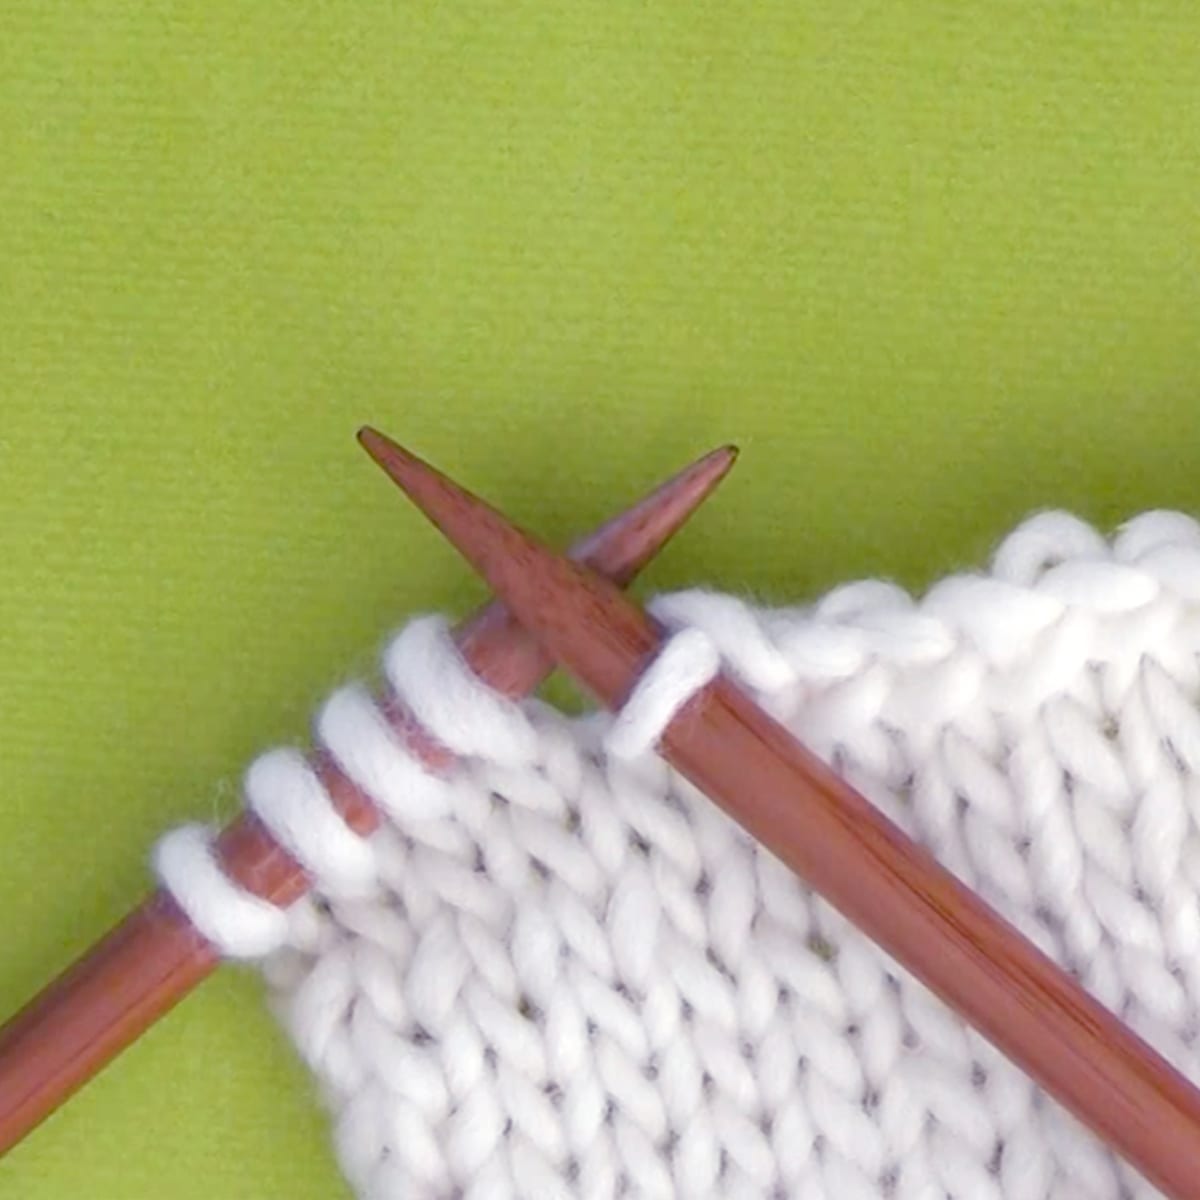
From setting the foundation by preparing your needles and yarn to wrapping the yarn and lifting off the completed purl stitch, my close-up photos and slow video simplify the process for you.

Table of Contents
Watch Video Tutorial
4 Steps to Purl Stitch in Knitting
Think of Purling as creating an inverted Knit stitch. When you insert your needle from the top of a loop and pull a new loop up and through the first stitch, you are purling.
In your knitting, for each stitch, there is a Knit and Purl side. It’s like the head and tail of a coin. Each Stitch (coin) has a Knit side (head) and a Purl side (tail).
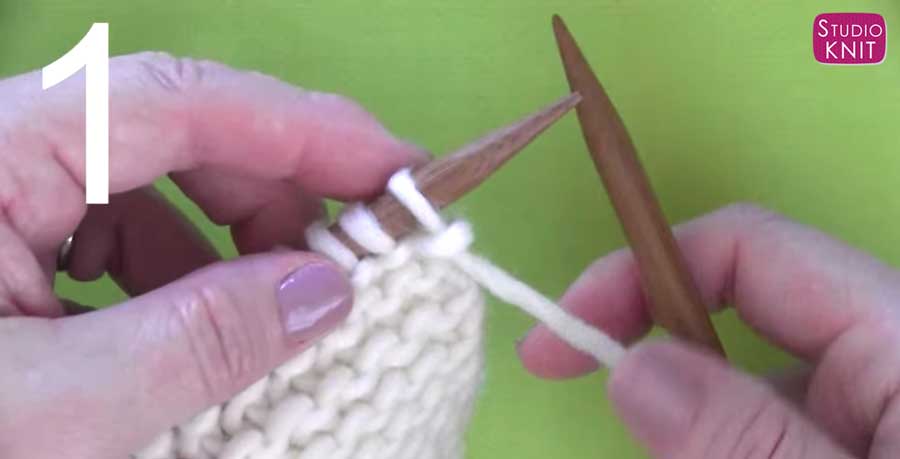
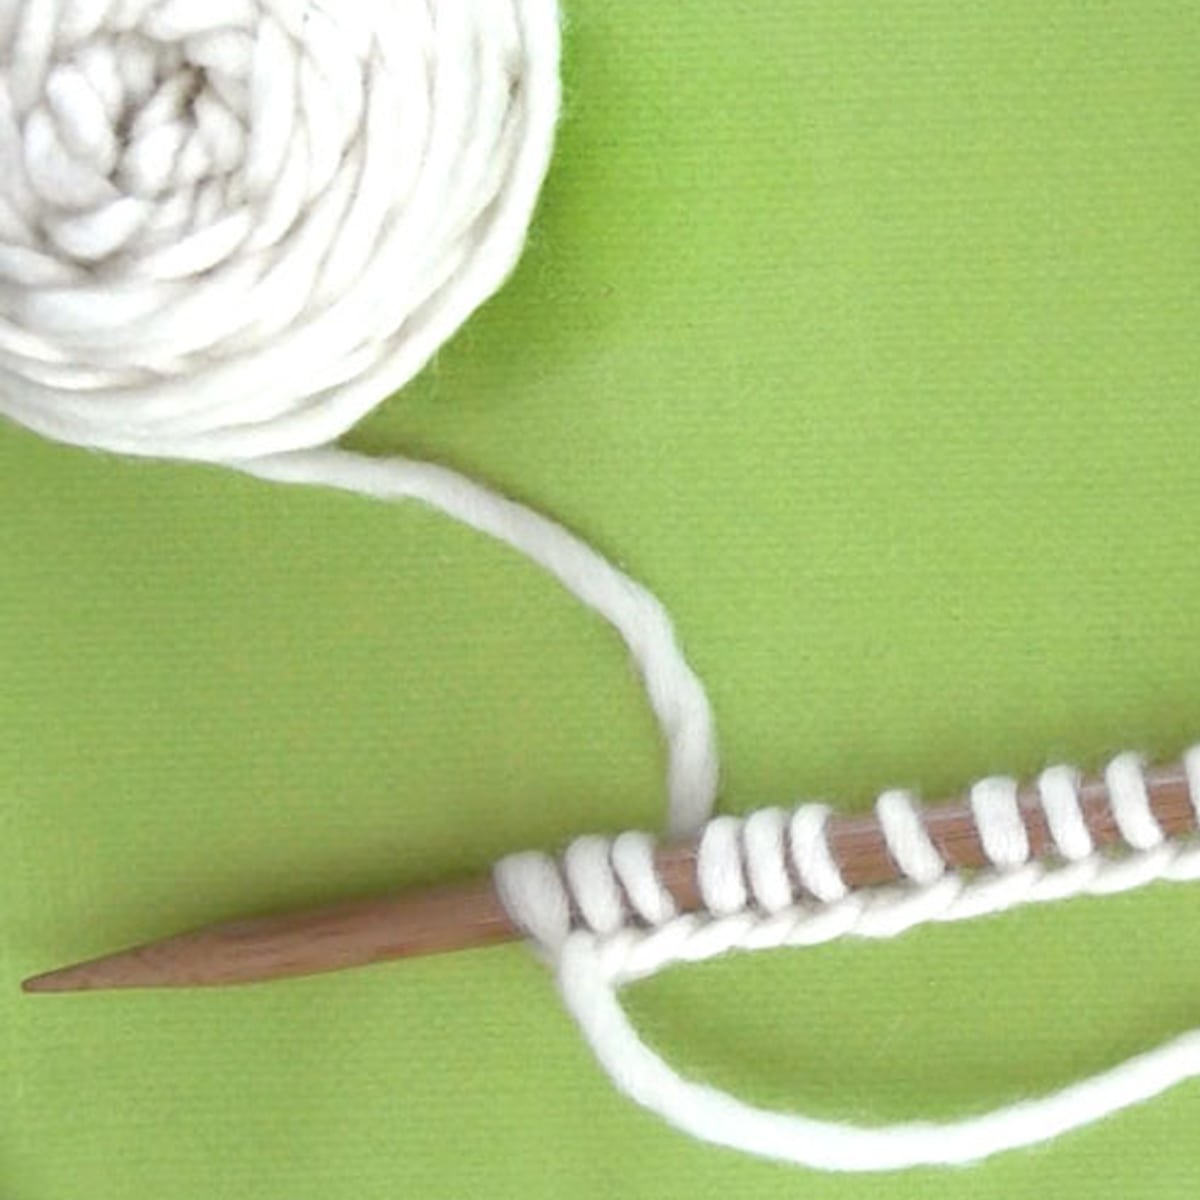
Step 1: Prepare needles and yarn
- Hold the knitting needle with the stitches on it in your left hand.
- Hold the knitting needle without any stitches in your right hand.
- With the yarn in the front of your work, insert the right needle from the back to the front of the first stitch, or you can think of it as straight into it. Your right knitting needle will be resting over your left needle.
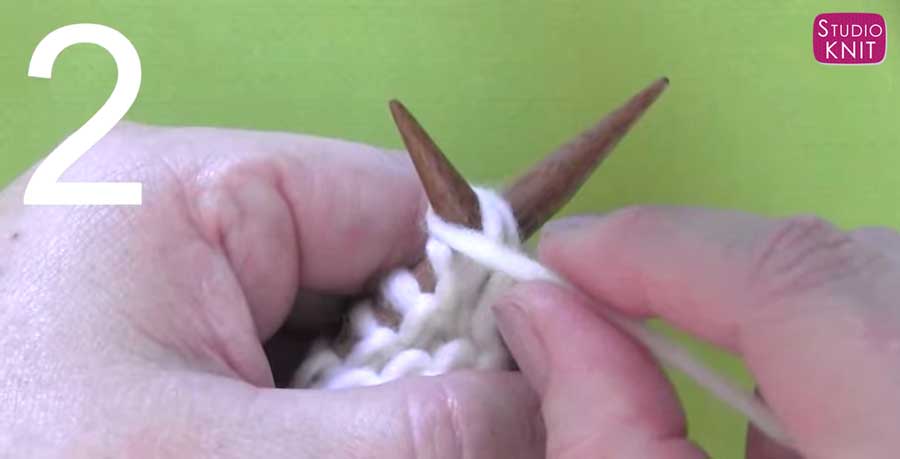
Step 2: Wrap yarn in a downward counter-clockwise motion
- Starting with your yarn in the front, wrap your yarn around the right side of your right needle counter-clockwise direction, finishing with your yarn in the front of your needles again.
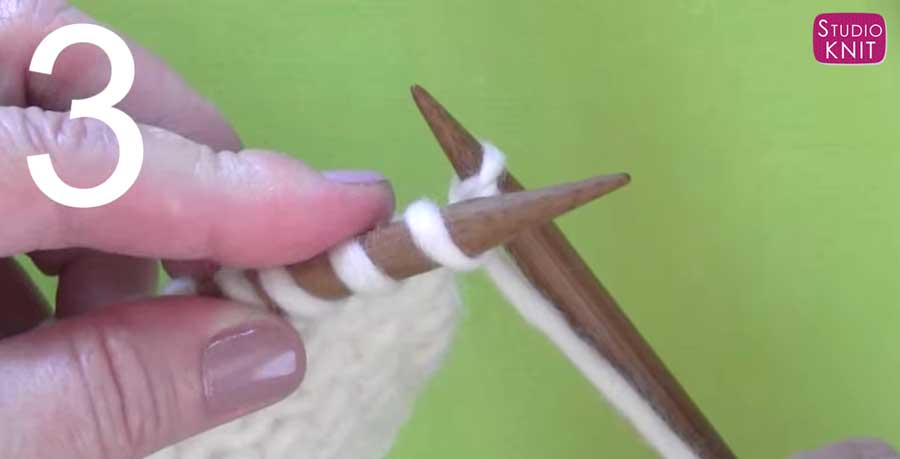
Step 3: Slide the right needle with yarn on it
- Slide the right needle down and bring the point from front to back of the stitch, bringing the yarn with it.

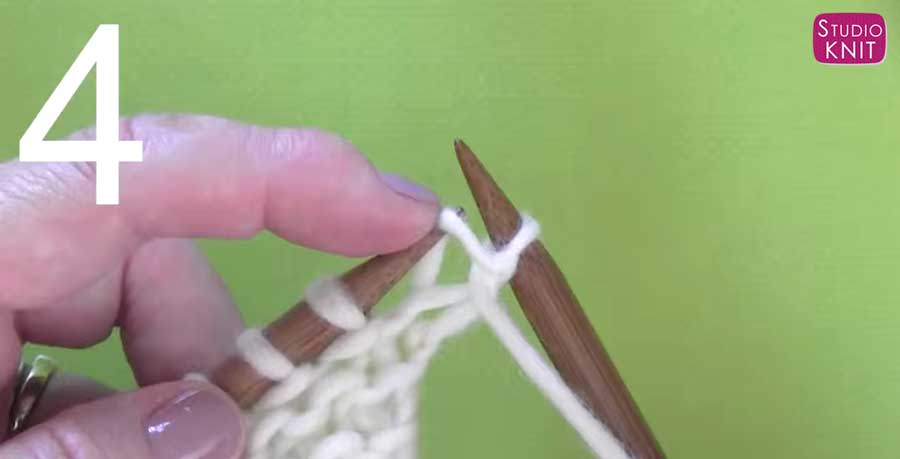
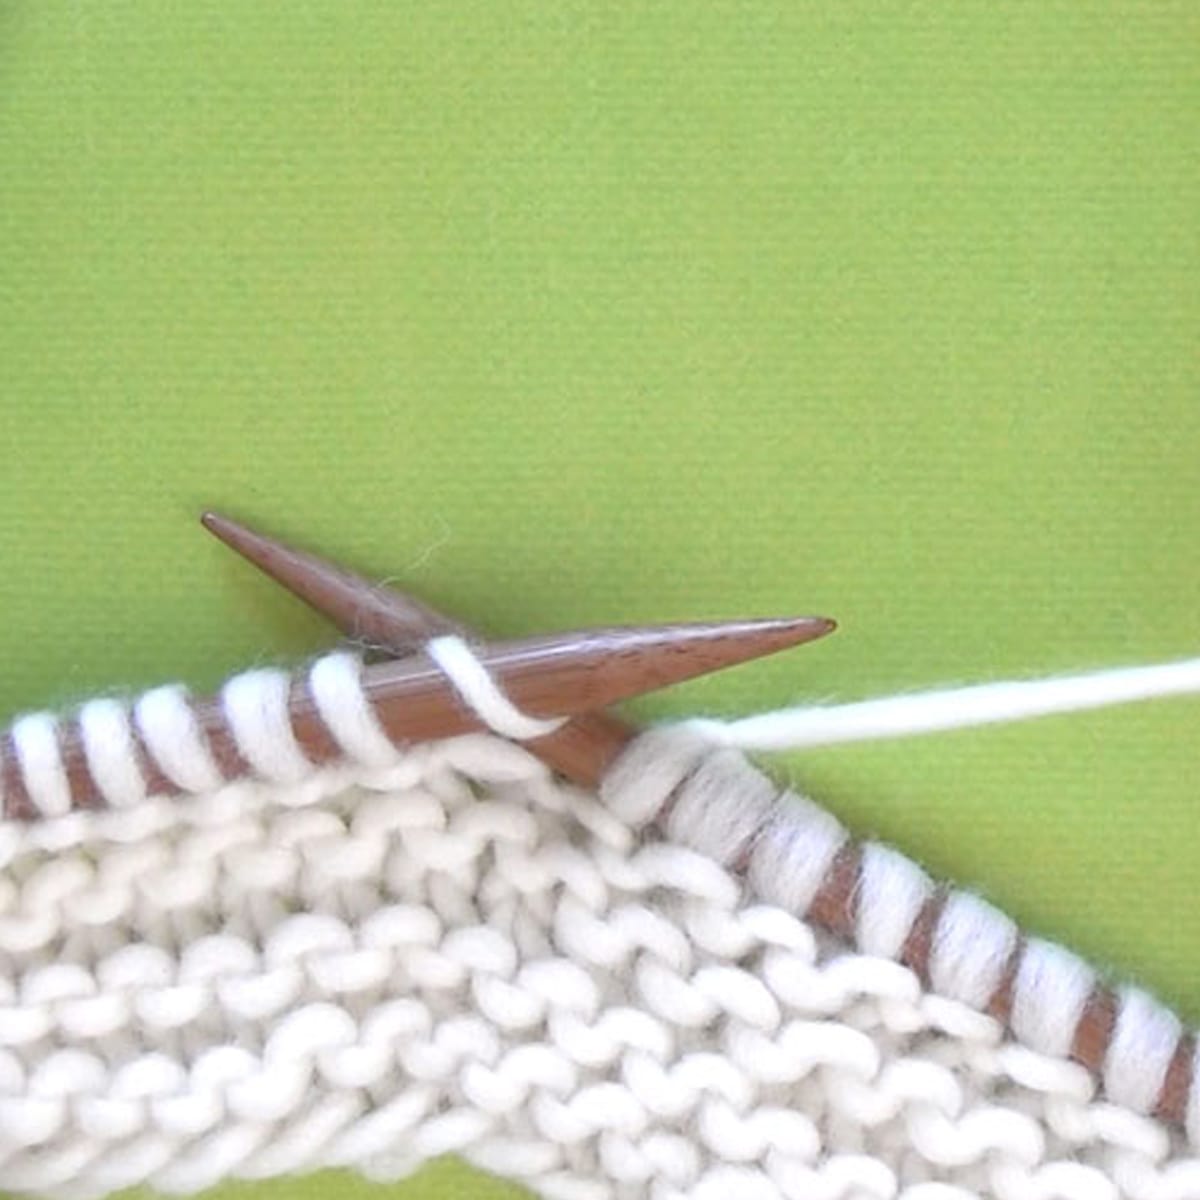
Step 4: Pull the new loop off the left needle
- Slip the old stitch off the left needle. Now the new stitch is on your right needle.
Continue Purling the Entire Row
- Repeat these four steps for each stitch on your left needle.
- At the end of the row, all the new purled stitches are on your right needle now and your left knitting needle is empty.

Knit Stitch Pattern Book
Love easy knitting? Get 50 stitch patterns from my Knit Stitch Pattern Book available in both print and digital formats.
Frequently Asked Questions About the Purl Stitch
Many beginners mistake this often-heard term as the “pearl stitch” or “pearling.” However, the proper spelling is “purl stitch” and “purling.” The origin of this word purl is derived from the Middle English word Pirl, which means twist.
The abbreviation P in knitting means to Purl Stitch.
When making a knit stitch, the wrong (back) side of your work will have a little horizontal bump texture. Conversely, the purl stitch will create that horizontal bump on the right (front) side of your work.
After you understand how to Knit Stitch, you are ready to learn this other basic stitch in knitting. You are able to create amazing knit stitch patterns with just these two stitches. Once you see the abbreviation “P” in future knitting patterns, you’ll be purling stitches like a pro!
When knitting, your working yarn will be in the back of the work. To switch to the purl stitch, bring the yarn from the back to the front of your work before creating your purl stitch.
If you purl stitch on every row of your knitted work, you will create the Garter Stitch. However, this is a very unusual way to create this texture and most knitters prefer the Knit Stitch on every row to create this texture.

Kristen McDonnell
Author • Designer • Teacher
Kristen from StudioKnit LLC produces knitting video lessons and pattern designs from her vibrant production studio on Half Moon Bay’s California coast.
Kristen McDonnell is the author of the highly acclaimed book Knit Stitch: 50 Knit + Purl Patterns featuring vintage and unique designs.