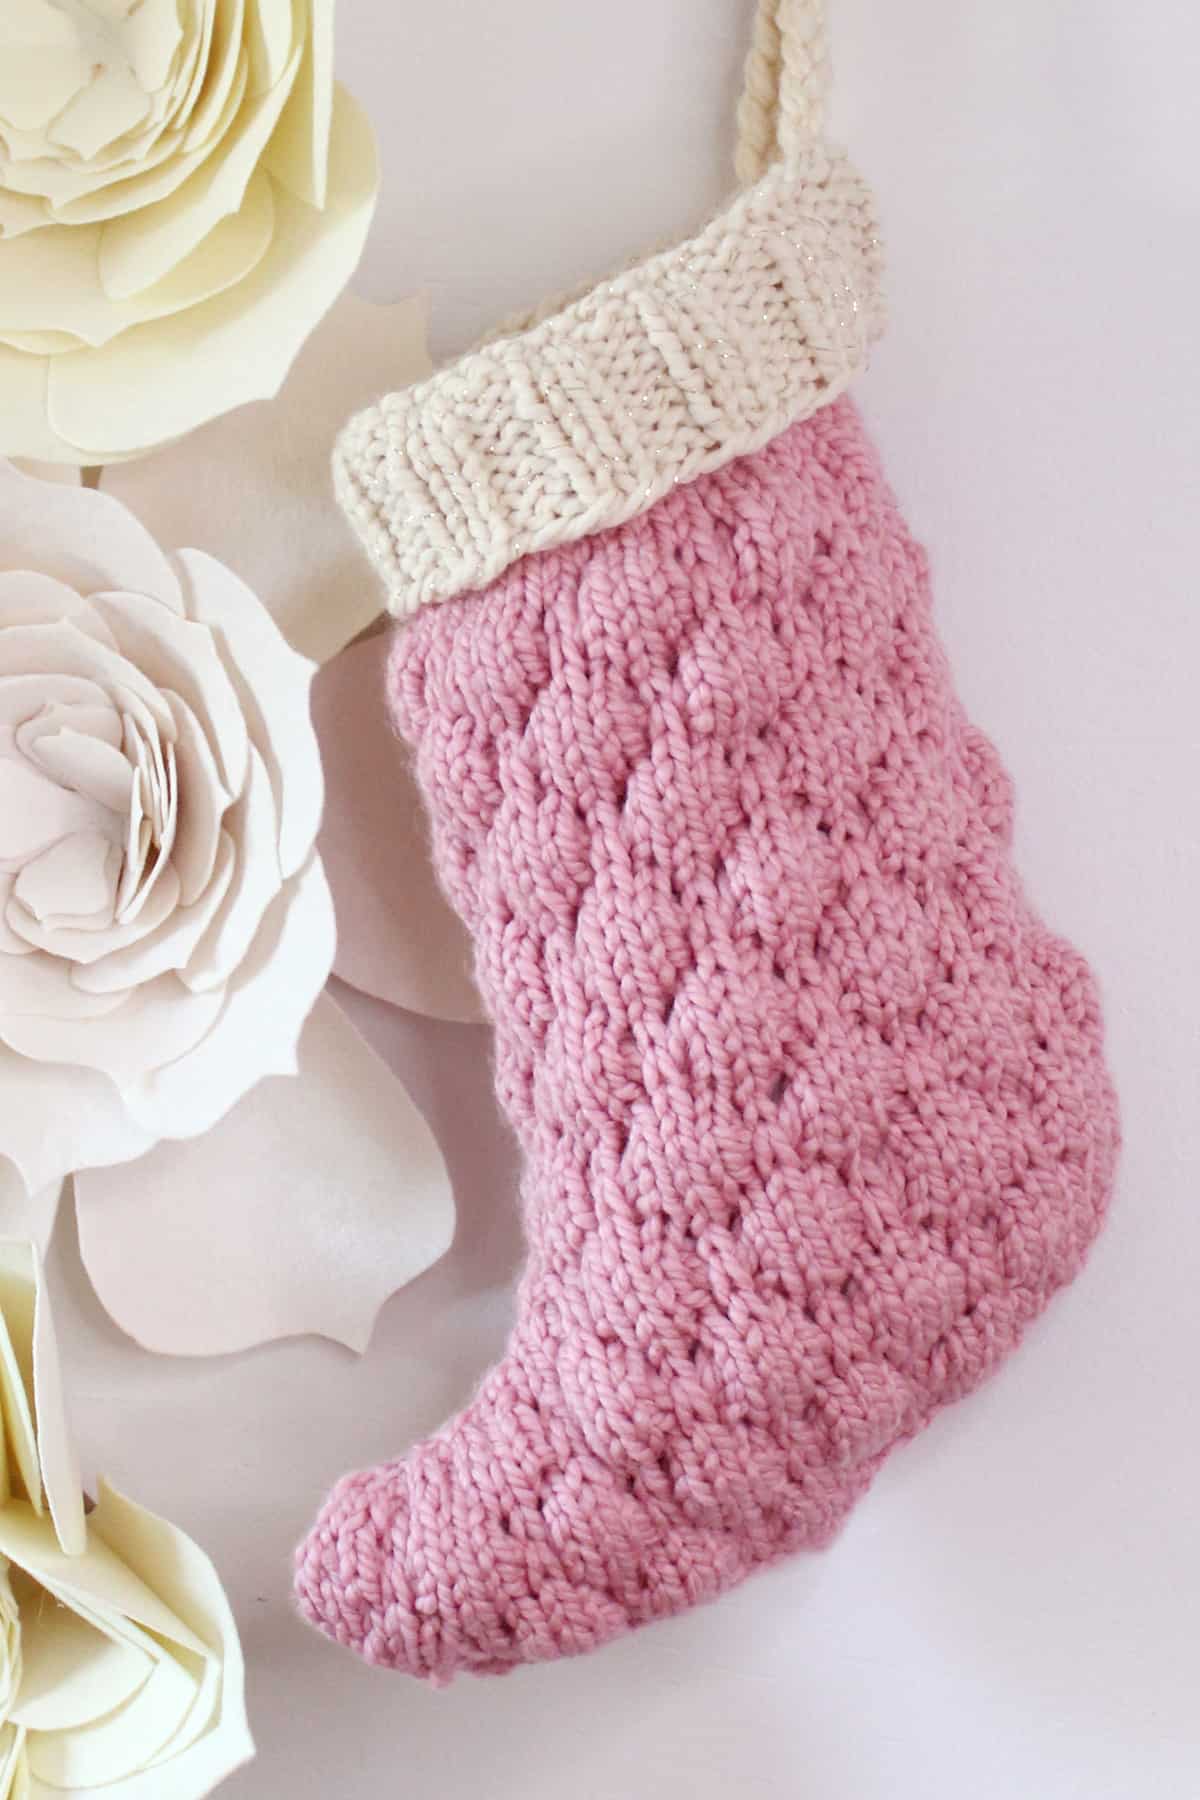
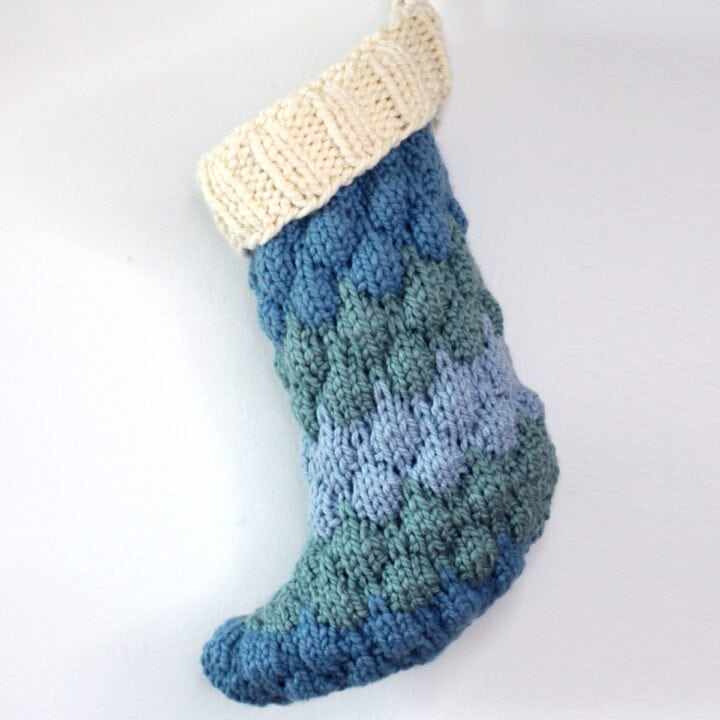
Bubble Christmas Stocking Knitting Pattern
This Bubble Christmas Stocking Knitting Pattern creates a whimsical textured holiday decoration with super bulky yarn. I love using thicker yarn to quickly knit up impressive projects and beloved gifts for years to come.
Get your free written pattern instructions with video tutorial below.
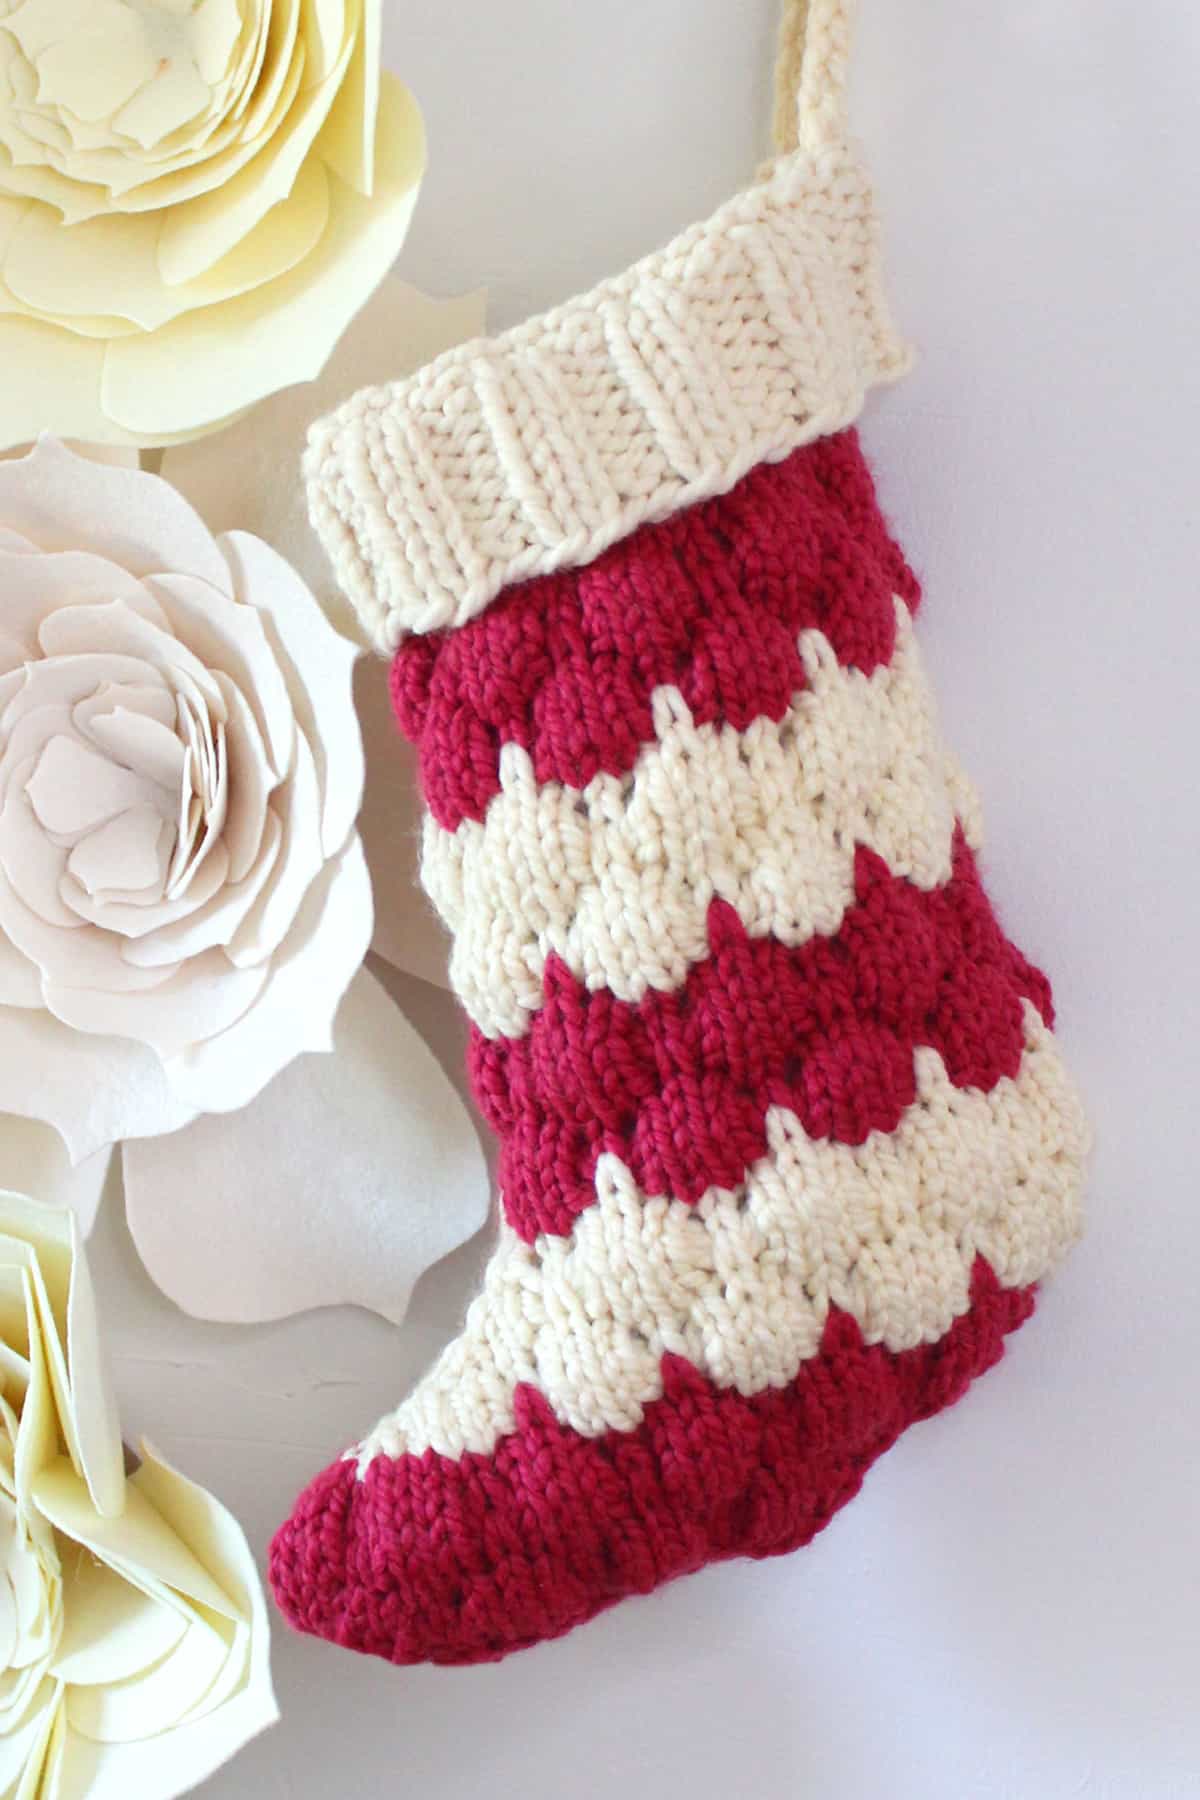
Table of Contents
Christmas Stocking Attributes
Skill-Level: Intermediate. Best for knitters comfortable with Knit 4 Below, increase, and decrease techniques.
Knitted Flat: This pattern creates a sturdy and substantial piece knitted flat on a long circular needle with super bulky yarn. The bigger the yarn, the bigger the knitting needles, the faster it knits up.
Simple Shaping: There are no complicated heel and toe techniques. Instead, we easily shape the foot with a series of basic increase and decrease stitches.
Shop Stocking Patterns
Enjoy my free pattern instructions below.
You may also purchase the ad-free printable pdf from my
Studio Knit Shop.
Watch Video Tutorial
Knitting Supplies
As an Amazon Associate, I earn from qualifying purchases.
Yarn: Super Bulky Weight #6.
220 yards (201 m) total.
Select any fiber and colors of your choice.
Suggested Yarn: Lion Brand Wool-Ease Thick & Quick. This yarn blend has the feel, warmth, and softness of wool with the easy care and washability of acrylic. It’s commonly found in many big box craft shops here in the US.
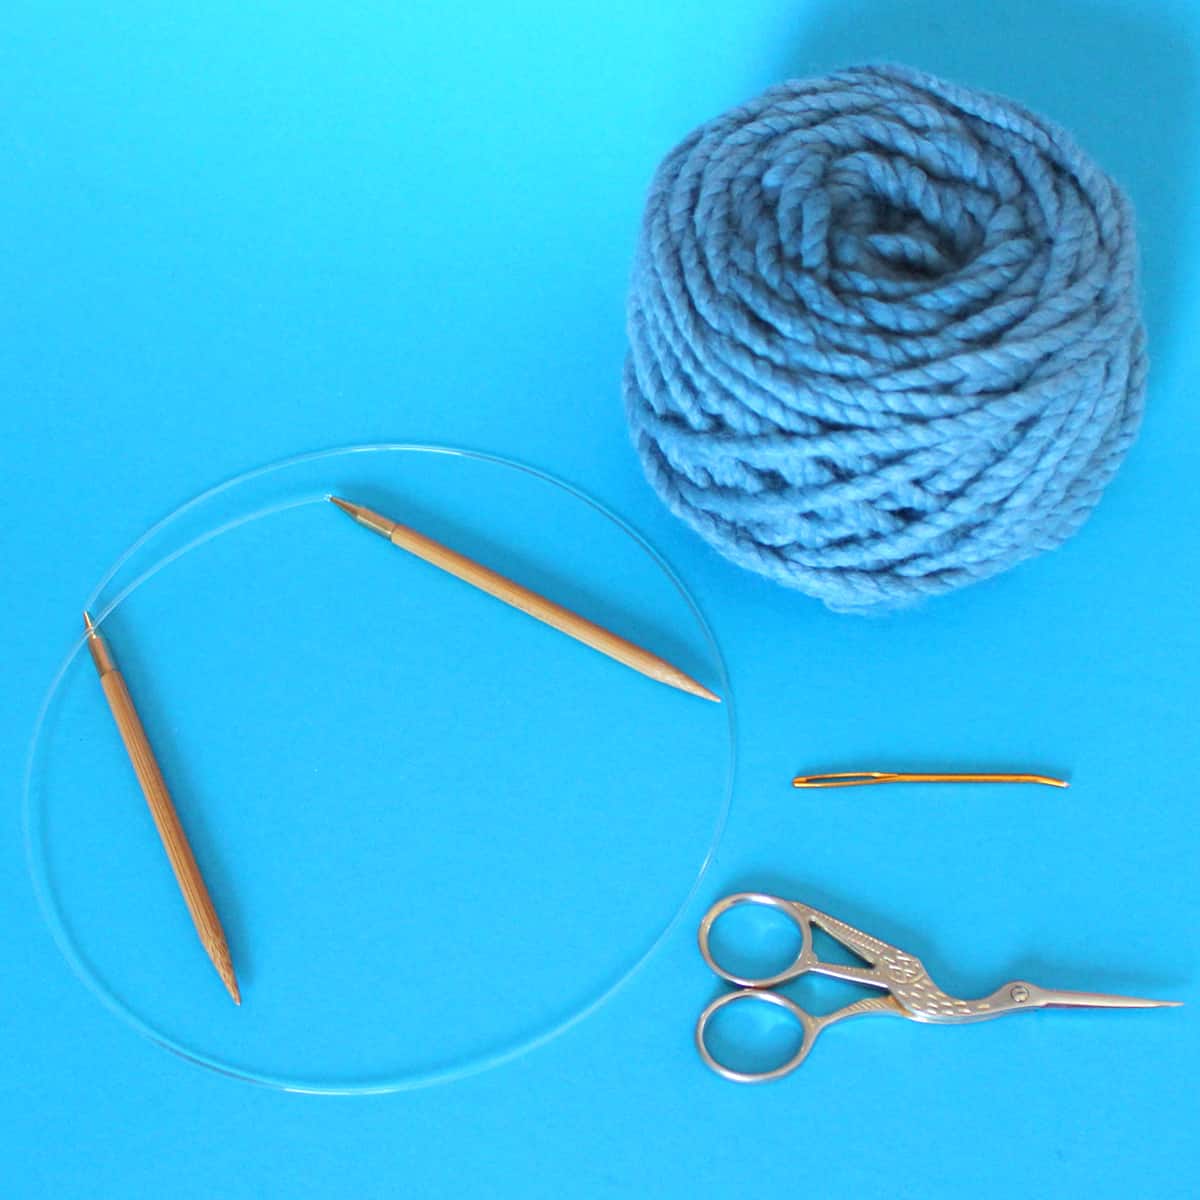
Knitting Needles: Circular Size 10 US (6.0 mm), Length 24″ or longer.
Although this piece is knitted flat, a circular needle accommodates its length.
Note: We are intentionally knitting this pattern on smaller needles than the yarn gauge recommends. This tighter weave allows the bubble stitch texture to pop and keep the contents inside without gaps or holes.
Knitting Tools
- Tapestry Needle
- Scissors
Optional: - Knitting Blocks and T-Pins
- Digital Row Counter – Using row counters tutorial >
- Needle Point Protectors – How to prevent stitches from falling off your needles >
Knitting Construction
Stocking Dimensions
Full-sized is finished at 8″ wide and 18″ tall.
Knitting Gauge
Create Gauge Swatch in Super Bulky Weight #6 yarn with Size 10 US needles.
10 stitches and 18 rows = 4 x 4 inches in Bubble Stitch.
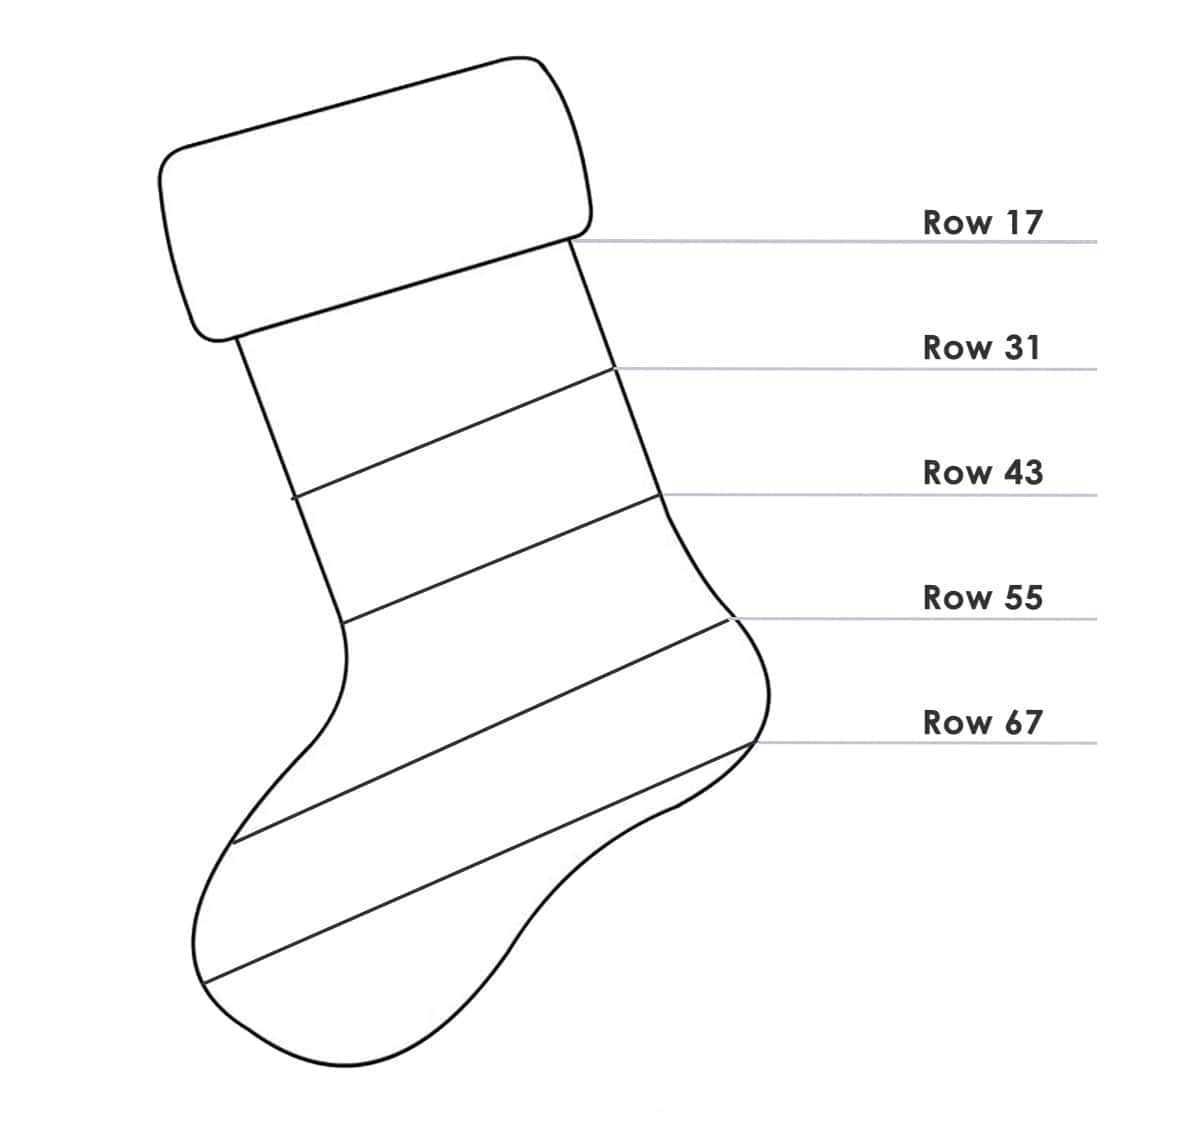
Color Change Options
Design with your custom yarn color combinations. Switch yarn colors prior to the following knitting rows for the design of your choice.
Knitted Top/Cuff Down
This pattern is knitted top/cuff down, which is a method of making socks that uses the top of the cuff as the starting point.
Cuff Ribbing
Begin by casting on 40 stitches on your knitting needle in Color A yarn, which is white in my pictured sample. We are casting on the edge of the rib stitch cuff.
Helpful Tip: Begin Cast On with an 80-inch long yarn tail.
Knit up the cuff in the classic 2×2 Rib Stitch with two rows in Stockinette Stitch for cuff top seam. Once you see how quickly these first 16 rows knit up, you’ll start getting excited about how soon it will be created.
Stocking Body in Bubble Stitch
The body of your stocking is knitted in the popular Bubble Stitch. It knits up quickly and really pops.
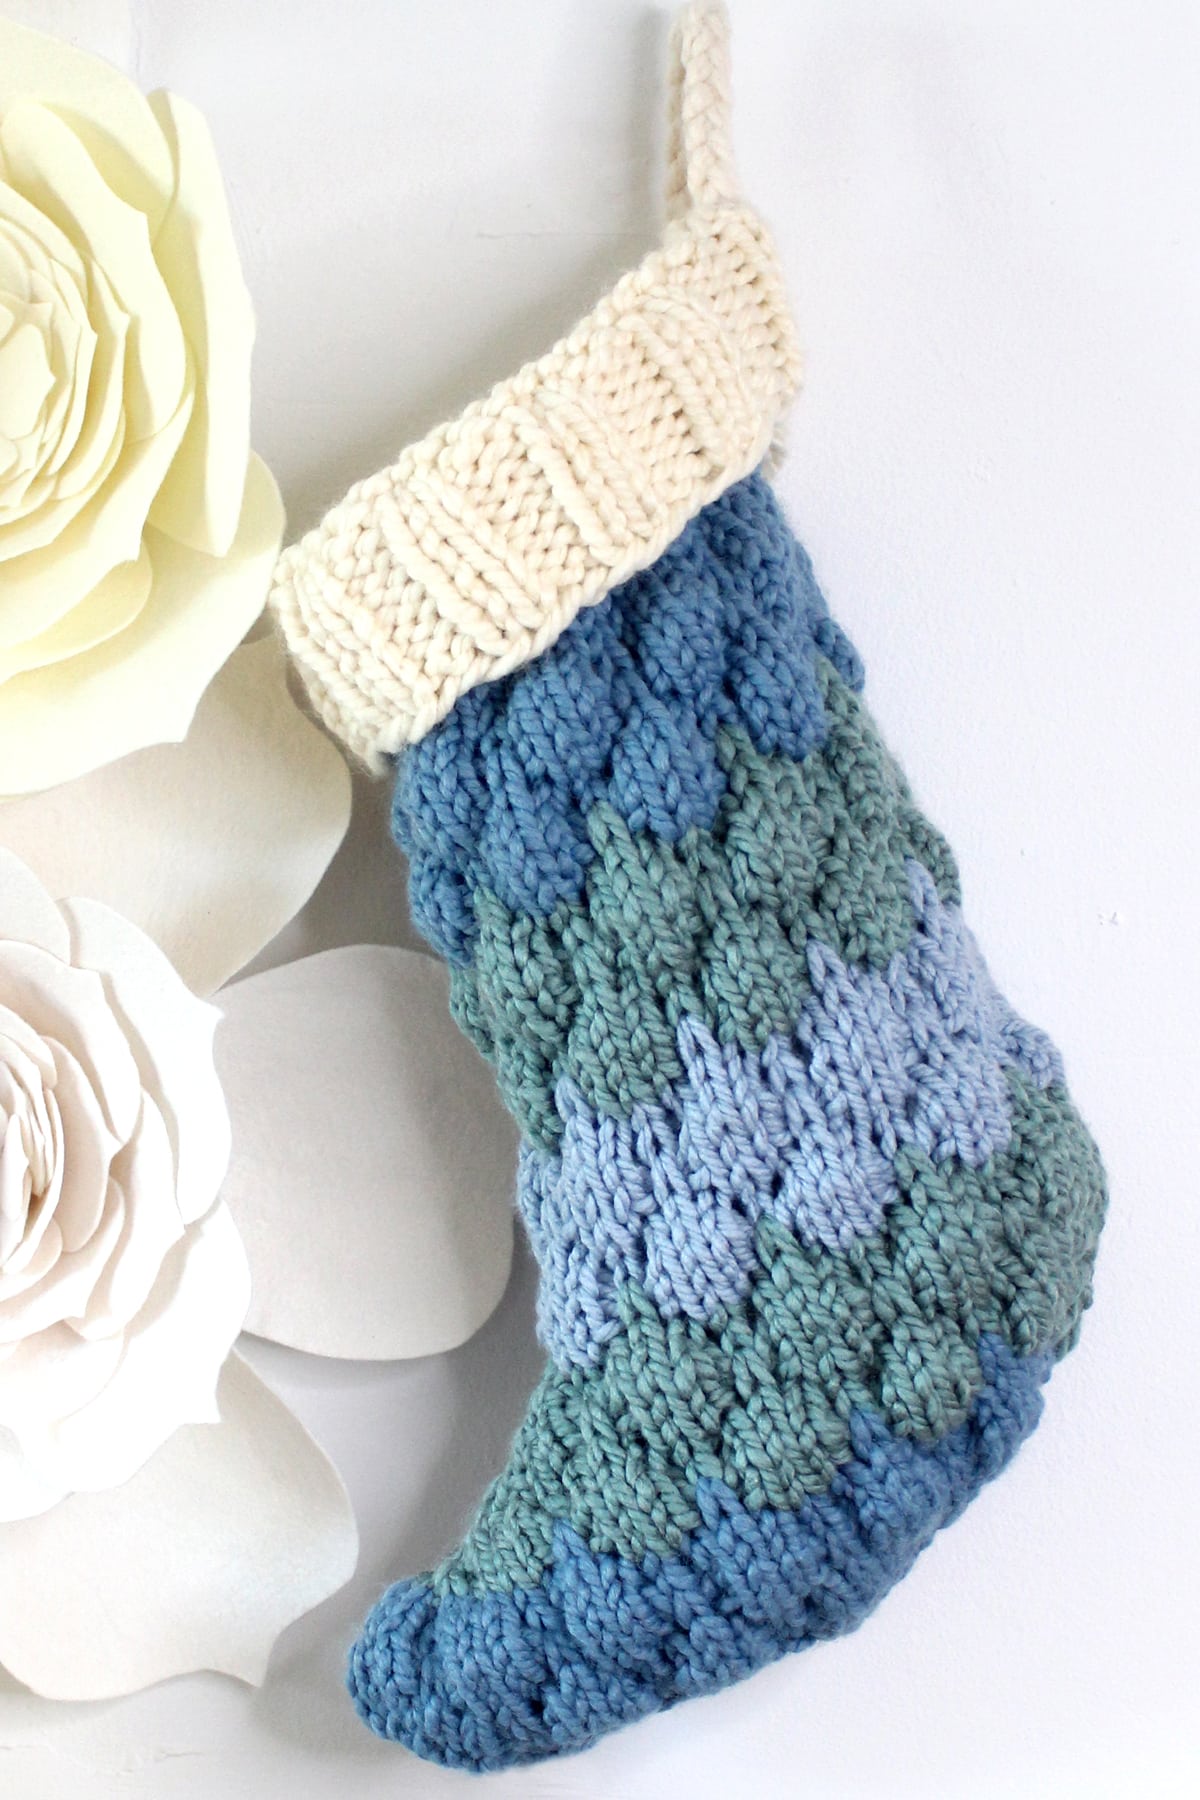
You may wish to knit your piece in all one color, with a different cuff color, or colorful stripes. The written pattern instructions include recommended row color changes. Mix and match color combinations to make your own creative design!
Shape Stocking Foot
This pattern is designed to create a beautifully shaped stocking foot as easily as possible. We are using simple knit and purl increase and decrease techniques to create the shape.
Casting Off Stitches
Once you have completed knitting, increasing, and decreasing all 79 rows, it is time to cast off purlwise on the wrong side of your work.
Wrong Side of Knitted Work
Here’s a quick look at the wrong side of your knitting. This is the backside, which has never-to-be-seen purl dash lines in reverse stockinette stitch and the cinched bubble stitches.
Seam Edge
Fold your piece with the right sides touching. The wrong side is visible on the outside so you can easily tack the piece together using yarn and a tapestry needle with the Mattress Stitch.
Finishing
Simply fold your stocking right-side-out.
Wet blocking is optional. I feel the super bulky yarn shape looks great unblocked!
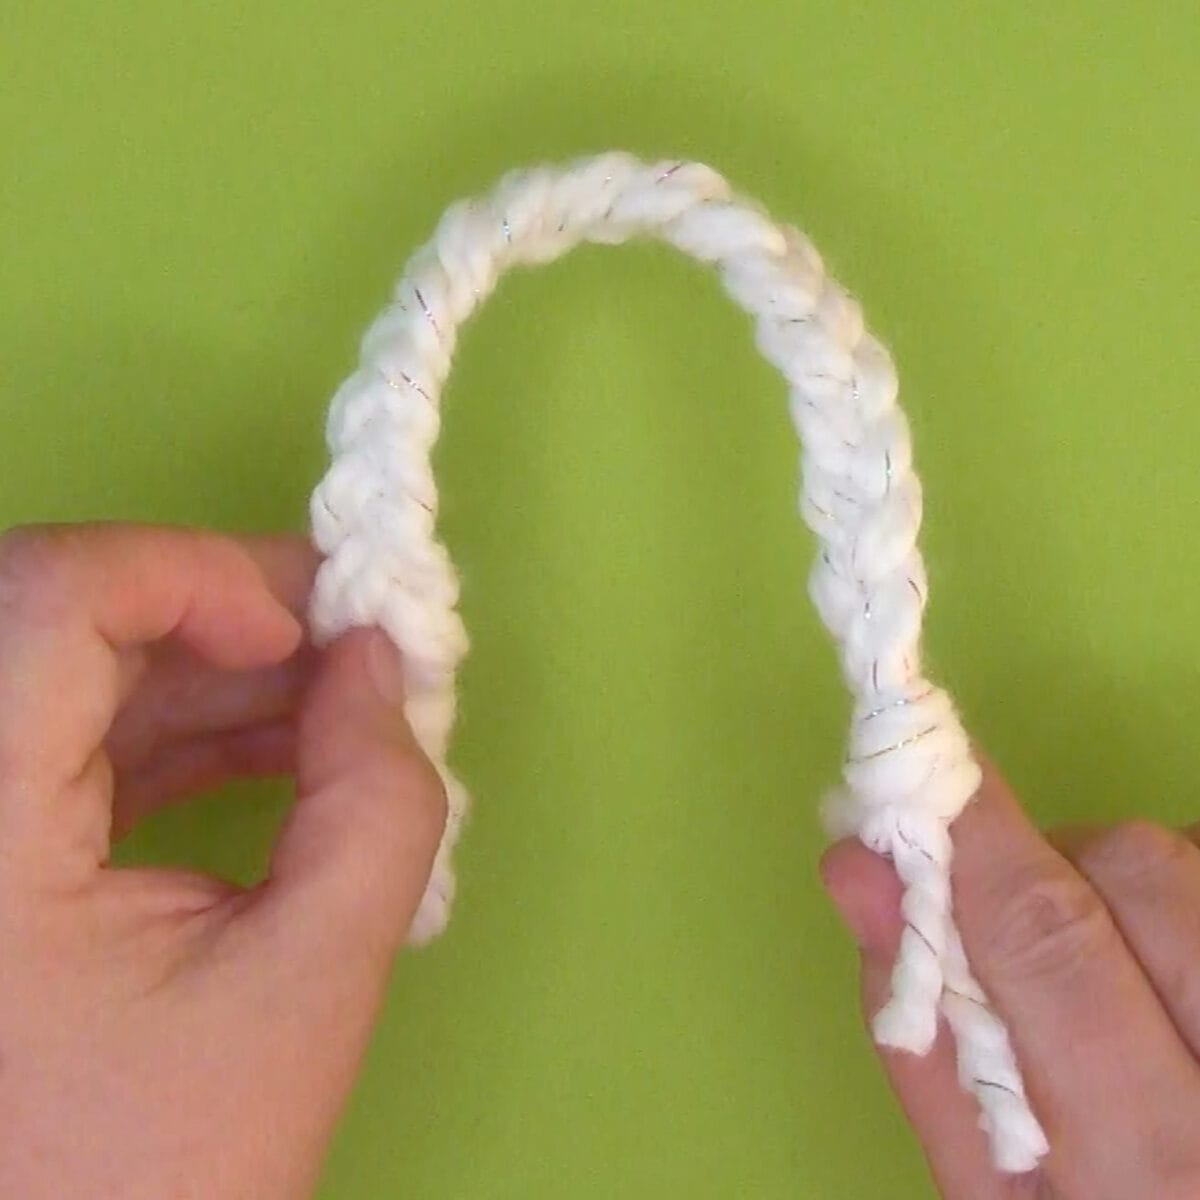
Make Braided Hanging Loop
• Cut 9 strands of yarn 16 inches long each.
• Knot one end, braid with three strands together, knot to finish.
• Insert each knotted end into the top of the seam.
• Tack loop with yarn and tapestry to hold in place.
Knitting Techniques
Need to brush up or learn a new technique? Check out my entire library of Knitting Techniques to help you along as you knit up this blanket pattern.
NOTE: Because the knitting abbreviations KFB (increase) and K4B (bubble) are so similar to the eye, I am bolding and underlining the technique K4B in the written pattern instructions belowto help you best see the difference.
- Slip Knot
- CO = Cast On Long Tail
- K = Knit Stitch
- P = Purl Stitch
- K4B = Knit 4 Below
- KFB = Knit Front + Back to Increase
- PFB = Purl Front + Back to Increase
- K2TOG = Knit Two Sts Together to Decrease
- P2Tog = Purl Two Stitches Together to Decrease
- SSK = Slip, Slip, Knit to Decrease
- SSP = Slip, Slip, Purl to Decrease
- Rem = Number of Stitches Remaining on the Needle
- Cast Off Purlwise
- Weave in Yarn Tails
- PM = Place Marker
- SM = Slip Marker
- Rem = Number of stitches remaining needle
- * * = Repeat Pattern Between Asterisks

Printable Knitting Instructions
Printable Knitting Pattern
This Bubble Stitch Christmas Stocking Knitting Pattern is quick-knit with super bulky yarn.
Materials
- Yarn: Super Bulky Weight #6.
- 200 yards (184 m) total = 100 yards (92 m) each of two colors.
- Select any fiber and colors of your choice.
Tools
- 1 Circular Needle: Size 10 US (6.0 mm) - Length 24" or longer
- Tapestry Needle
- Scissors
- Stitch Marker (optional)
Instructions
- STEP 1: Cast On 40 Sts
Helpful Tip: Begin Cast On with an 80-inch long yarn tail.
Prior to knitting, design your color changes from the stocking diagram.
- STEP 2: CUFF
Begin with Color A
2 x 2 Rib and Stockinette Stitch
Rows 1 - 8: * K2, P2 *
Rows 9 & 10: Knit All
Rows 11 - 16: * K2, P2 * - STEP 3: BODY OF STOCKING
Switch yarn color (optional)
Stockinette and Bubble Stitch
Note: Because K4B (bubble) and KFB (increase) have a similar abbreviation, K4B is bolded and underlined throughout the pattern to help differentiate the stitches.
Row 17: SSK, K36, K2Tog (38 rem)
Row 18: P38
Row 19: SSK, K34, K2Tog (36 rem)
Row 20: P36
Row 21: K36
Row 22: P36
Row 23: K36
Row 24: P36
Row 25: * K3, K4B *, K4
Row 26: P36
Row 27: K36
Row 28: P36
Row 29: K36
Row 30: P36
Switch yarn color (optional)
Row 31: K1, K4B, * K3, K4B *, K2
Row 32: P36
Row 33: K36
Row 34: P36
Row 35: K36
Row 36: P36
Row 37: * K3, K4B *, K4
Row 38: P36
Row 39: K36
Row 40: P36
Row 41: K36
Row 42: P36
Switch yarn color (optional)
Row 43: K1, K4B, * K3, K4B *, K2
Row 44: P36
Row 45: K36
Row 46: P36
Row 47: K36
Row 48: P36
Row 49: * K3, K4B *, K4
Row 50: P36
Row 51: K36
Row 52: P36
Row 53: K36
Row 54: P36
Switch yarn color (optional)
Row 55: K1, K4B, * K3, K4B *, K2
Row 56: P36 - STEP 4: STOCKING FOOT
Increase and Decrease Rows Begin.
Place Marker (PM) at mid-point, then Slip Marker (SM) as you knit each row.
Row 57: K17, KFB, (PM), KFB, K17 (38 rem)
Row 58: P19, (SM), P19
Row 59: K18, KFB, (SM), KFB, K18 (40 rem)
Row 60: P20, (SM), P20
Row 61: * K3, K4B * (4 times), K3, KFB, (SM), KFB, K2, K4B, * K3, K4B * (3 times), K4 (42 rem)
Row 62: P21, (SM), P21
Row 63: SSK, K18, KFB, (SM), KFB, K18, K2Tog (42 rem)
Row 64: P20, PFB, (SM), PFB, P20 (44 rem)
Row 65: SSK, K19, KFB, (SM), KFB, K19, K2Tog (44 rem)
Row 66: P21, PFB, (SM), PFB, P21 (46 rem)
Switch yarn color (optional)
Row 67: SSK, K1, K4B, * K3, K4B * (3 times), K6, KFB, (SM), KFB, K5, K4B, * K3, K4B * (3 times), K2, K2Tog (46 rem)
Row 68: P22, PFB, (SM), PFB, P22 (48 rem)
Row 69: SSK, K22, (SM), K22, K2Tog (46 rem)
Row 70: P23, (SM), P23
Row 71: SSK, K21, KFB, (SM), KFB, K21, K2Tog (46 rem)
Row 72: P23, (SM), P23
Row 73: SSK, K4B, * K3, K4B * (4 times), K4, (SM), * K3, K4B * (5 times), K1, K2Tog (44 rem)
Row 74: SSP, P20, (SM), P20, P2Tog (42 rem)
Row 75: SSK, K17, SSK, (SM), K2Tog, K17, K2Tog (38 rem)
Row 76: SSP, P15, SSP, (SM), P2Tog, P15, P2Tog (34 rem)
Row 77: SSK, K13, SSK, (SM), K2Tog, K13, K2Tog (30 rem)
Row 78: SSP, P11, SSP, (REMOVE STITCH MARKER), P2Tog, P11, P2Tog (26 rem)
Row 79: K2, K4B, * K3, K4B * (5 times), K3 (26 rem)
Cast Off Purlwise
Cut Yarn, leaving a long yarn tail to use for seaming. - STEP 5: FINISHING
• With right sides facing, seam edges with mattress stitch.
• Weave in and cut off remaining yarn ends.
• Turn the right side out.
• Fold stocking cuff down. - STEP 6: MAKE HANGING LOOP
• Cut 9 strands of yarn 16 inches long each.
• Knot one end, braid, knot to finish.
• Insert each knotted end into the top of the stocking seam.
• Tack loop with yarn and tapestry to hold in place.
Notes
Construction: Knitted Top Down
Sizes: One Size, 8" wide x 16" tall.
_____
Gauge Swatch: 10 stitches and 18 rows = 4 inches in Bubble Stitch.
_____
Knitting Techniques
- Slip Knot
- CO = Cast On Long Tail
- K = Knit Stitch
- P = Purl Stitch
- * * = Repeat Pattern Between Asterisks
- K4B = Knit 4 Below
- KFB = Knit Front + Back (Increase)
- PFB = Purl Front + Back (Increase)
- K2Tog = Knit 2 Stitches Together (Decrease)
- P2Tog = Purl 2 Stitches Together (Decrease)
- SSK = Slip, Slip, Knit (Decrease)
- SSP = Slip, Slip, Purl (Decrease)
- Rem = Number of stitches remaining on the needle
- PM = Place Marker
- SM = Slip Marker
- Cast Off Purlwise
- Weave in Yarn Tails

Kristen McDonnell
Author • Designer • Teacher
Kristen from StudioKnit LLC produces knitting video lessons and pattern designs from her vibrant production studio on Half Moon Bay’s California coast.
Kristen McDonnell is the author of the highly acclaimed book Knit Stitch: 50 Knit + Purl Patterns featuring vintage and unique designs.