XO Cable Stitch Knitting Pattern (Hugs and Kisses)
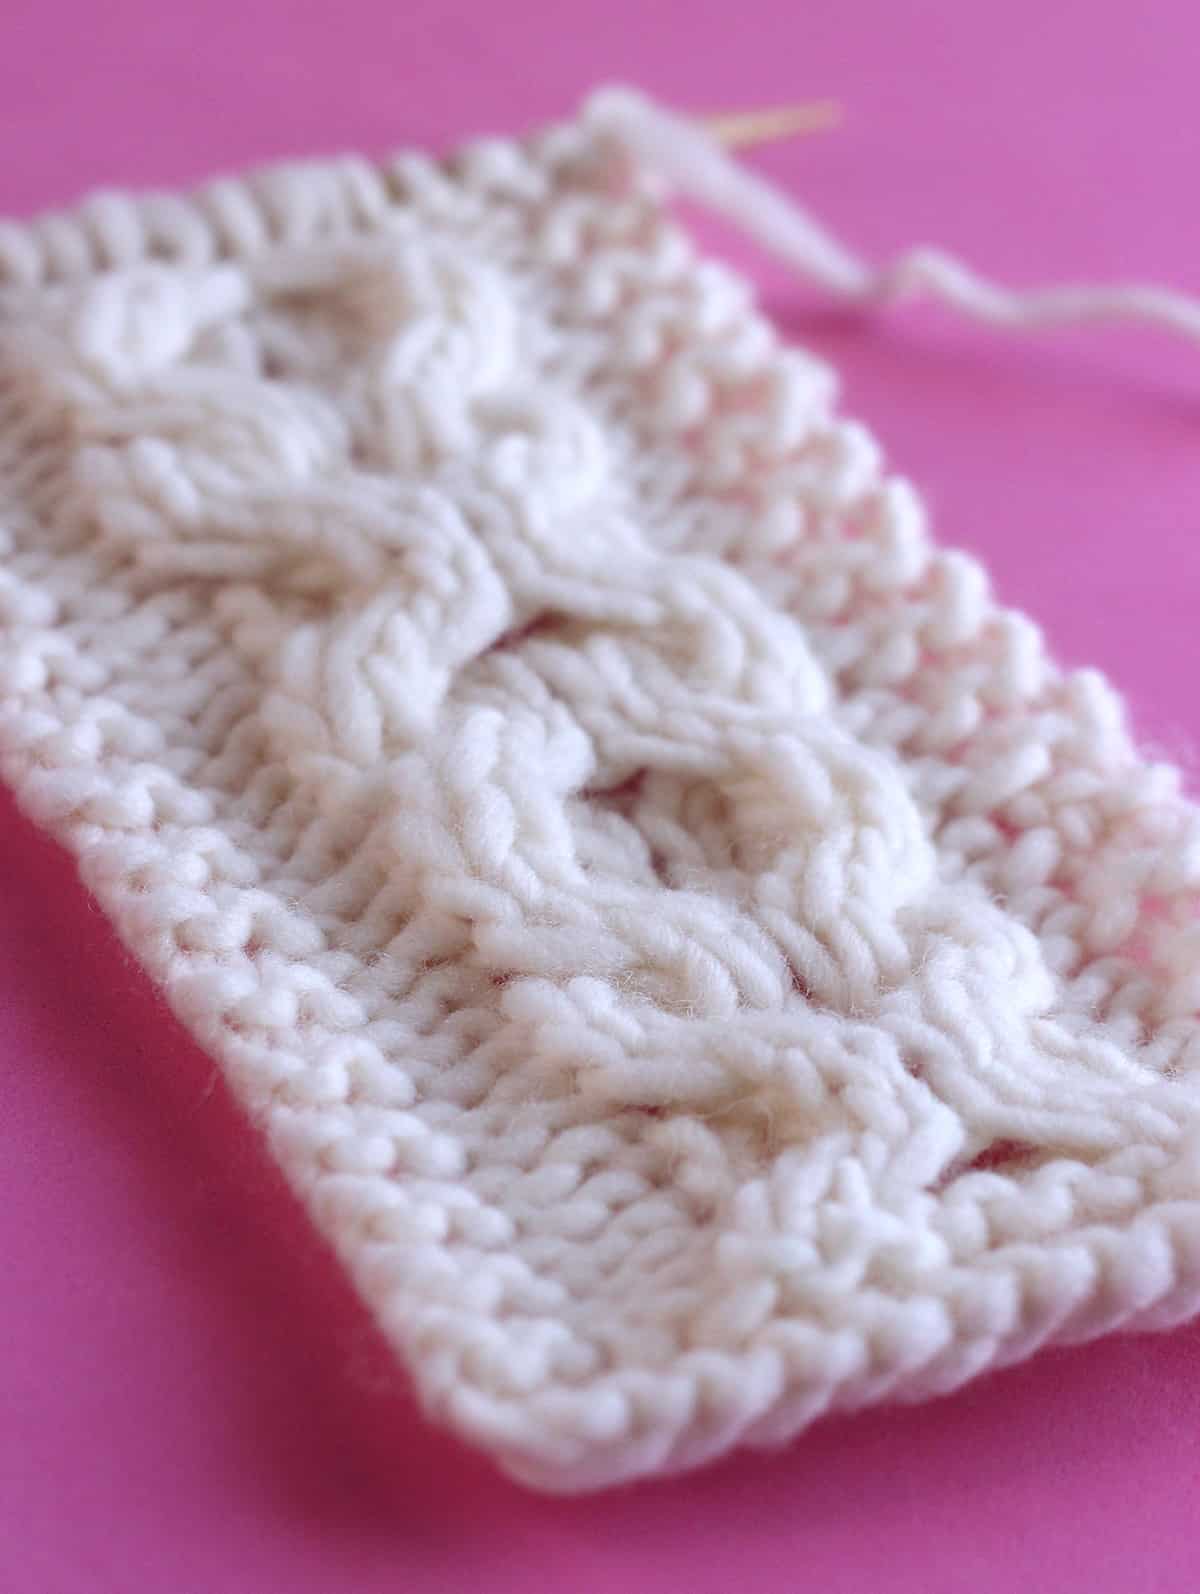
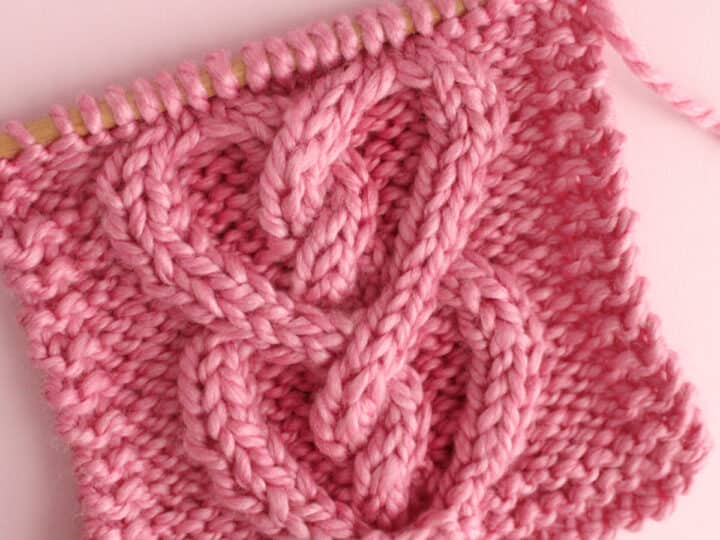
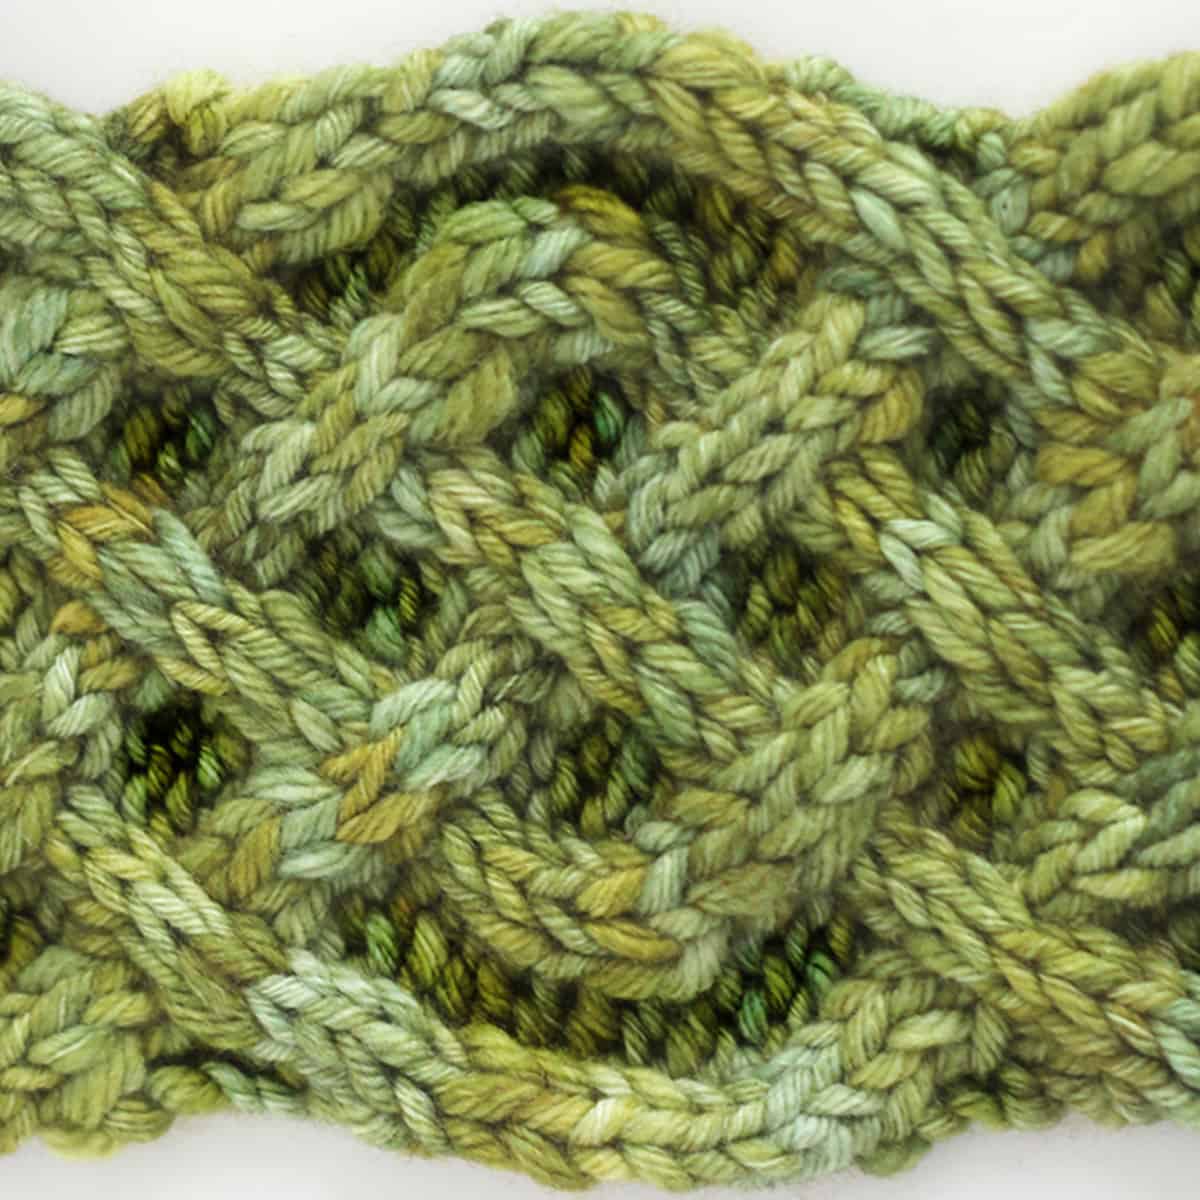
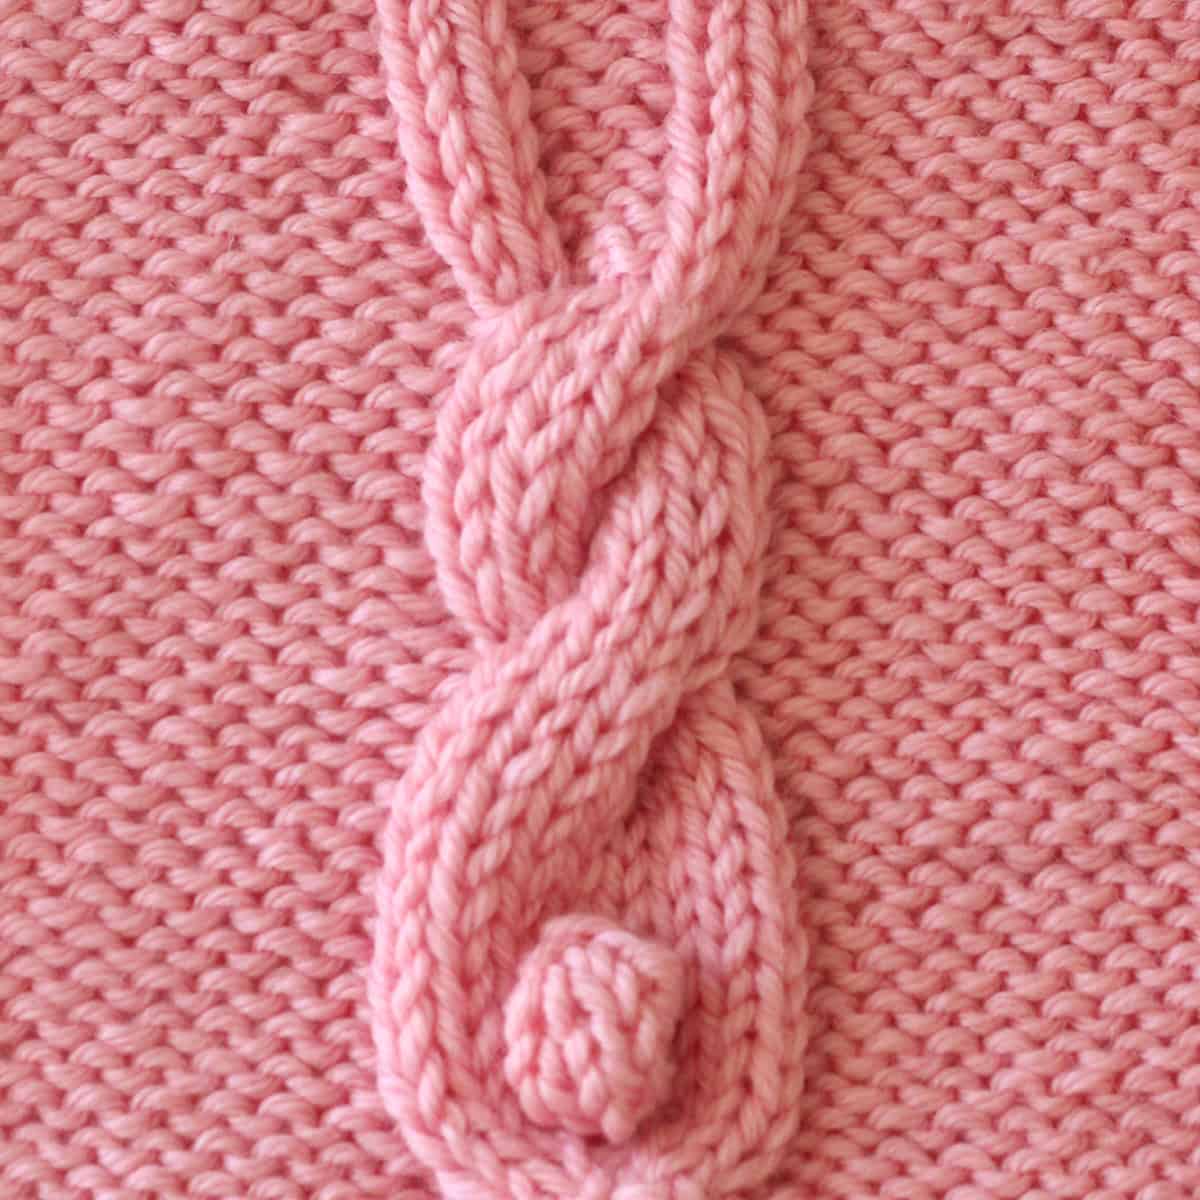
The XO Cable Stitch Knitting Pattern, also affectionately known as “Hugs and Kisses,” is created from intertwining stitches seamlessly combining two simple right- and left-crossing rope cables.
Get your written pattern instructions both flat and in the round, along with knitting chart and video tutorial.
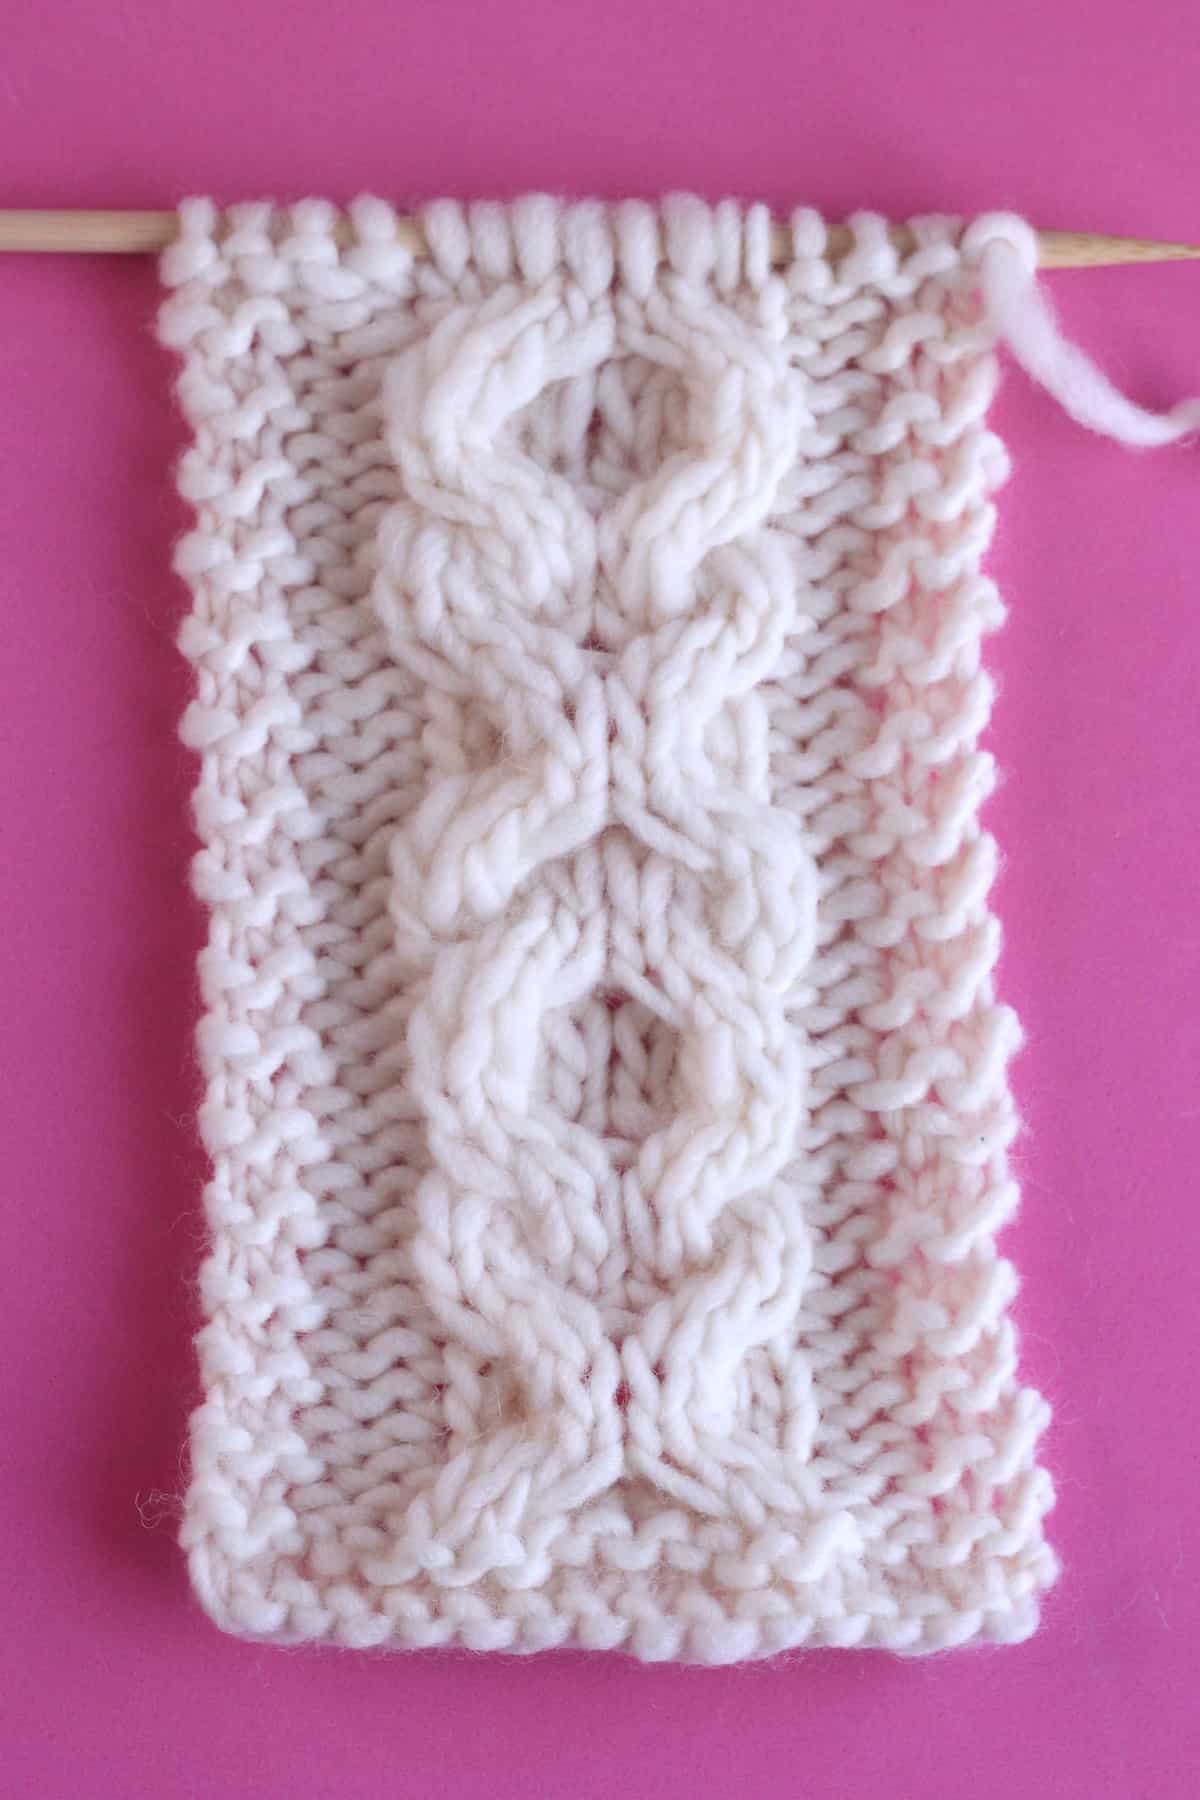
Table of Contents
About the XO Cable Stitch Stitch
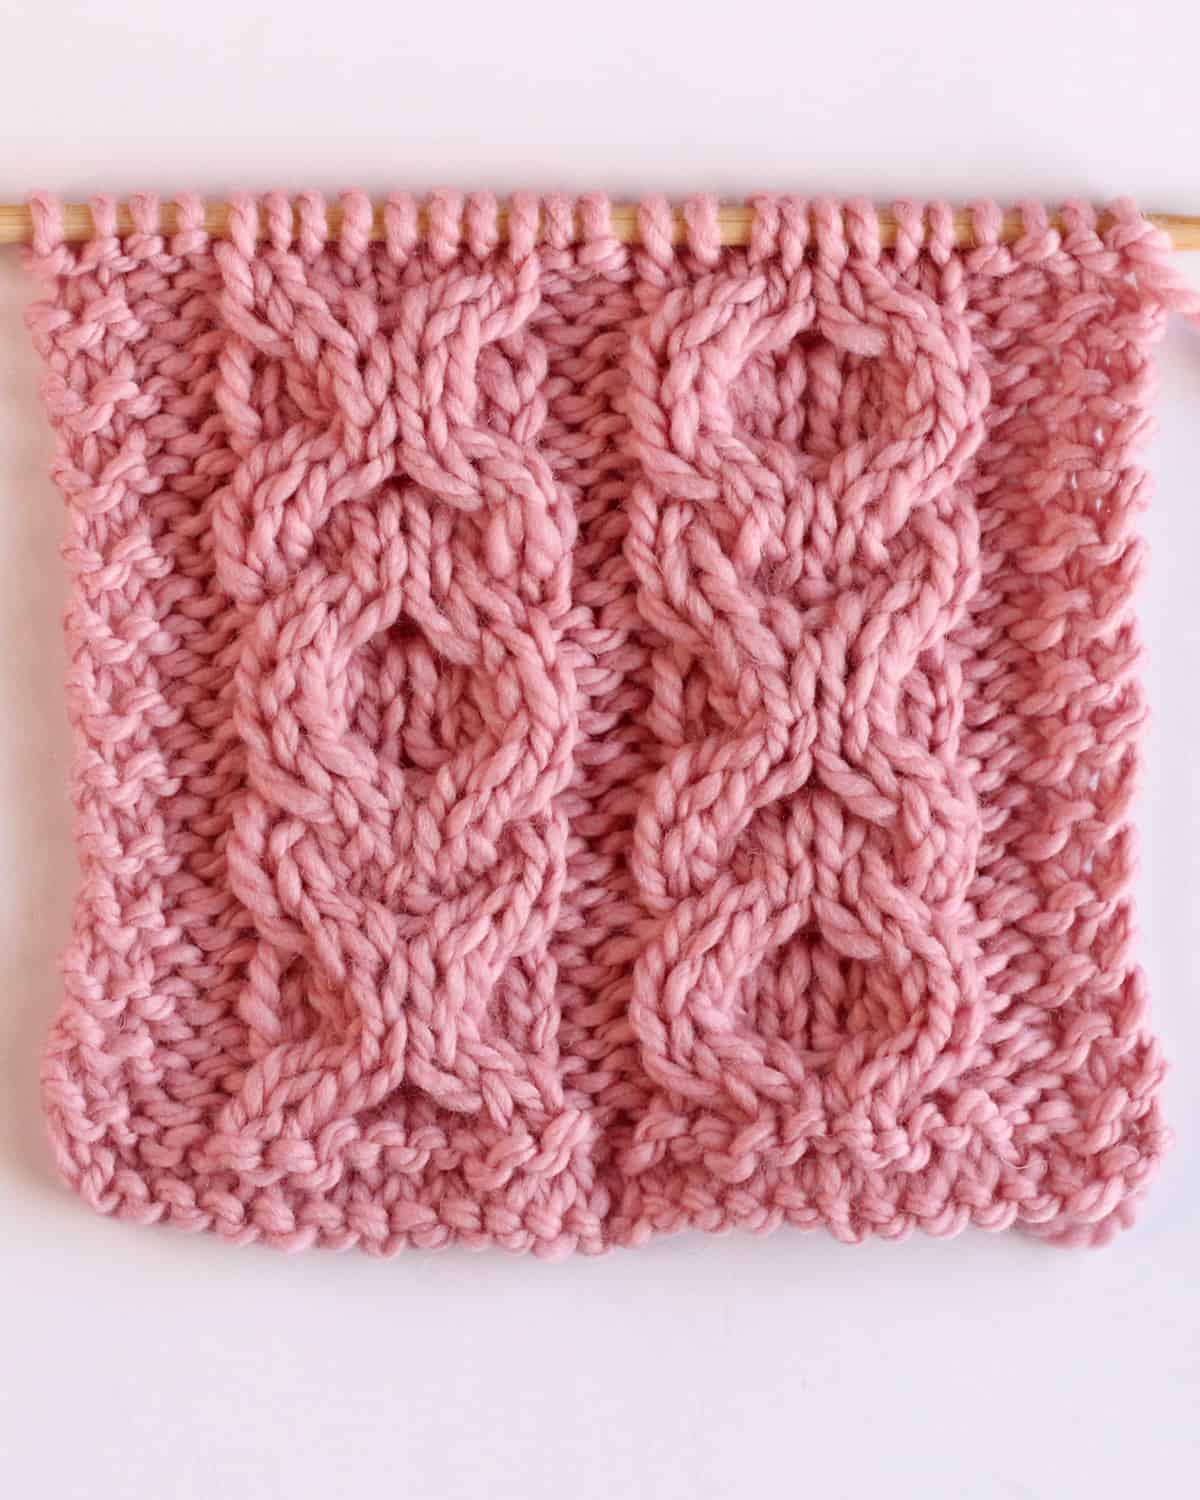
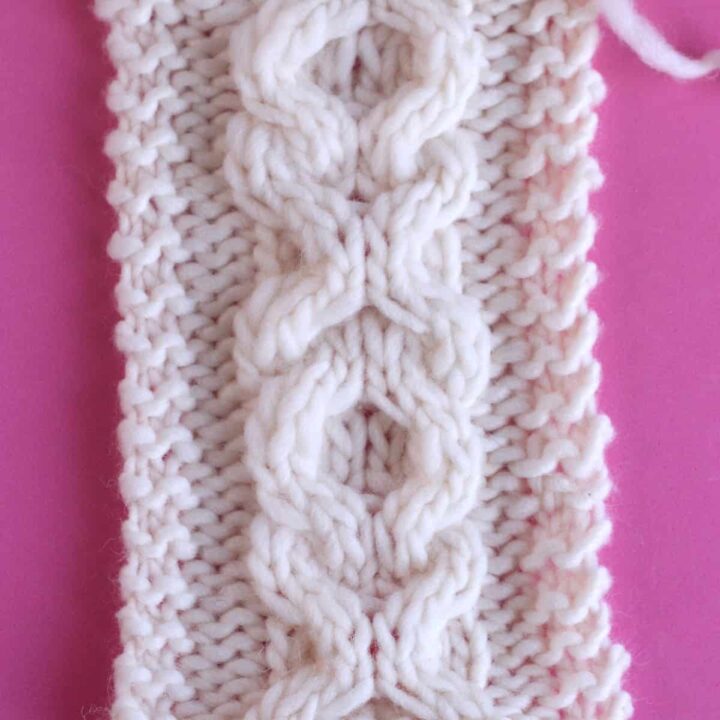
Knit just one vertical rope of XO cable repeats, or combine XO and OX with alternating repeats for a larger panel design. The crossed cables rest atop a reverse stockinette background.
Row Repeat
Knit up the XO Cable Stitch in a 16-row repeat. If you wish to knit one verticle XO rope, the cable section is created with 8 stitches. There is also a double cable rope pattern provided that alternates the XO pattern horizontally.
Is this Cable Stitch Reversible?
No, this is not a reversible pattern since the right side of the work displays the cable stitch design while the wrong side does not.
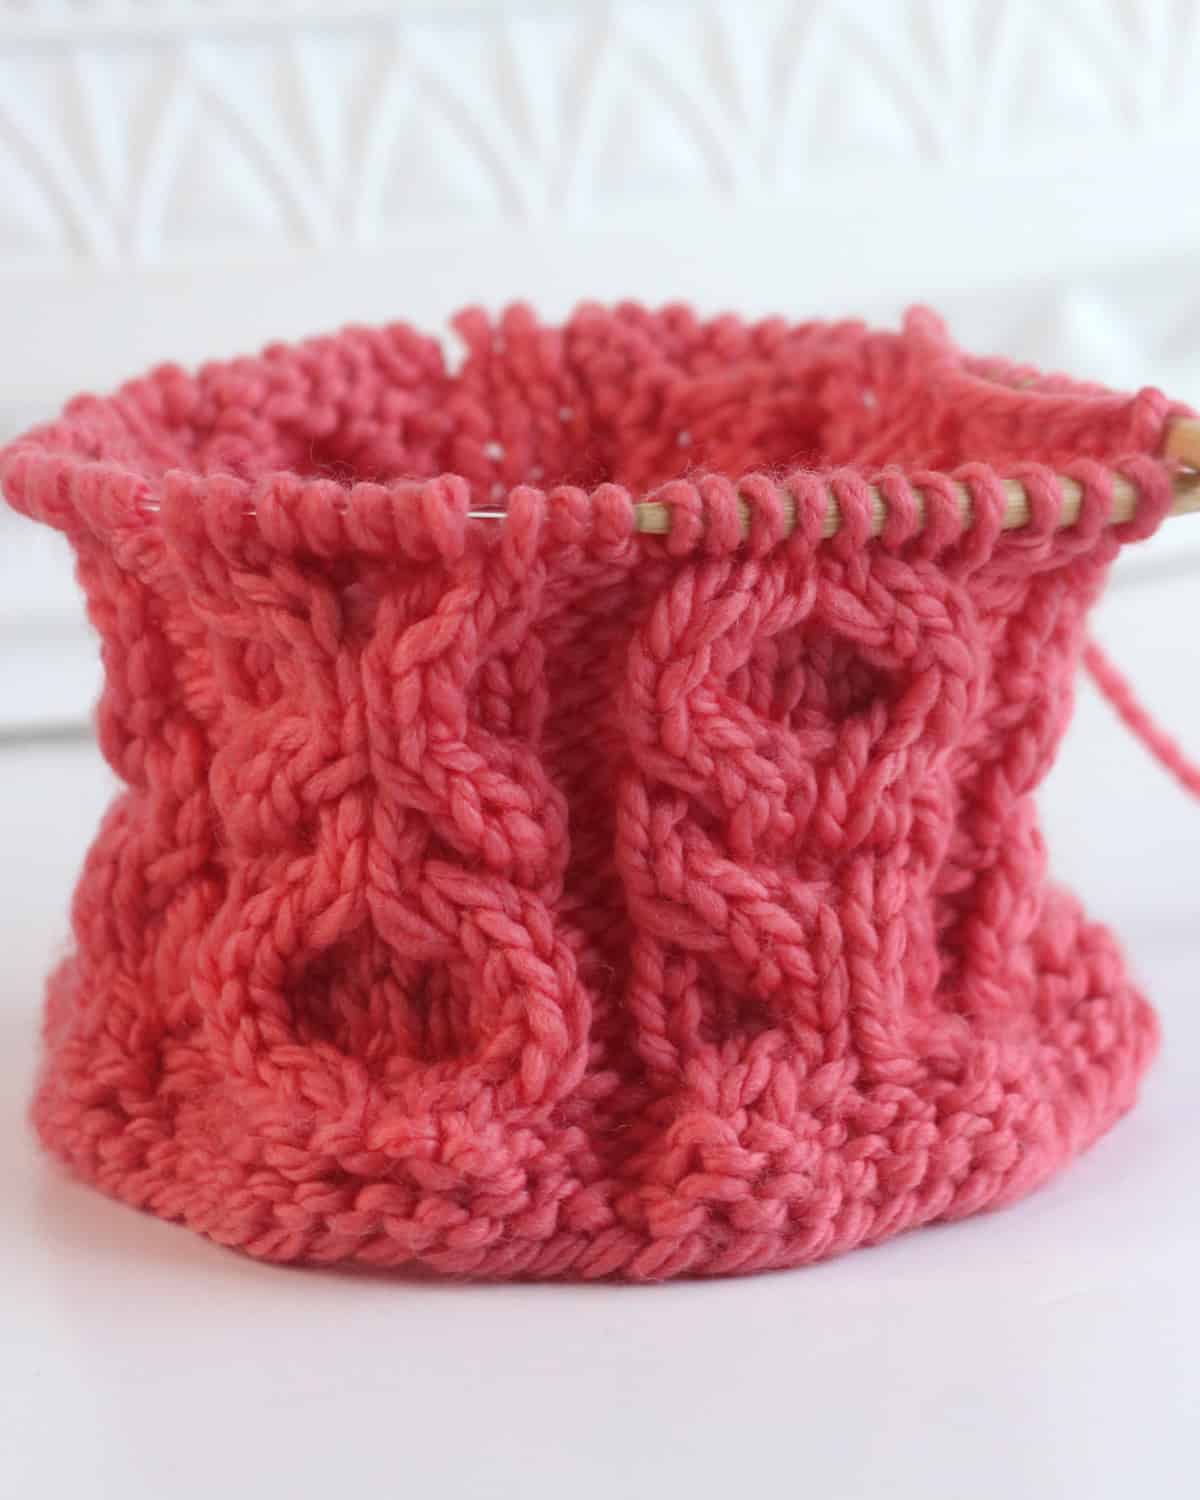
Can this stitch be knit in the round on circular needles?
Yes, this pattern includes written instructions to knit in the round. Try it out with either circular or double-pointed needles to include in hats, sweater sleeves, or infinity cowls.
Sweet History Behind XO: Hugs and Kisses
The use of “XO” to signify hugs and kisses has a playful and historical origin.
In medieval times, when many people were unable to read or write, they would sign documents with an “X” as a symbol of sincerity. Over time, this practice evolved, and the “X” began to represent a kiss. The letter “O” was later added to symbolize a hug, creating the familiar “XO” combination. Just like Gossip Girl, doubling it up with “XOXO” is also a fun way to sign off with love.
Today, this is a charming and widely recognized way to express affection, both in writing and even in the world of knitting patterns, adding a delightful touch to the XO Cable Knit Stitch Pattern in my Valentine Knitting Collection.
Watch Video Tutorial
Knitting Techniques
For this XO Cable Stitch design, we are using the following knitting techniques and abbreviations:
- RS = Right Side (front of work)
- WS = Wrong Side (back of work)
- CO = Long Tail Cast On
- K = Knit Stitch
- P = Purl Stitch
- 2/2LC = 2/2 Left Cross Cable. Slip 2 stitches to cable needle and hold in front, knit 2 from left needle, knit 2 from cable needle.
- 2/2RC = 2/2 Right Cross Cable. Slip 2 stitches to cable needle and hold in back, knit 2 from left needle, knit 2 from cable needle.
- ST/STS = Stitch/Stitches
- BO = Bind Off
- Weave-in Yarn Ends
Printable Knitting Instructions
Printable Knitting Pattern
The XO Cable Stitch Knitting Pattern, also affectionately known as “Hugs and Kisses,” is created from two simple right- and left-crossing rope cables.
Materials
- Yarn - Any Gauge
Tools
- Knitting Needles - Appropriate Size for Yarn
- Tapestry Needle
- Cable Needle
- Scissors
Instructions
KNITTING TECHNIQUES
K = Knit Stitch
P = Purl Stitch
2/2LC = 2/2 Left Cross Cable. Slip 2 stitches to cable needle and hold in front, knit 2 from left needle, knit 2 from cable needle.
2/2RC = 2/2 Right Cross Cable. Slip 2 stitches to cable needle and hold in back, knit 2 from left needle, knit 2 from cable needle.
/////
SINGLE ROW - KNITTED FLAT ON STRAIGHT NEEDLES:
Cast On in Multiples 10 plus 2 stitches
Repeat Pattern between * *
- Row 1: * P2, K8 *, P2
- Row 2: K2, * P8, K2 *
- Row 3: * P2, 2/2LC, 2/2RC *, P2
- Row 4: K2, * P8, K2 *
- Row 5: * P2, K8 *, P2
- Row 6: K2, * P8, K2 *
- Row 7: * P2, 2/2RC, 2/2LC *, P2
- Row 8: K2, * P8, K2 *
- Row 9: * P2, K8 *, P2
- Row 10: K2, * P8, K2 *
- Row 11: * P2, 2/2RC, 2/2LC *, P2
- Row 12: K2, * P8, K2 *
- Row 13: * P2, K8 *, P2
- Row 14: K2, * P8, K2 *
- Row 15: * P2, 2/2LC, 2/2RC *, P2
- Row 16: K2, * P8, K2 *
Repeat Rows 1 – 16 until your piece is the length you desire.
---
SINGLE ROW - KNITTED IN-THE-ROUND:
Cast On in Multiples 10 stitches
Repeat Pattern between * *
- Row 1: * P2, K8 *
- Row 2: * P2, K8 *
- Row 3: * P2, 2/2LC, 2/2RC *
- Row 4: * P2, K8 *
- Row 5: * P2, K8 *
- Row 6: * P2, K8 *
- Row 7: * P2, 2/2RC, 2/2LC *
- Row 8: * P2, K8 *
- Row 9: * P2, K8 *
- Row 10: * P2, K8 *
- Row 11: * P2, 2/2RC, 2/2LC *
- Row 12: * P2, K8 *
- Row 13: * P2, K8 *
- Row 14: * P2, K8 *
- Row 15: * P2, 2/2LC, 2/2RC *
- Row 16: * P2, K8 *
Repeat Rows 1 – 16 until your piece is the length you desire.
____
DOUBLE ROW - KNITTED FLAT ON STRAIGHT NEEDLES:
Cast On in Multiples 20 plus 2 stitches
Repeat Pattern between * *
- Row 1: * P2, K8, P2, K8 *, P2
- Row 2: K2, * P8, K2, P8, K2 *
- Row 3: * P2, 2/2RC, 2/2LC, P2, 2/2LC, 2/2RC *, P2
- Row 4: K2, * P8, K2, P8, K2 *
- Row 5: * P2, K8, P2, K8 *, P2
- Row 6: K2, * P8, K2, P8, K2 *
- Row 7: * P2, 2/2LC, 2/2RC, P2, 2/2RC, 2/2LC *, P2
- Row 8: K2, * P8, K2, P8, K2 *
- Row 9: * P2, K8, P2, K8 *, P2
- Row 10: K2, * P8, K2, P8, K2 *
- Row 11: * P2, 2/2LC, 2/2RC, P2, 2/2RC, 2/2LC *, P2
- Row 12: K2, * P8, K2, P8, K2 *
- Row 13: * P2, K8, P2, K8 *, P2
- Row 14: K2, * P8, K2, P8, K2 *
- Row 15: * P2, 2/2RC, 2/2LC, P2, 2/2LC, 2/2RC *, P2
- Row 16: K2, * P8, K2, P8, K2 *
---
DOUBLE ROW - KNITTED IN-THE-ROUND:
Cast On in Multiples 20 stitches
Repeat Pattern between * *
- Row 1: * P2, K8, P2, K8 *, P2
- Row 2: * P2, K8, P2, K8 *, P2
- Row 3: * P2, 2/2RC, 2/2LC, P2, 2/2LC, 2/2RC *
- Row 4: * P2, K8, P2, K8 *, P2
- Row 5: * P2, K8, P2, K8 *, P2
- Row 6: * P2, K8, P2, K8 *, P2
- Row 7: * P2, 2/2LC, 2/2RC, P2, 2/2RC, 2/2LC *
- Row 8: * P2, K8, P2, K8 *, P2
- Row 9: * P2, K8, P2, K8 *, P2
- Row 10: * P2, K8, P2, K8 *, P2
- Row 11: * P2, 2/2LC, 2/2RC, P2, 2/2RC, 2/2LC *
- Row 12: * P2, K8, P2, K8 *, P2
- Row 13: * P2, K8, P2, K8 *, P2
- Row 14: * P2, K8, P2, K8 *, P2
- Row 15: * P2, 2/2RC, 2/2LC, P2, 2/2LC, 2/2RC *
- Row 16: * P2, K8, P2, K8 *, P2
Notes
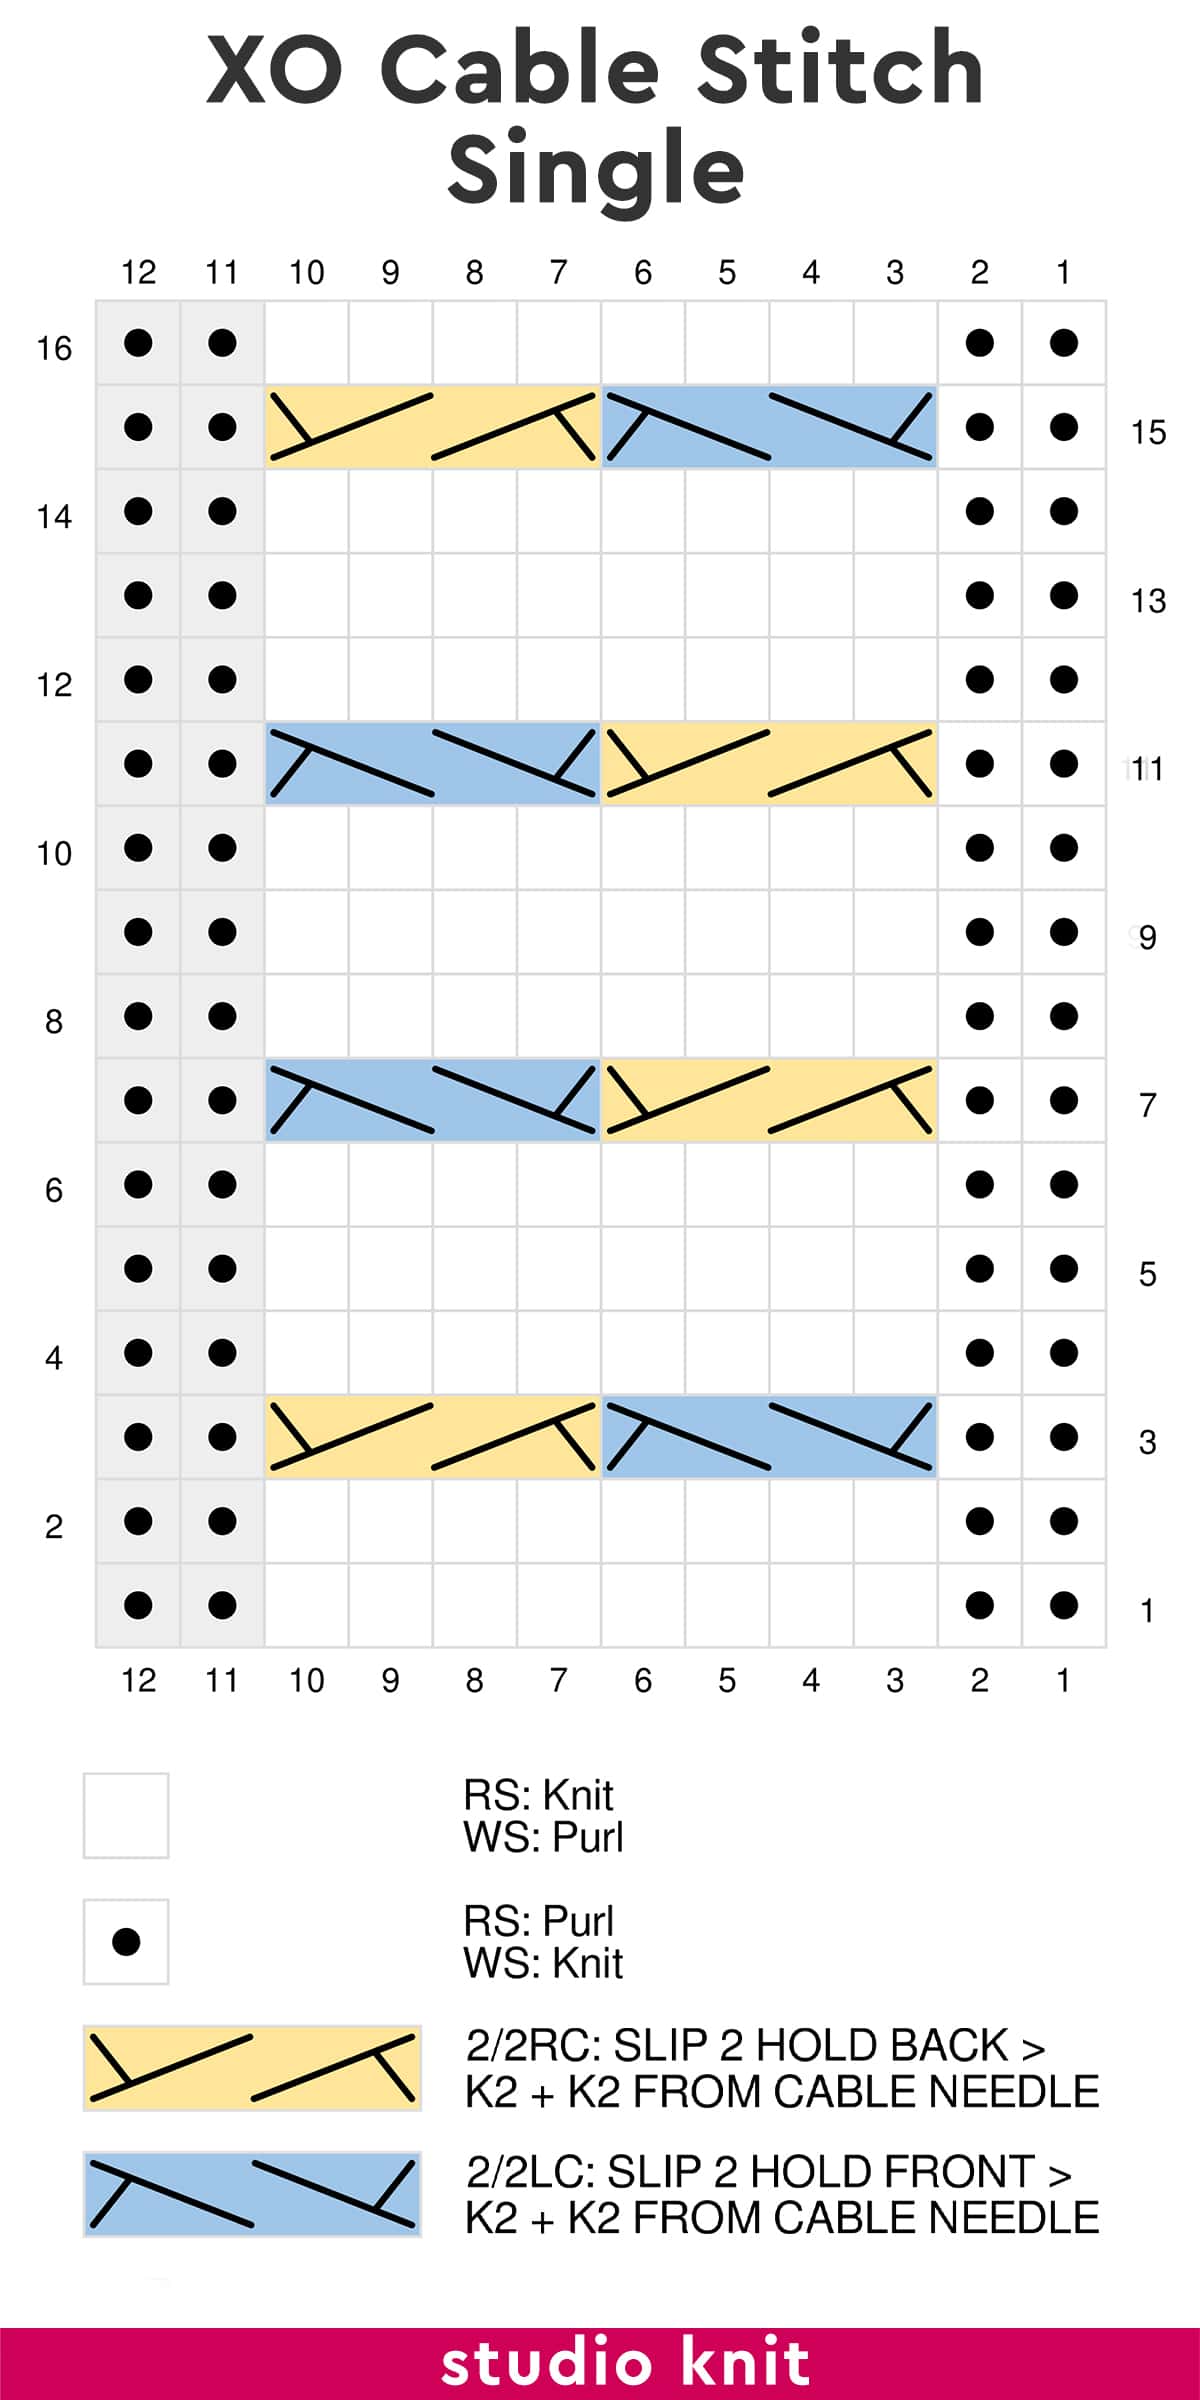
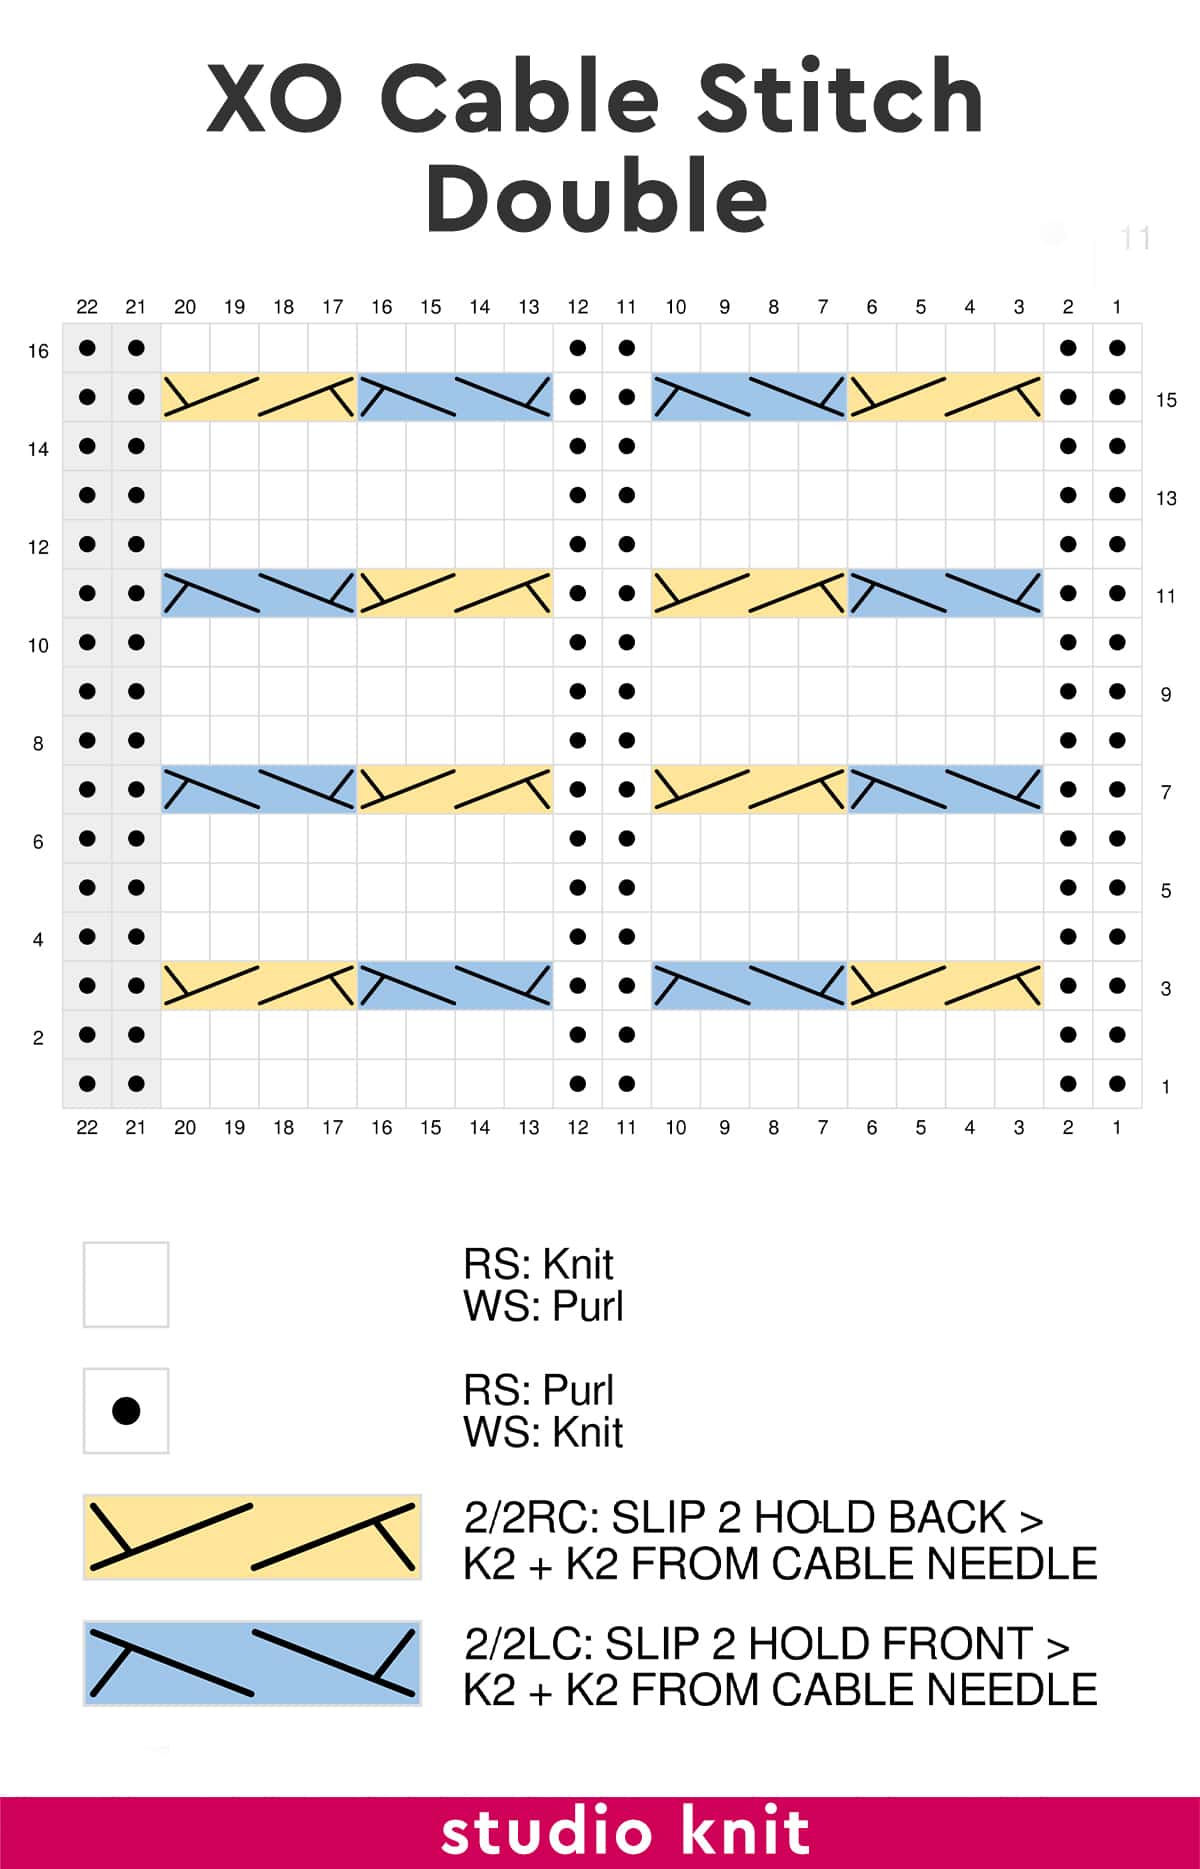
KNITTING CHARTS
I have created a color-coded system in the chart patterns to easily discern the 2 different cable stitches at a glance. Knitters have told me they love it and I hope it helps you, too!

Kristen McDonnell
Author • Designer • Teacher
Kristen from StudioKnit LLC produces knitting video lessons and pattern designs from her vibrant production studio on Half Moon Bay’s California coast.
Kristen McDonnell is the author of the highly acclaimed book Knit Stitch: 50 Knit + Purl Patterns featuring vintage and unique designs.