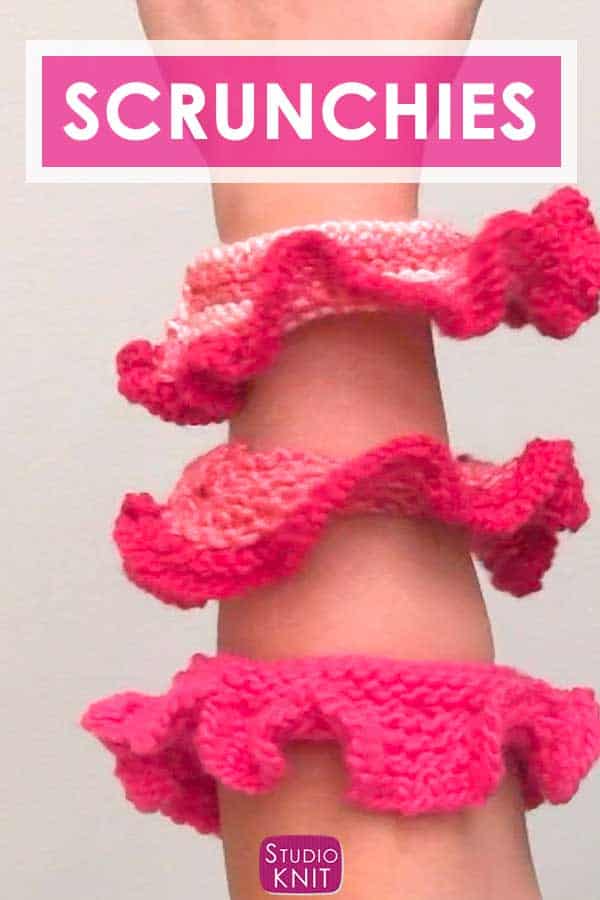
Hair Scrunchies Knitting Pattern with Ruffles

My new Hair Scrunchies Knitting Pattern with Ruffles is a fun quick-knit. It’s a great yarn busting project to make as gifts or for a Scrunchie Sale at craft fairs this holiday season.
I hope you enjoy my step-by-step instructions and full video tutorial to help you design your own super cute hair accessories today!
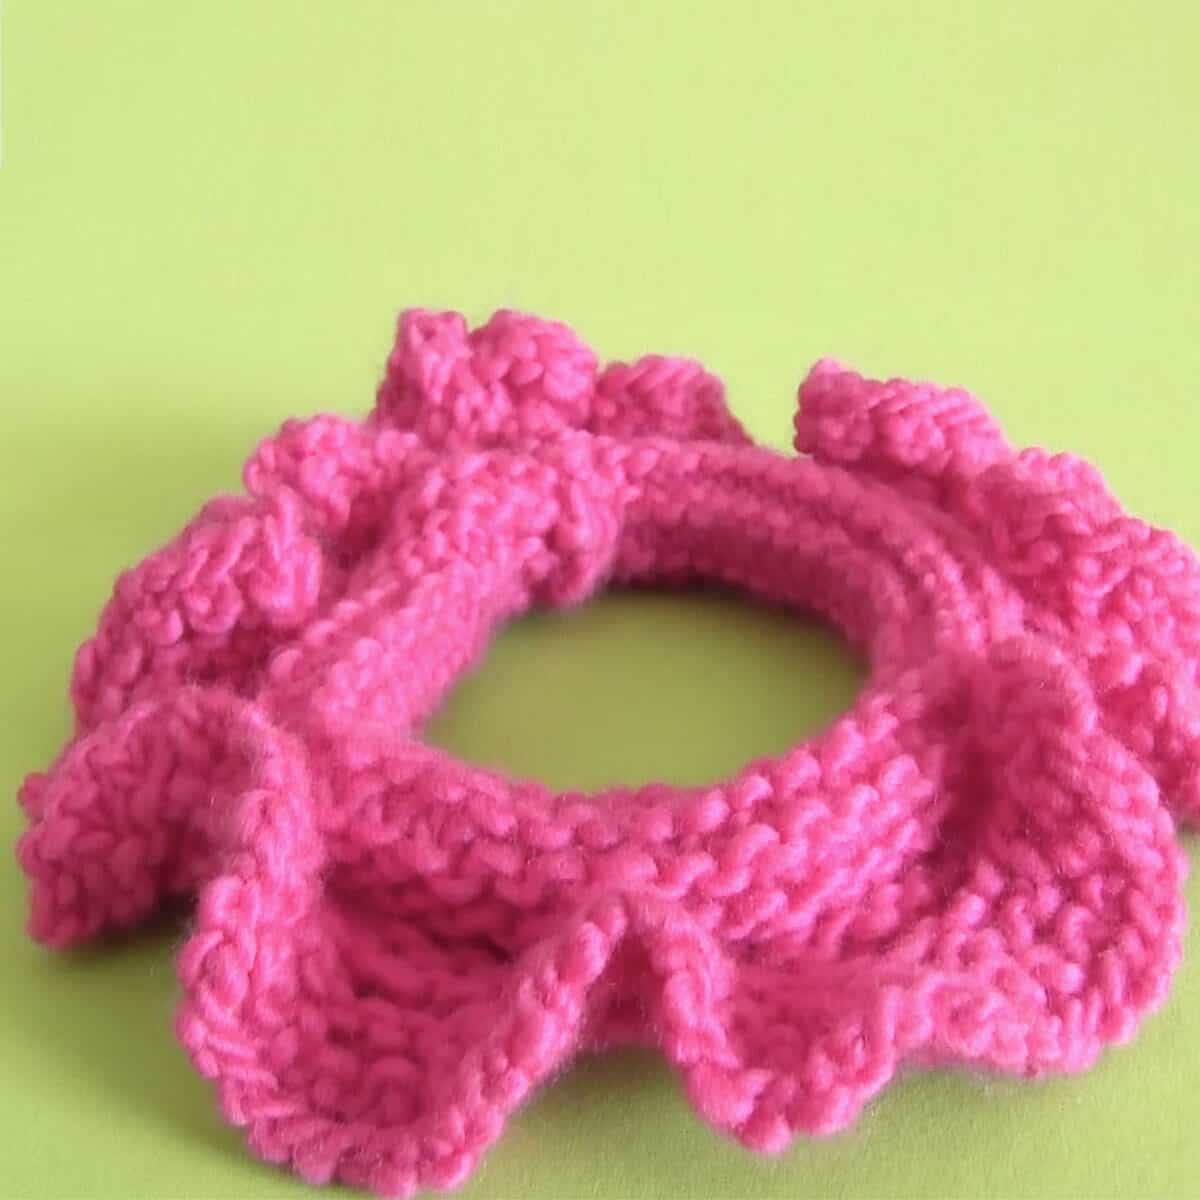
Table of Contents
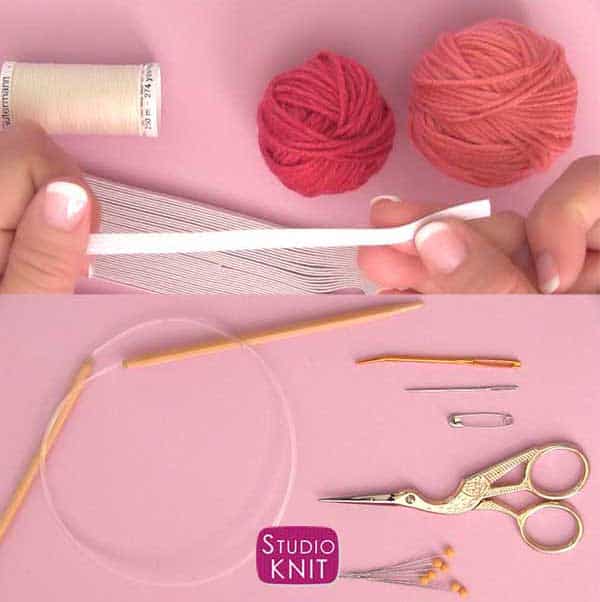
Knitting Supplies
- Knitting Needles – Size 8 US circular needles, 24 inches in length or longer
- Tapestry Needle
- Sewing Needle
- Safety Pin
- Straight Sewing Pins
- Scissors
- Yarn – 42 yards of Worsted Weight in any fiber and colors of your choice
- Braided Elastic – ¼″ width
- Sewing Thread
Knitting Techniques
Need to brush up or learn a new technique? Check out my entire library of Knitting Techniques to help you along as you knit up this project. If you’re new to knitting, you’ll love my Absolute Beginners Knitting Series!
- How to Cast On Without a Slip Knot
- Slip Knot
- Cast On
- Knit
- Knit 2 Together
- Change Yarn Colors
- Cast Off
Watch Video Tutorial
Knitting Pattern
Helpful Tip: Before Casting On, unravel about 122 inches of yarn tail. This helps prevent you from underestimating the amount of yarn and running out after casting on dozens of stitches!
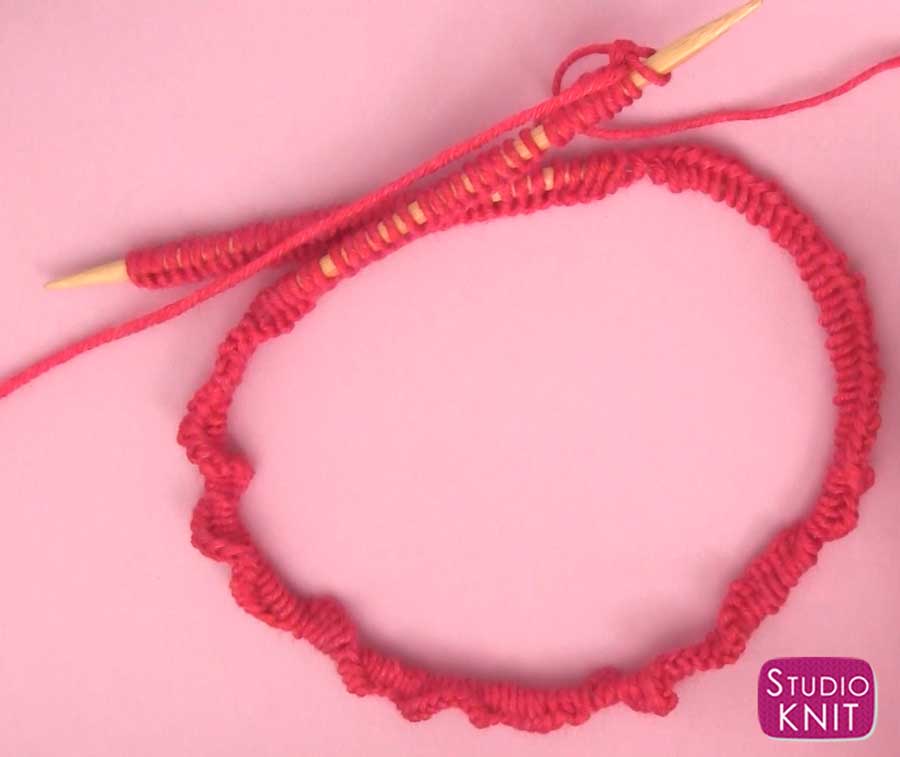
Cast On: 200 Stitches
Row 1: Knit All
Row 2: Knit 2 Together (100 Sts Remain)
Row 3: Knit All (Optional: Change yarn colors at the beginning of this row to achieve the same border as my sample)
Row 4: Knit 2 Together (50 Sts Remain)
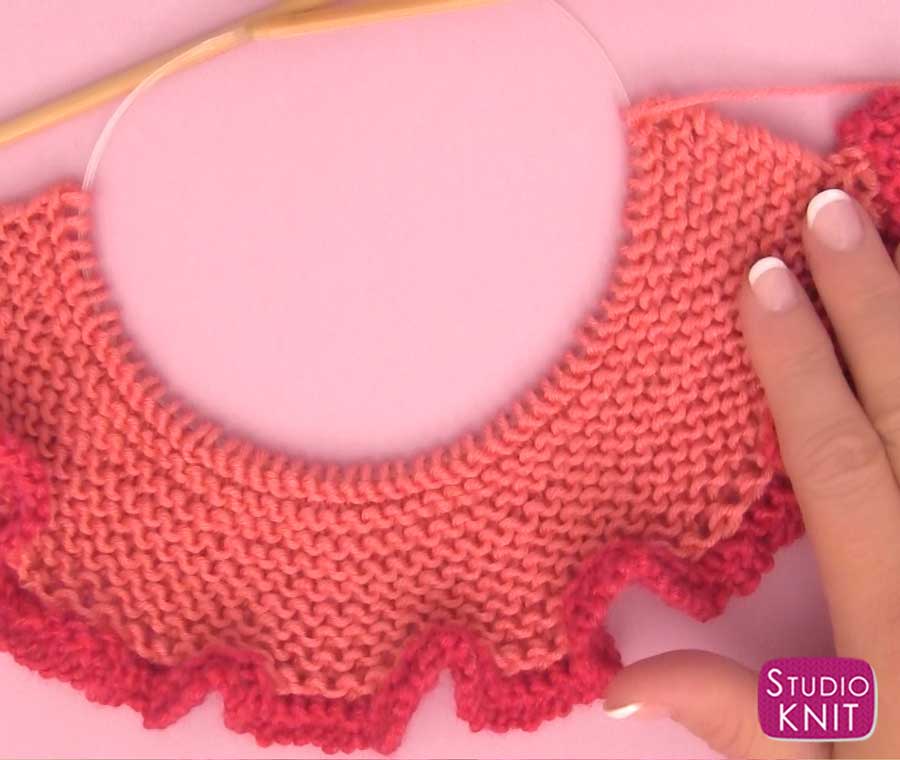
Rows 5 – 20: Knit All
Cast Off, leaving a long yarn tail from which you will sew up your work
RUFFLES: By decreasing our stitches from 200 down to 50 in just these first 4 rows of knitting, the edge easily ruffles. So cute!
How to Assemble Knitted Hair Scrunchies
Sewing the Edge
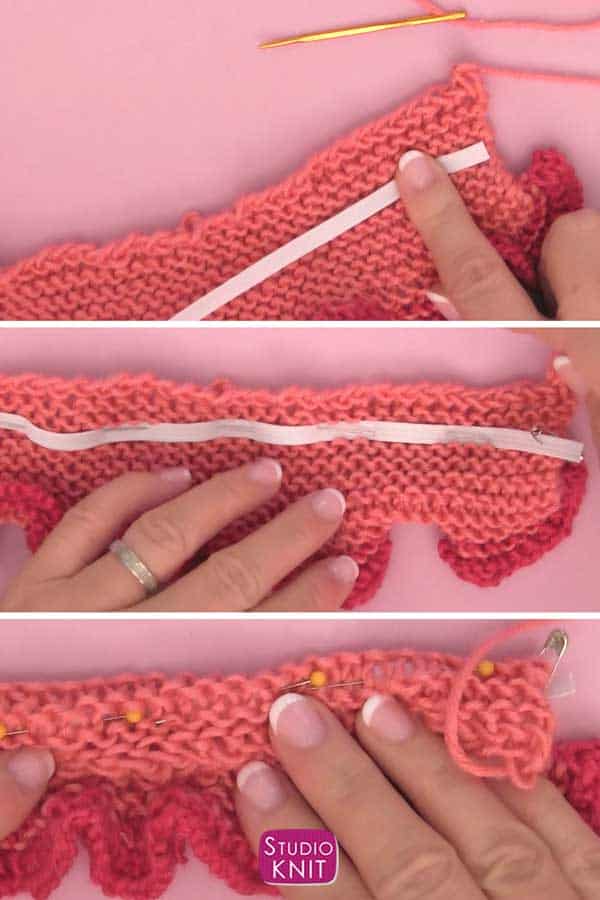
- Cut 9 inches of Braided Elastic Band;
- Hold it securely on one end with a safety pin;
- Pin the length of your elastic down with straight pins;
- Fold your knitted piece over the elastic;
- Using your tapestry needle and yarn tail, sew the edge of the scrunchie.
Finishing the Knitted Work
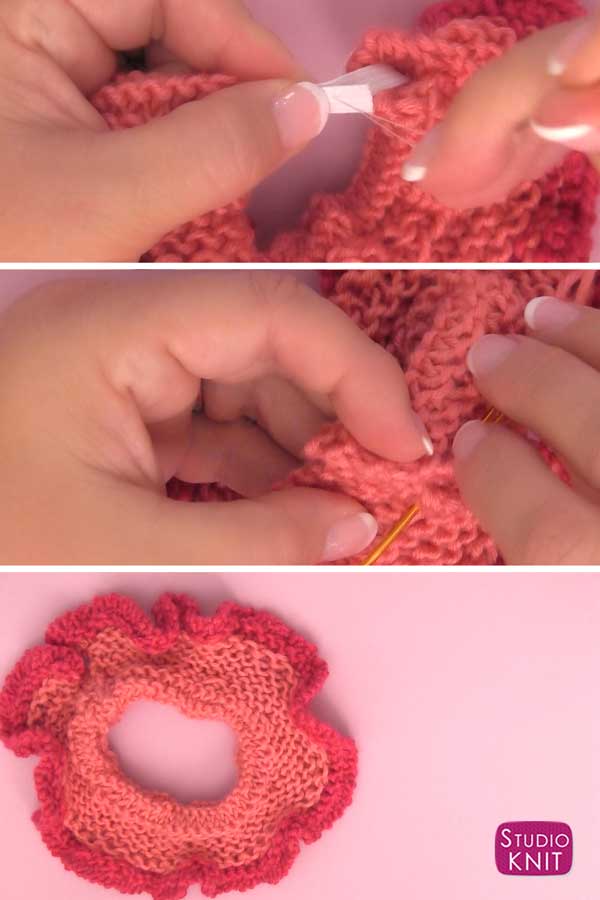
- Pull the other side of the elastic out to the other end and continue sewing over the elastic.
- Holding the two ends of the elastic band, sew it securely using your thread and a sewing needle.
- Seam the edges of your knitted work together.
- Weave in all yarn tail ends and cut.
Printable Knitting Instructions

Printable Knitting Pattern
My new Hair Scrunchies Knitting Pattern with Ruffles is a fun quick-knit.
Materials
- Knitting Needles - Size 8 US circular needles, 24 inches in length or longer
- Tapestry Needle
- Sewing Needle
- Safety Pin
- Straight Sewing Pins
- Scissors
Tools
- Yarn - 42 yards of Worsted Weight in any fiber and colors of your choice
- Braided Elastic - ¼" width
- Sewing Thread
Instructions
KNITTING PATTERN
Cast On: 200 Stitches
Helpful Tip: Before Casting On, unravel about 122 inches of yarn tail. This helps prevent you from underestimating the amount of yarn and running out after casting on dozens of stitches!
Row 1: Knit All
Row 2: Knit 2 Together (100 Sts Remain)
Row 3: Knit All (Optional: Change yarn colors at the beginning of this row to achieve the same border as my sample)
Row 4: Knit 2 Together (50 Sts Remain)
Rows 5 - 20: Knit All
Cast Off, leaving a long yarn tail from which you will sew up your work
RUFFLES: By decreasing our stitches from 200 down to 50 in just these first 4 rows of knitting, the edge easily ruffles.
_____
SEWING THE EDGE
- Cut 9 inches of Braided Elastic Band;
- Hold it securely on one end with a safety pin;
- Pin the length of your elastic down with straight pins;
- Fold your knitted piece over the elastic;
- Using your tapestry needle and yarn tail, sew the edge of the scrunchie.
_____
FINISHING THE KNITTED WORK
- Pull the other side of the elastic out to the other end and continue sewing over the elastic.
- Holding the two ends of the elastic band, sew it securely using your thread and a sewing needle.
- Seam the edges of your knitted work together.
- Weave in all yarn tail ends and cut.
Notes
Knitting Techniques
- How to Cast On Without a Slip Knot
- Slip Knot
- Cast On
- Knit
- Knit 2 Together
- Change Yarn Colors
- Cast Off

Kristen McDonnell
Author • Designer • Teacher
Kristen from StudioKnit LLC produces knitting video lessons and pattern designs from her vibrant production studio on Half Moon Bay’s California coast.
Kristen McDonnell is the author of the highly acclaimed book Knit Stitch: 50 Knit + Purl Patterns featuring vintage and unique designs.