Seacliff Seersucker Hat Knitting Pattern
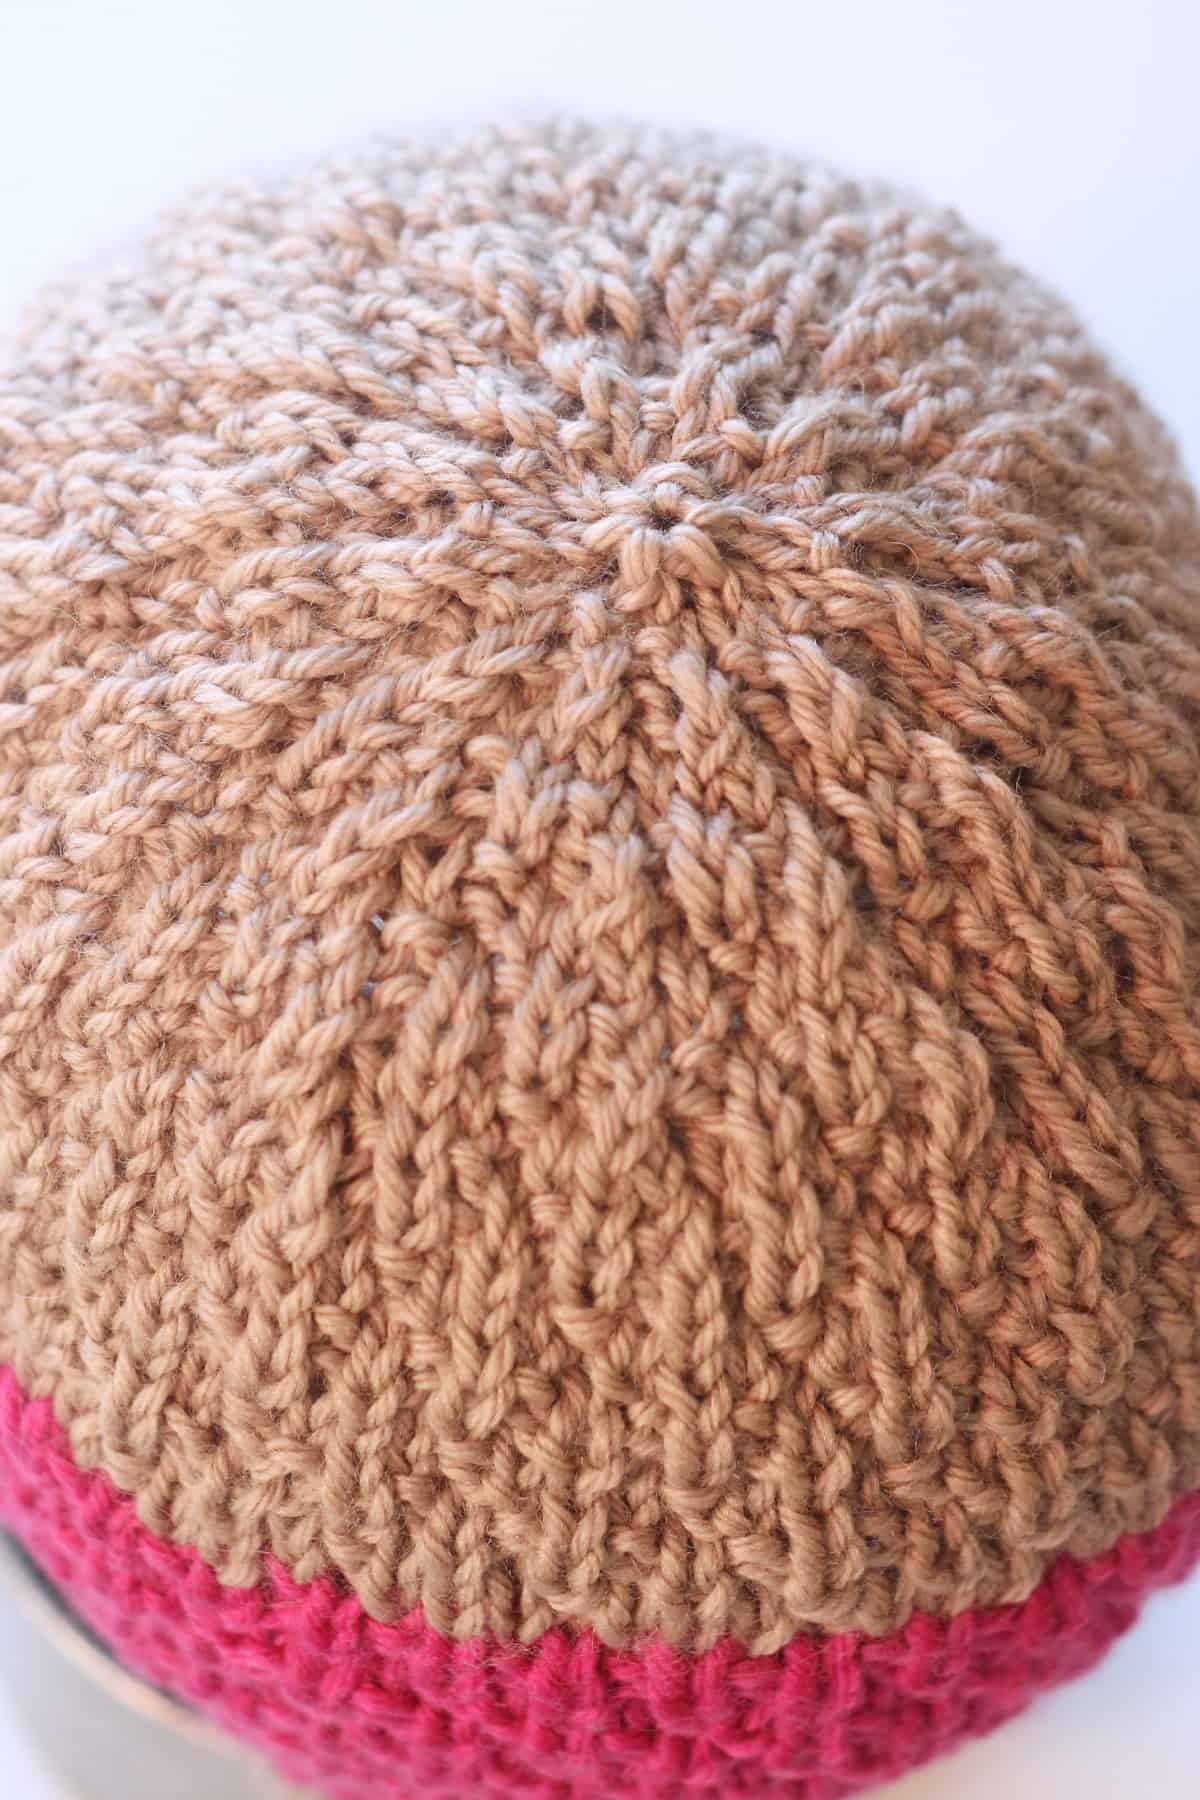
This Seacliff Seersucker Hat Knitting Pattern creates a loose-fitting textured beanie. The hat has textured rows that create diamond shapes giving it a raised and pillowy design. With a twisted 1×1 rib brim, this hat design is created by this elegant knit and purl texture using just one needle size.
Continue reading for your free knitting instructions. You may also purchase my ad-free printable pdf pattern in my Studio Knit Pattern Shop.
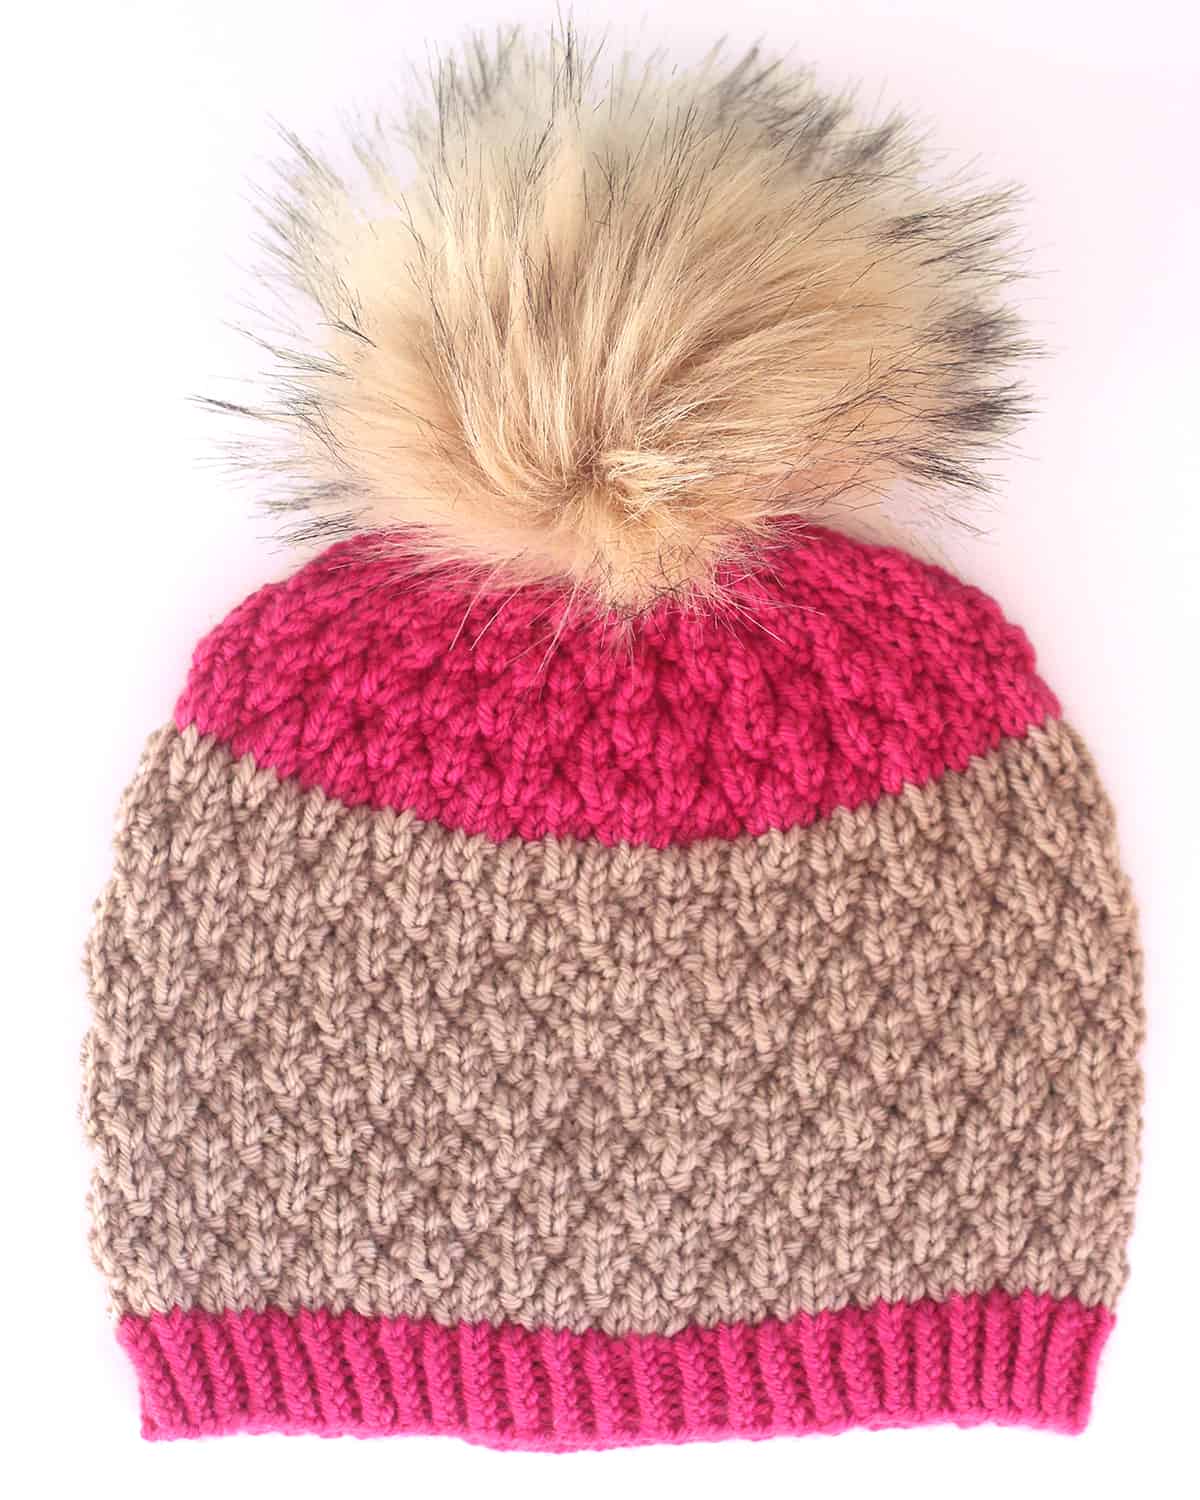
Table of Contents
Seersucker Knitted Hat Design
I designed this hat in the Seersucker Stitch, a popular easy knit and purl stitch. It may look intricate, but it’s made with basic stitches, perfect for knitters who are just starting.
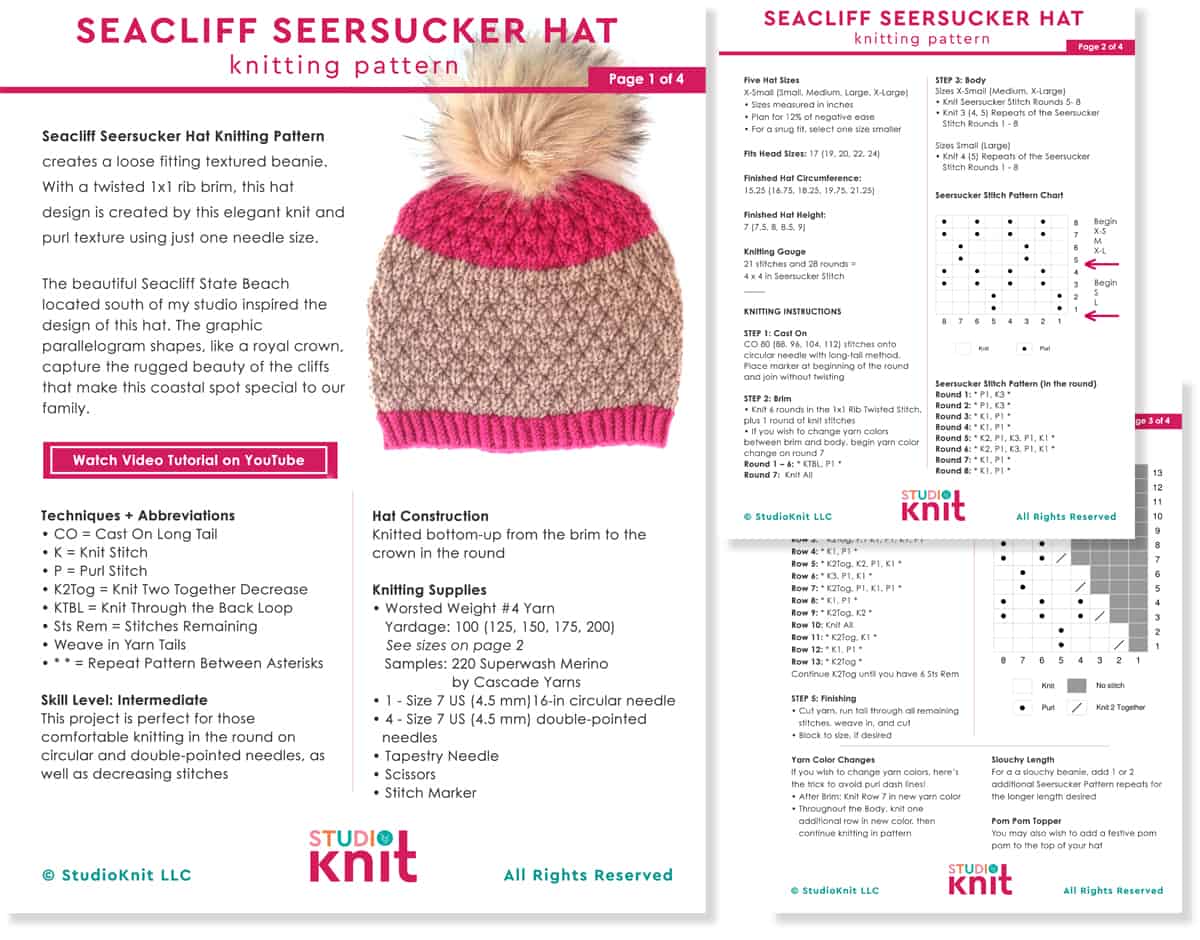
The beautiful Seacliff State Beach located south of my studio inspired the design of this hat. The graphic parallelogram shapes, like a royal crown, capture the rugged beauty of the cliffs that make this coastal spot special to our family.
Skill Level: Intermediate
This project is perfect for those comfortable knitting in the round on circular and double-pointed needles, as well as decreasing stitches.
Active Time to Complete
This hat can easily be finished in a couple of sittings, taking approximately 8 to 12 hours to complete, depending on hat size and knitting speed.
Knitted Bottom-Up
This hat pattern is knitted bottom-up from the brim to the crown.
Watch Video Tutorial
Printable Knitting Pattern (ad-free)
Want the free written pattern instructions? Keep reading this page!
SINGLE PATTERN DOWNLOAD: Purchase the ad-free printable pdf pattern in my Studio Knit Pattern Shop. A great way to support my knitting work!
DISCOUNTED BLANKET BUNDLE: Save when you buy 4 Easy Hat Patterns together… buy 3, get 1 free! These knit and purl textures are identical on both sides, adding depth and beauty to create a durable heirlooms.
Five Hat Sizes
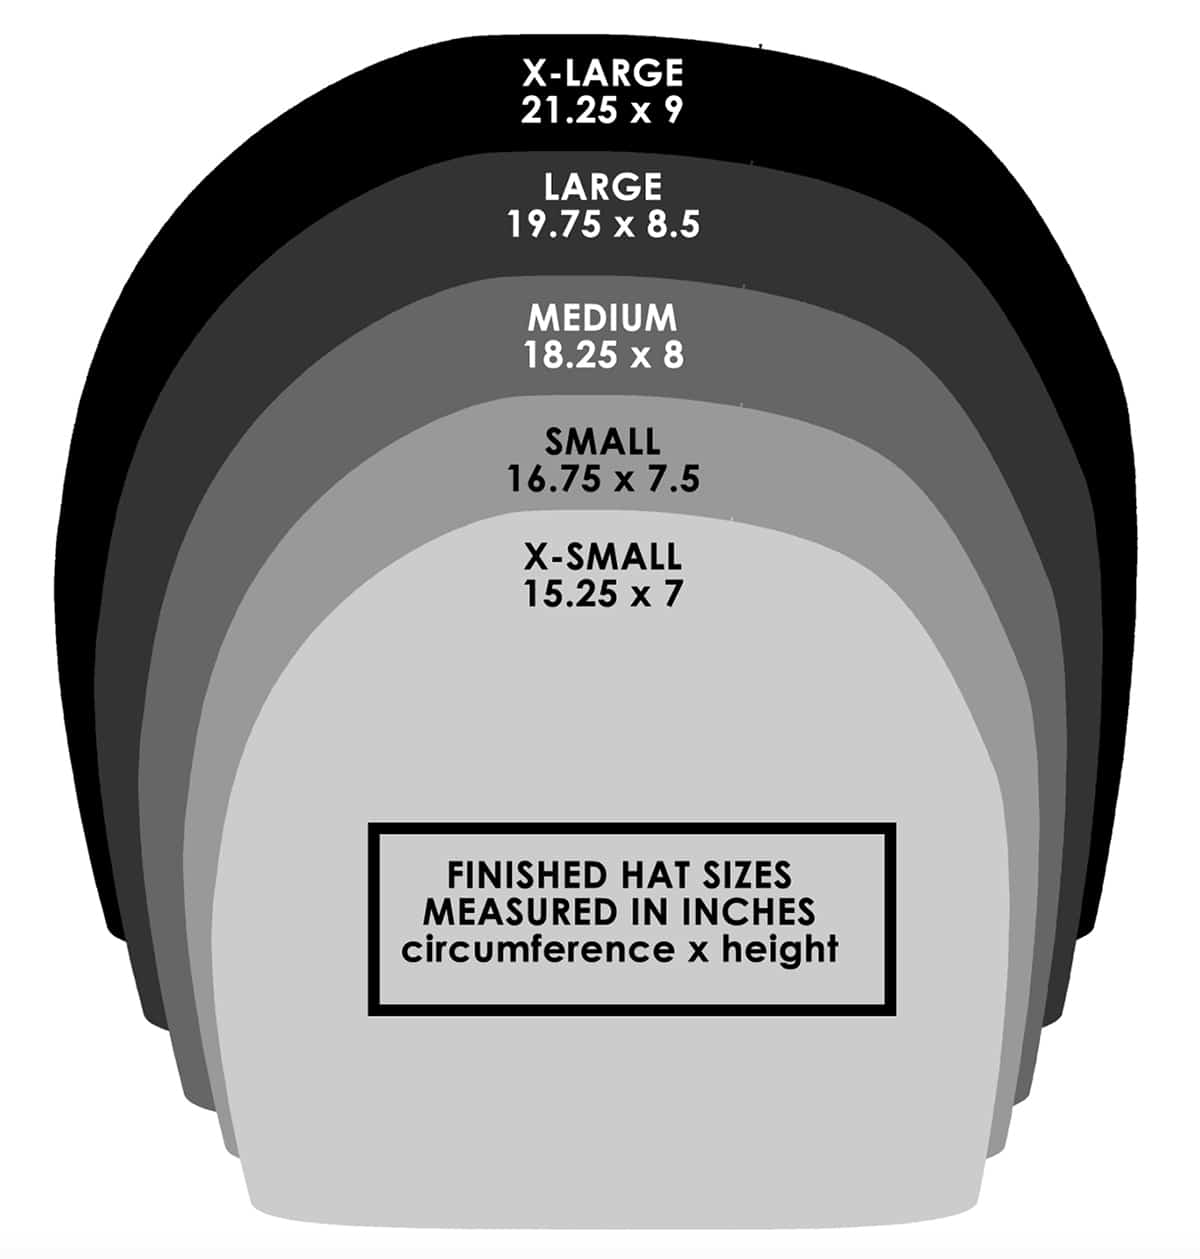
To assess your correct hat size, measure your head circumference just above the eyebrows.
Gauge Swatch
21 stitches and 28 rows = 4 x 4 in (10 x 10 cm) in the Seersucker Stitch
X-Small (Small, Medium, Large, X-Large)
• Sizes measured in inches
• Plan for 12% of negative ease
• For a snug fit, select one size smaller
Fits Head Sizes: 17″ (19″, 20″, 22″, 24″)
Finished Hat Circumference:
15.25″ (16.75″, 18.25″, 19.25″, 21.75″)
Finished Hat Height: 7″ (7.5″, 8″, 8.5″, 9″)
Knitting Supplies
As an Amazon Associate, I earn from qualifying purchases.
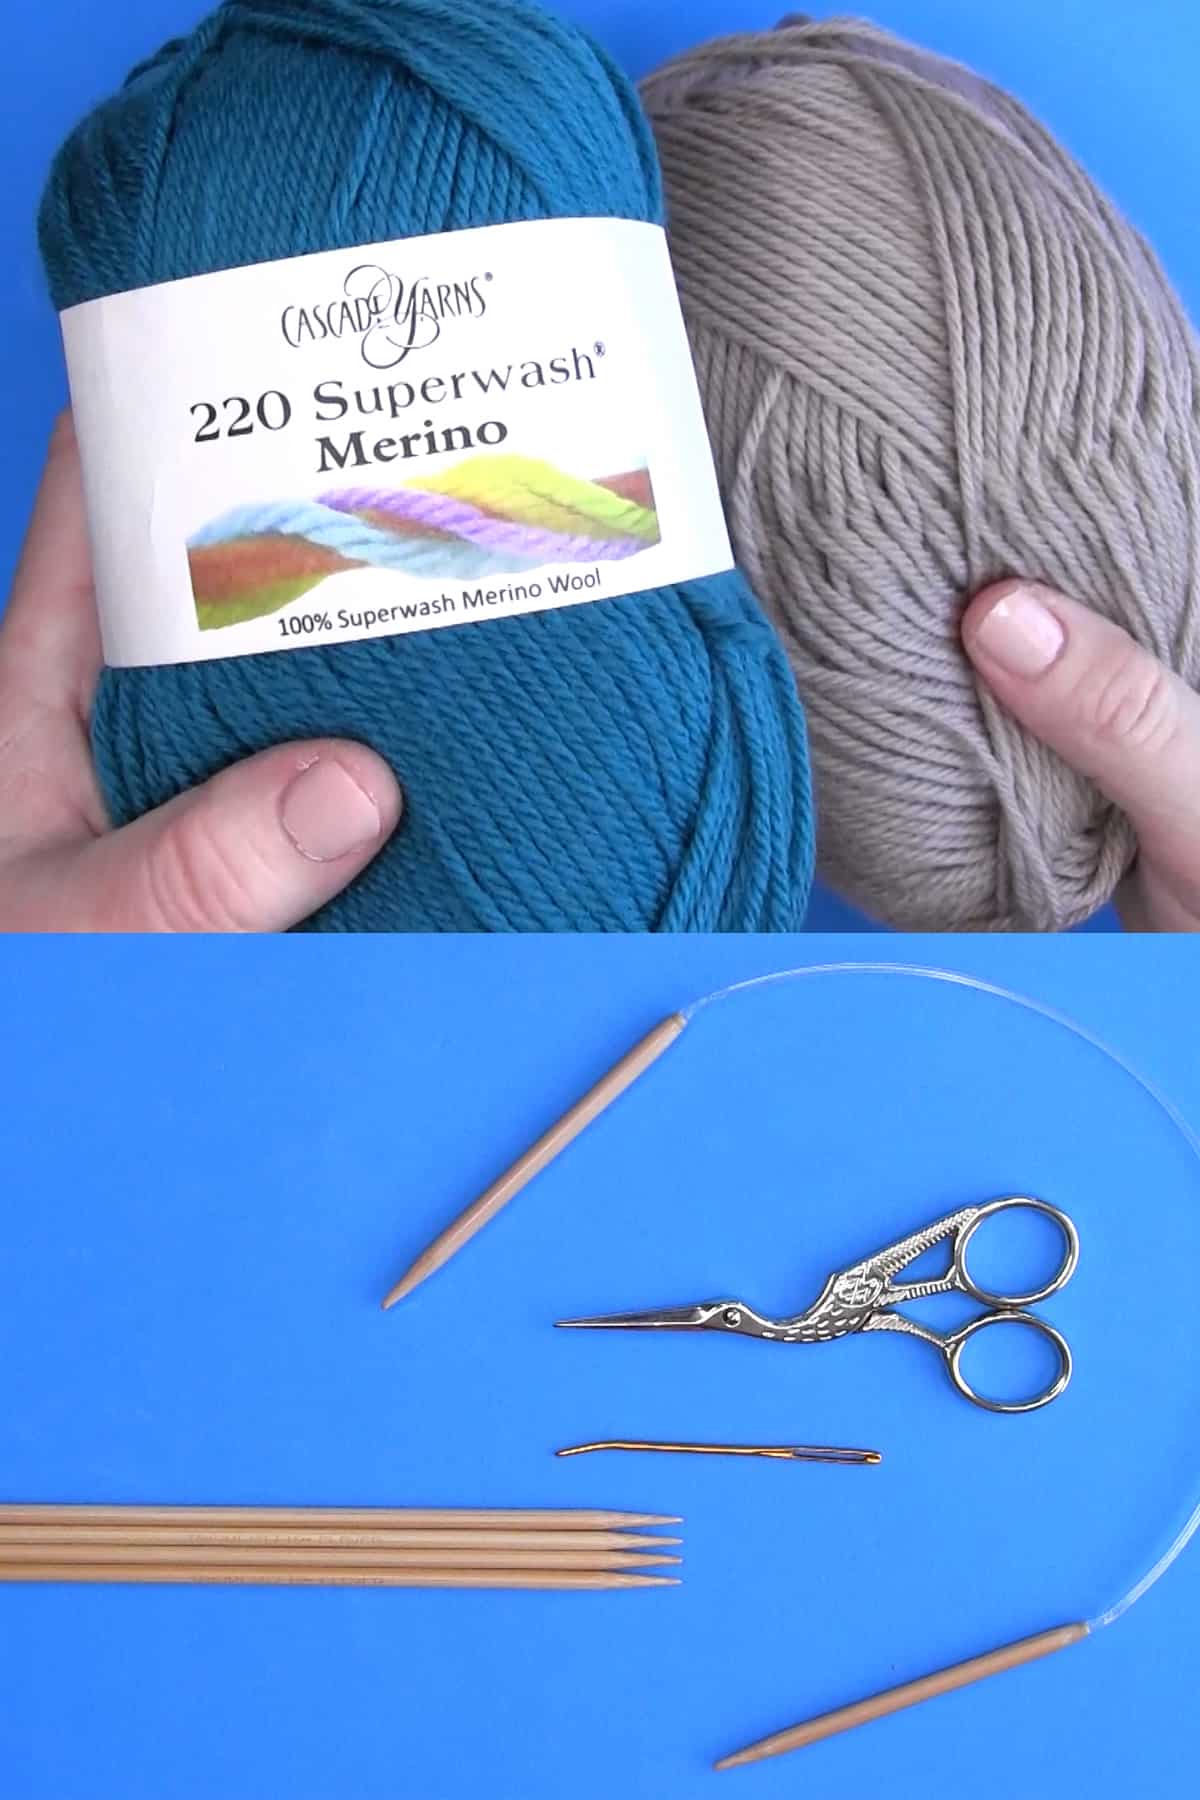
Yarn: Worsted Weight #4 Yarn
Samples: 220 Superwash Merino by Cascade Yarns
Yardage: 100 (125, 150, 175, 200)
Feel free to select any fiber and colors of your choice
Knitting Needles: Size 7 US (4.5 mm) 16-inch circular needle and set of 4 double-pointed needles or size needed to obtain gauge
Stitch Marker – I just use a scrap of yarn with a slip knot
Pom Pom (optional): Faux Fur or Use a Pom Pom Maker
Knitting Techniques
- CO = Cast On Long Tail
- K = Knit Stitch
- P = Purl Stitch
- K2Tog = Knit Two Together Decrease
- KTBL = Knit Through the Back Loop
- Sts Rem = Stitches Remaining
- Weave in Yarn Tails
- * * = Repeat Pattern Between Asterisks
Knitting Instructions
Step 1: Cast On
Cast on 80 (88, 96, 104, 112) stitches onto a circular needle with the long-tail method. Place the marker at the beginning of the round and join without twisting.
See hat sizing >
Step 2: Brim
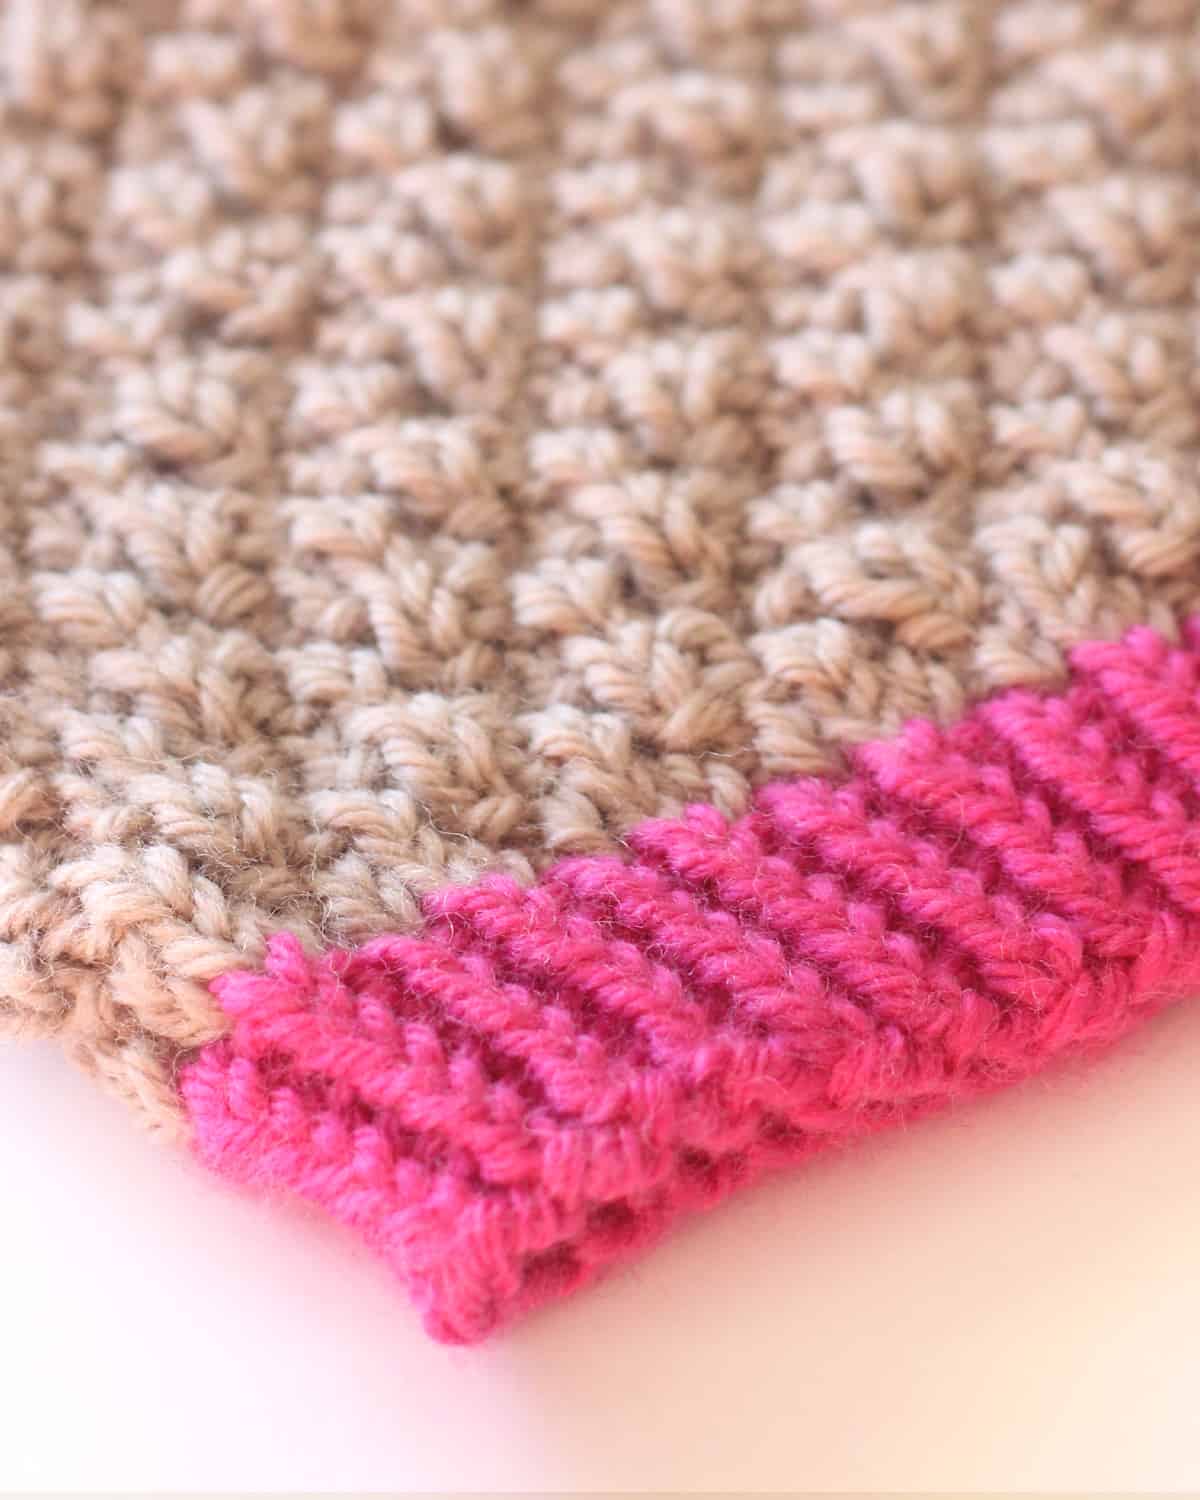
- Knit 6 rounds in the 1×1 Rib Twisted Stitch, plus 1 round of knit stitches. This creates a tighter brim.
- If you wish to change yarn colors between brim and body, begin yarn color change on round 7
Round 1 – 6: * KTBL, P *
Round 7: Knit All
Step 3: Body
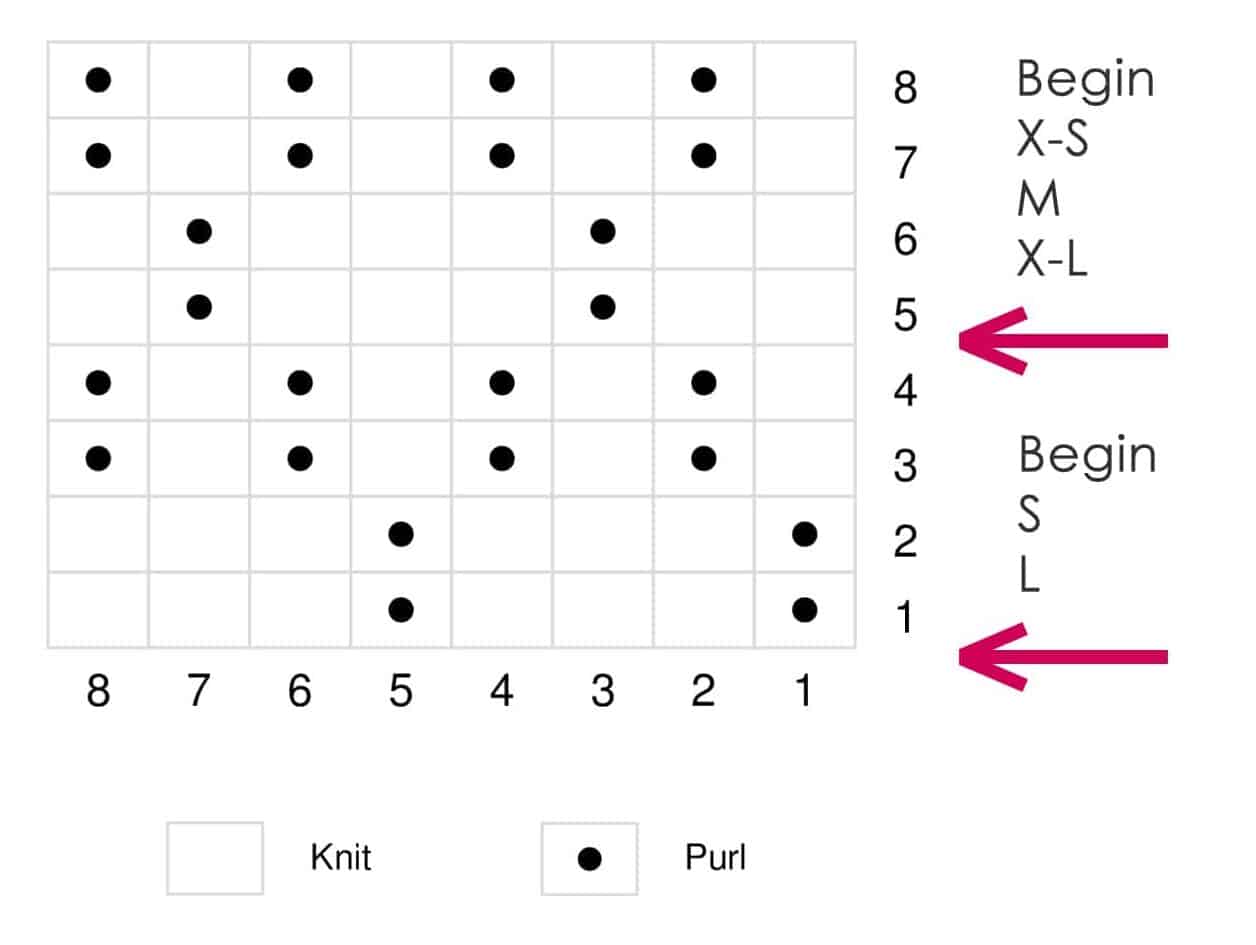
Sizes X-Small (Medium, X-Large)
- Knit Seersucker Stitch Rows 5 – 8
- Knit 3 (4, 5) Repeats of the Seersucker Stitch Rows 1 – 8
Sizes Small (Large)
- Knit 4 (5) Repeats of the Seersucker Stitch Rows 1 – 8
Seersucker Stitch Pattern Chart
Seersucker Stitch Pattern (in the round)
- Row 1: * P1, K3 *
- Row 2: * P1, K3 *
- Row 3: * K1, P1 *
- Row 4: * K1, P1 *
- Row 5: * K2, P1, K3, P1, K1 *
- Row 6: * K2, P1, K3, P1, K1 *
- Row 7: * K1, P1 *
- Row 8: * K1, P1 *
Step 4: Crown
Change to double-pointed needles when necessary.
This hat’s crown is designed to carry the entire texture throughout the entire piece.
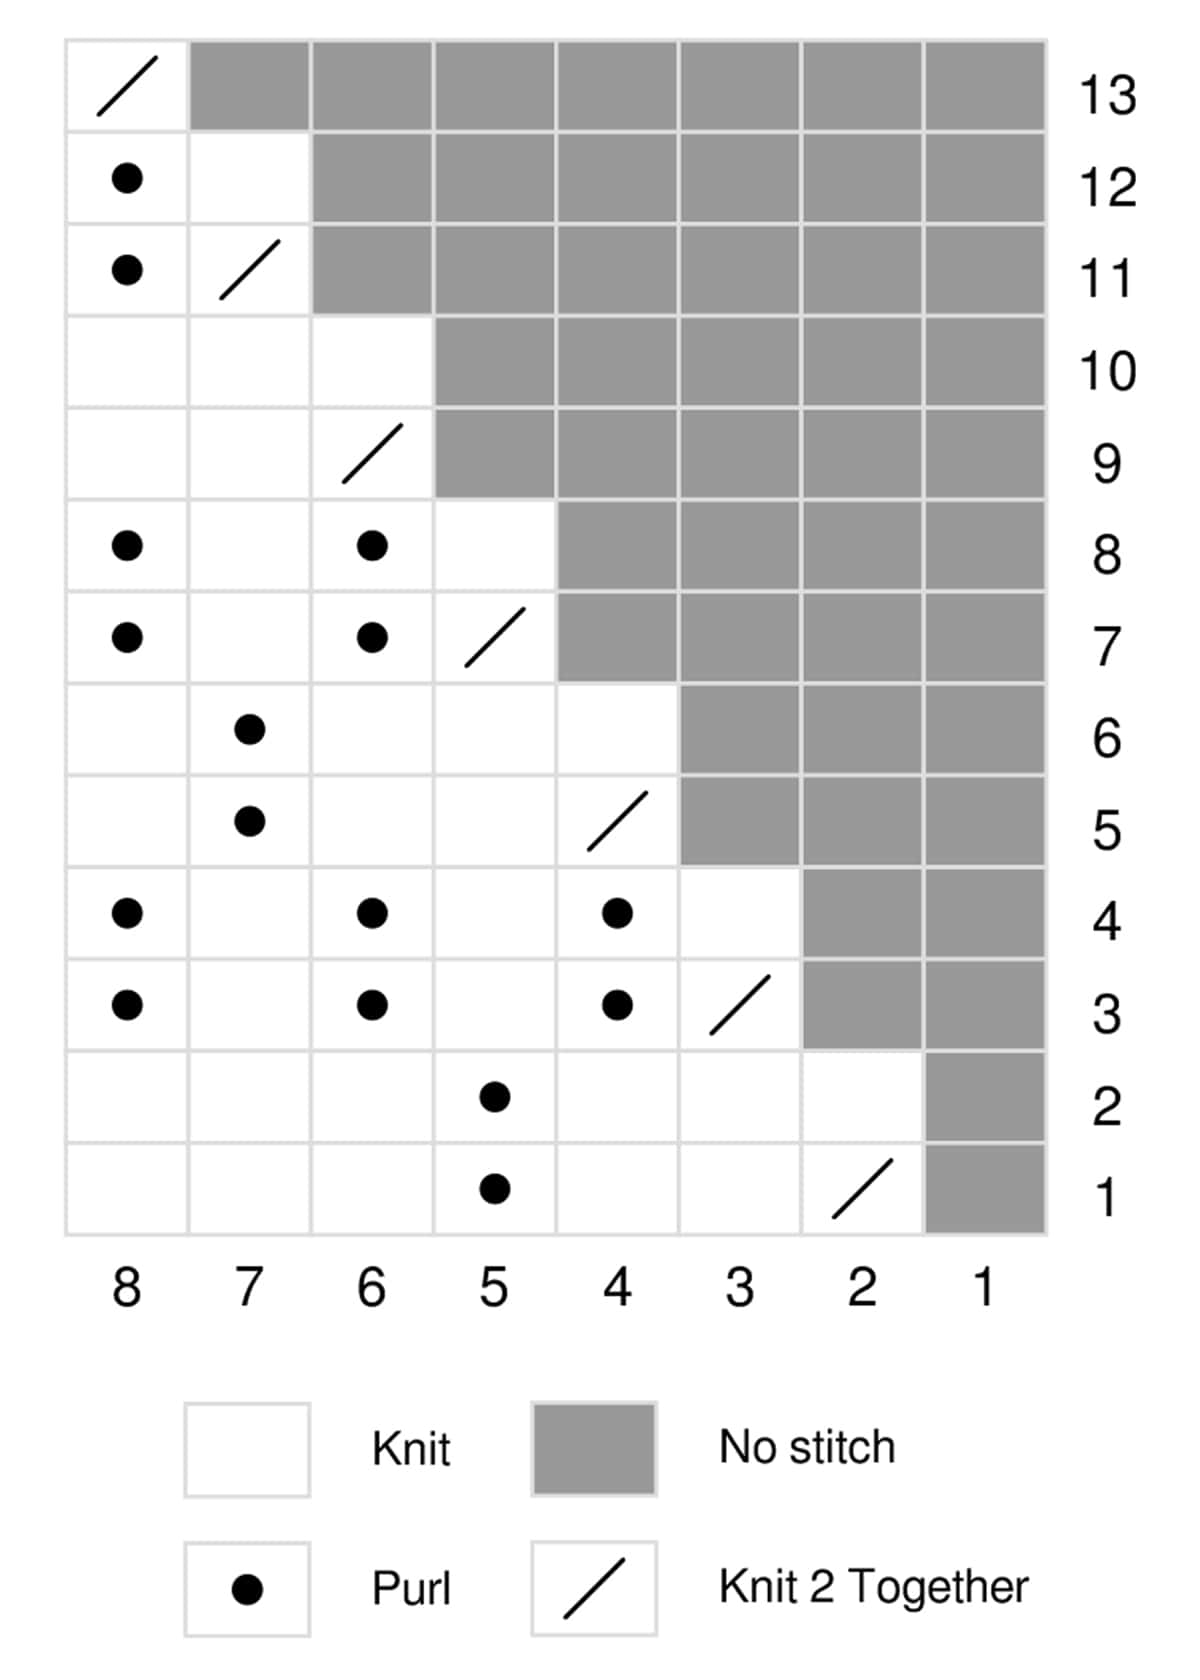
Crown Decrease Rows
- Row 1: * K2Tog, K2, P1, K3 *
- Row 2: * K3, P1, K3 *
- Row 3: * K2Tog, P,1 K1, P1, K1, P1 *
- Row 4: * K1, P1 *
- Row 5: * K2Tog, K2, P1, K1 *
- Row 6: * K3, P1, K1 *
- Row 7: * K2Tog, P1, K1, P1 *
- Row 8: * K1, P1 *
- Row 9: * K2Tog, K2 *
- Row 10: Knit All
- Row 11: * K2Tog, P1 *
- Row 12: * K1, P1 *
- Row 13: * K2Tog *
- Continue K2Tog until you have 6 Sts Rem
Crown Decrease Chart
Step 5: Finishing
- Cut yarn, run tail through all remaining stitches, weave in, and cut
- Block to size, if desired
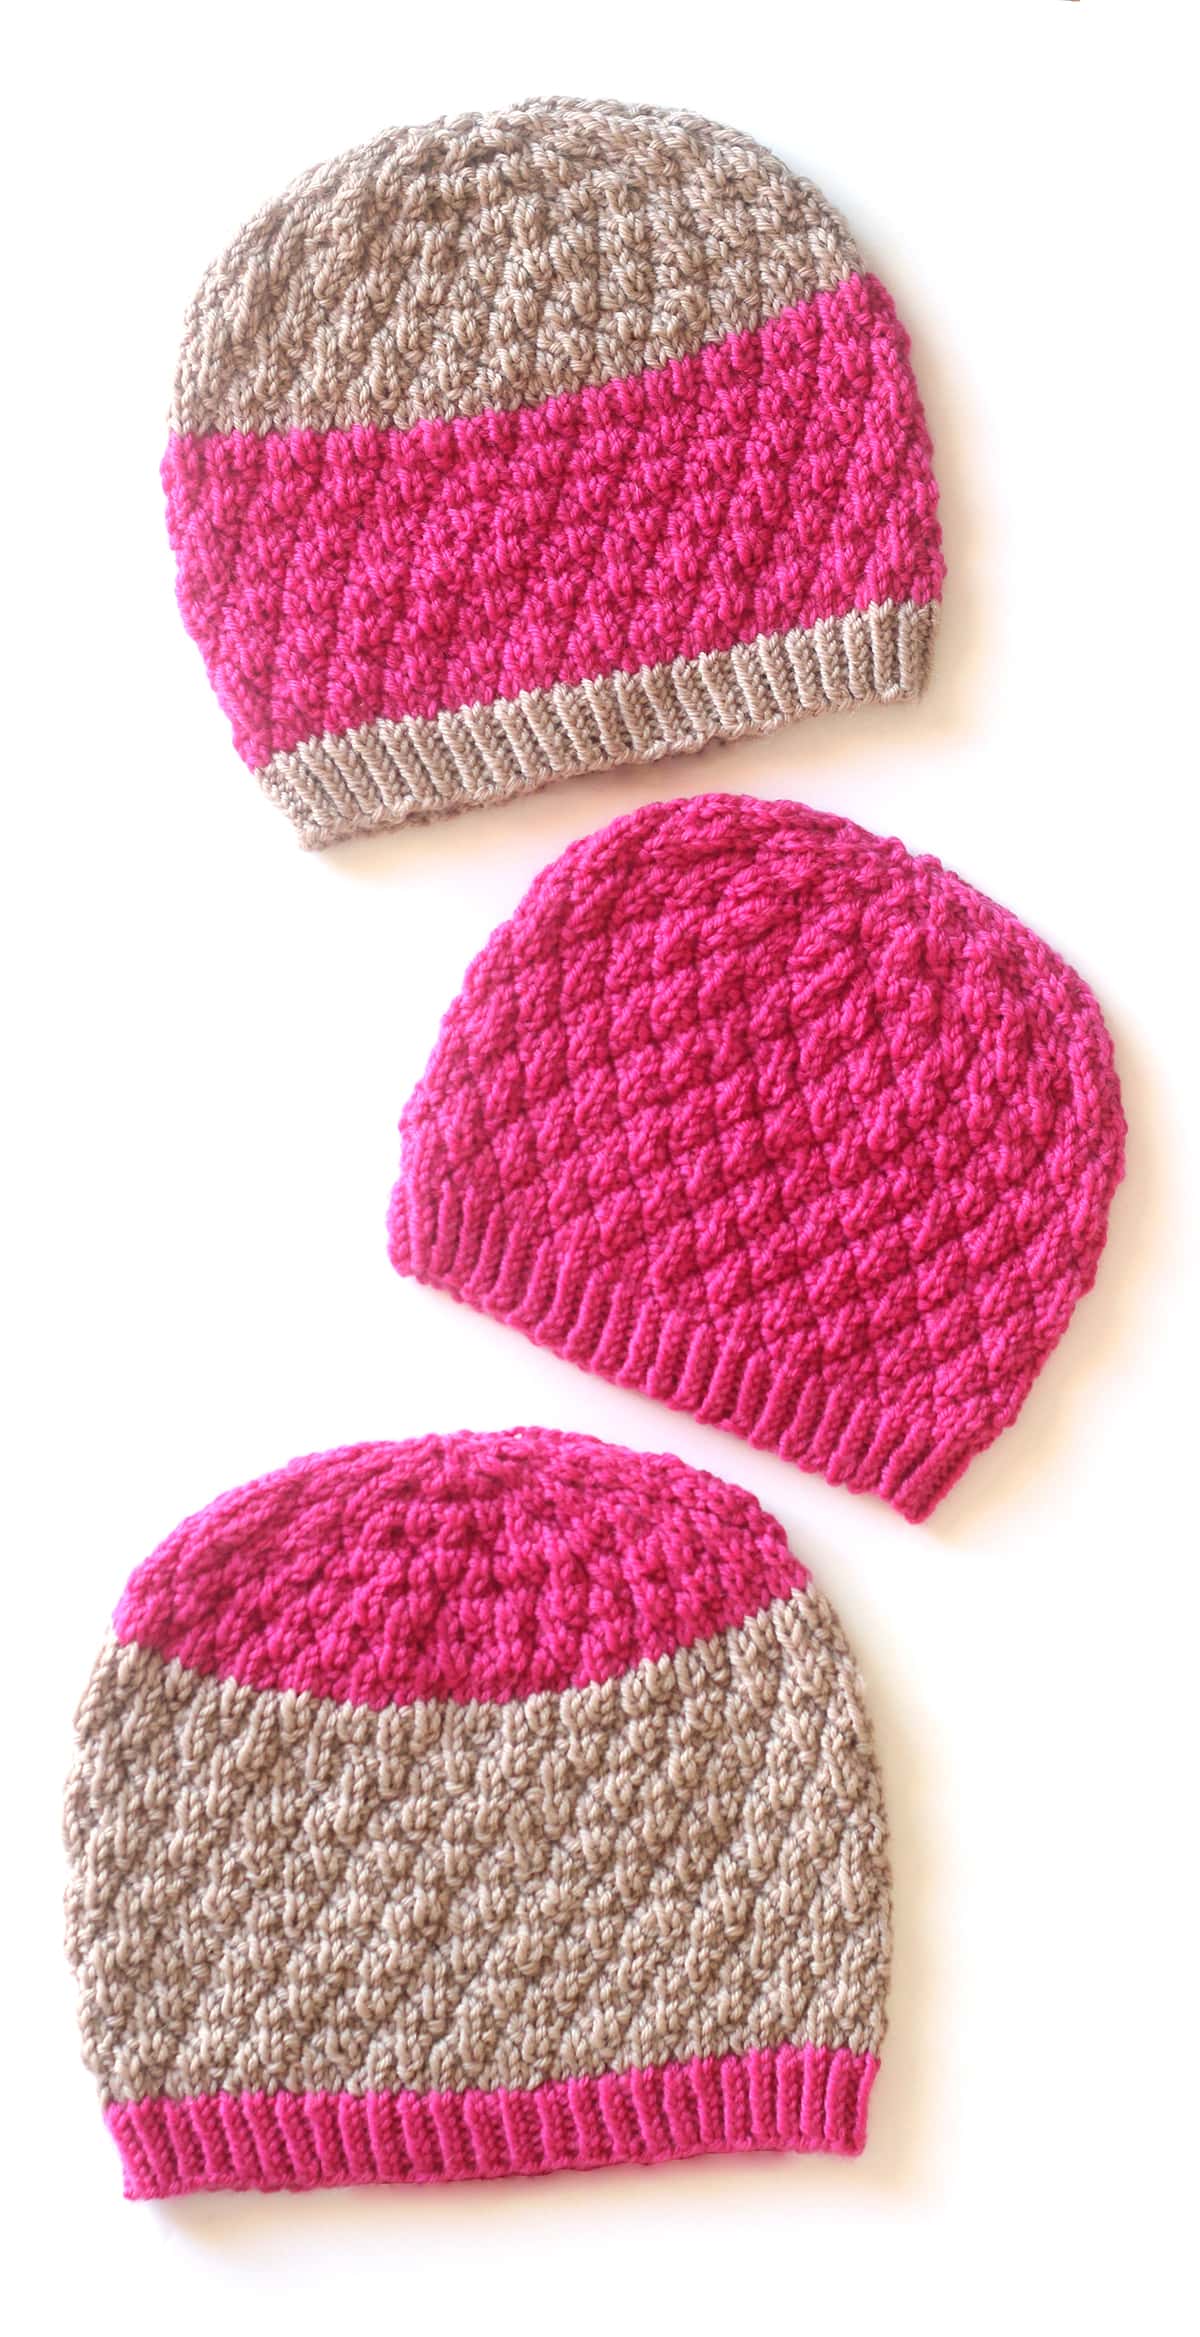
Hat Style Customizations
Yarn Color Changes
If you wish to change yarn colors, here’s the trick to avoid purl dash lines!
- After Brim: Knit Row 7 in new yarn color
- Throughout the Body, knit one additional row in a new color, then continue knitting in-pattern
Slouchy Length
If you wish to create a longer hat length to create a slouchy beanie, add 1 or 2 additional Seersucker Pattern repeats for the length desired
Pom Pom Topper
You may also wish to add a festive pom pom to the top of your hat. I have a great tutorial on how to make your own Faux Fur Pom Poms. For the yarn craft project, I highly recommend watching my friend Robert Mahar’s video “How to Make Yarn Pom Poms” on YouTube.
Pattern Credits
Knitting Technical Editor: A huge thank you to Kim Wilkerson of Knit Julep for her expert technical editing on this knitting pattern! I strive to create patterns that make sense. Working together ensures my patterns are error-free, complete, accurate, consistent, and clear.
Knitting Testers: A huge thank you to all of the talented testers who knitted up various hat sizes. See their beautiful finished work on its Ravelry pattern page here >

Kristen McDonnell
Author • Designer • Teacher
Kristen from StudioKnit LLC produces knitting video lessons and pattern designs from her vibrant production studio on Half Moon Bay’s California coast.
Kristen McDonnell is the author of the highly acclaimed book Knit Stitch: 50 Knit + Purl Patterns featuring vintage and unique designs.

