Boho Rainbow Knitting Pattern
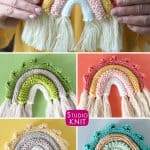
This colorful Boho Rainbow Knitting Pattern is inspired by nature and favorite design trends. This whimsical fiber art decor brightens any room with a relaxed, joyful, natural touch! These Rainbow Window decorations are giving hope to everyone around the world.
Get your free written pattern instructions with video tutorials below. You may also purchase my ad-free printable pdf pattern in my Studio Knit Pattern Shop.
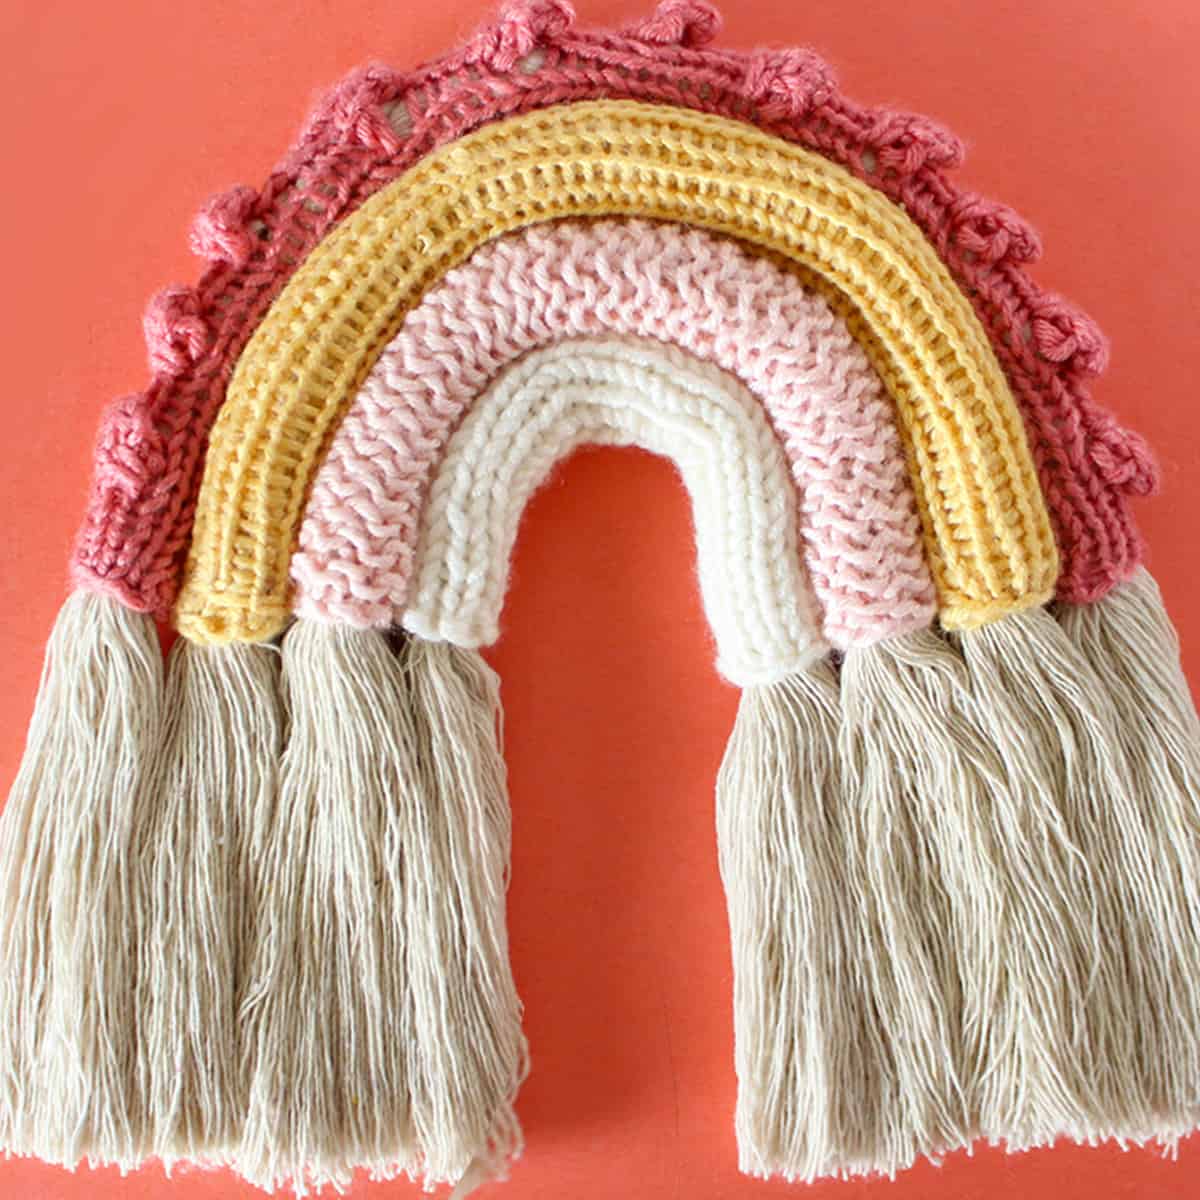
Table of Contents
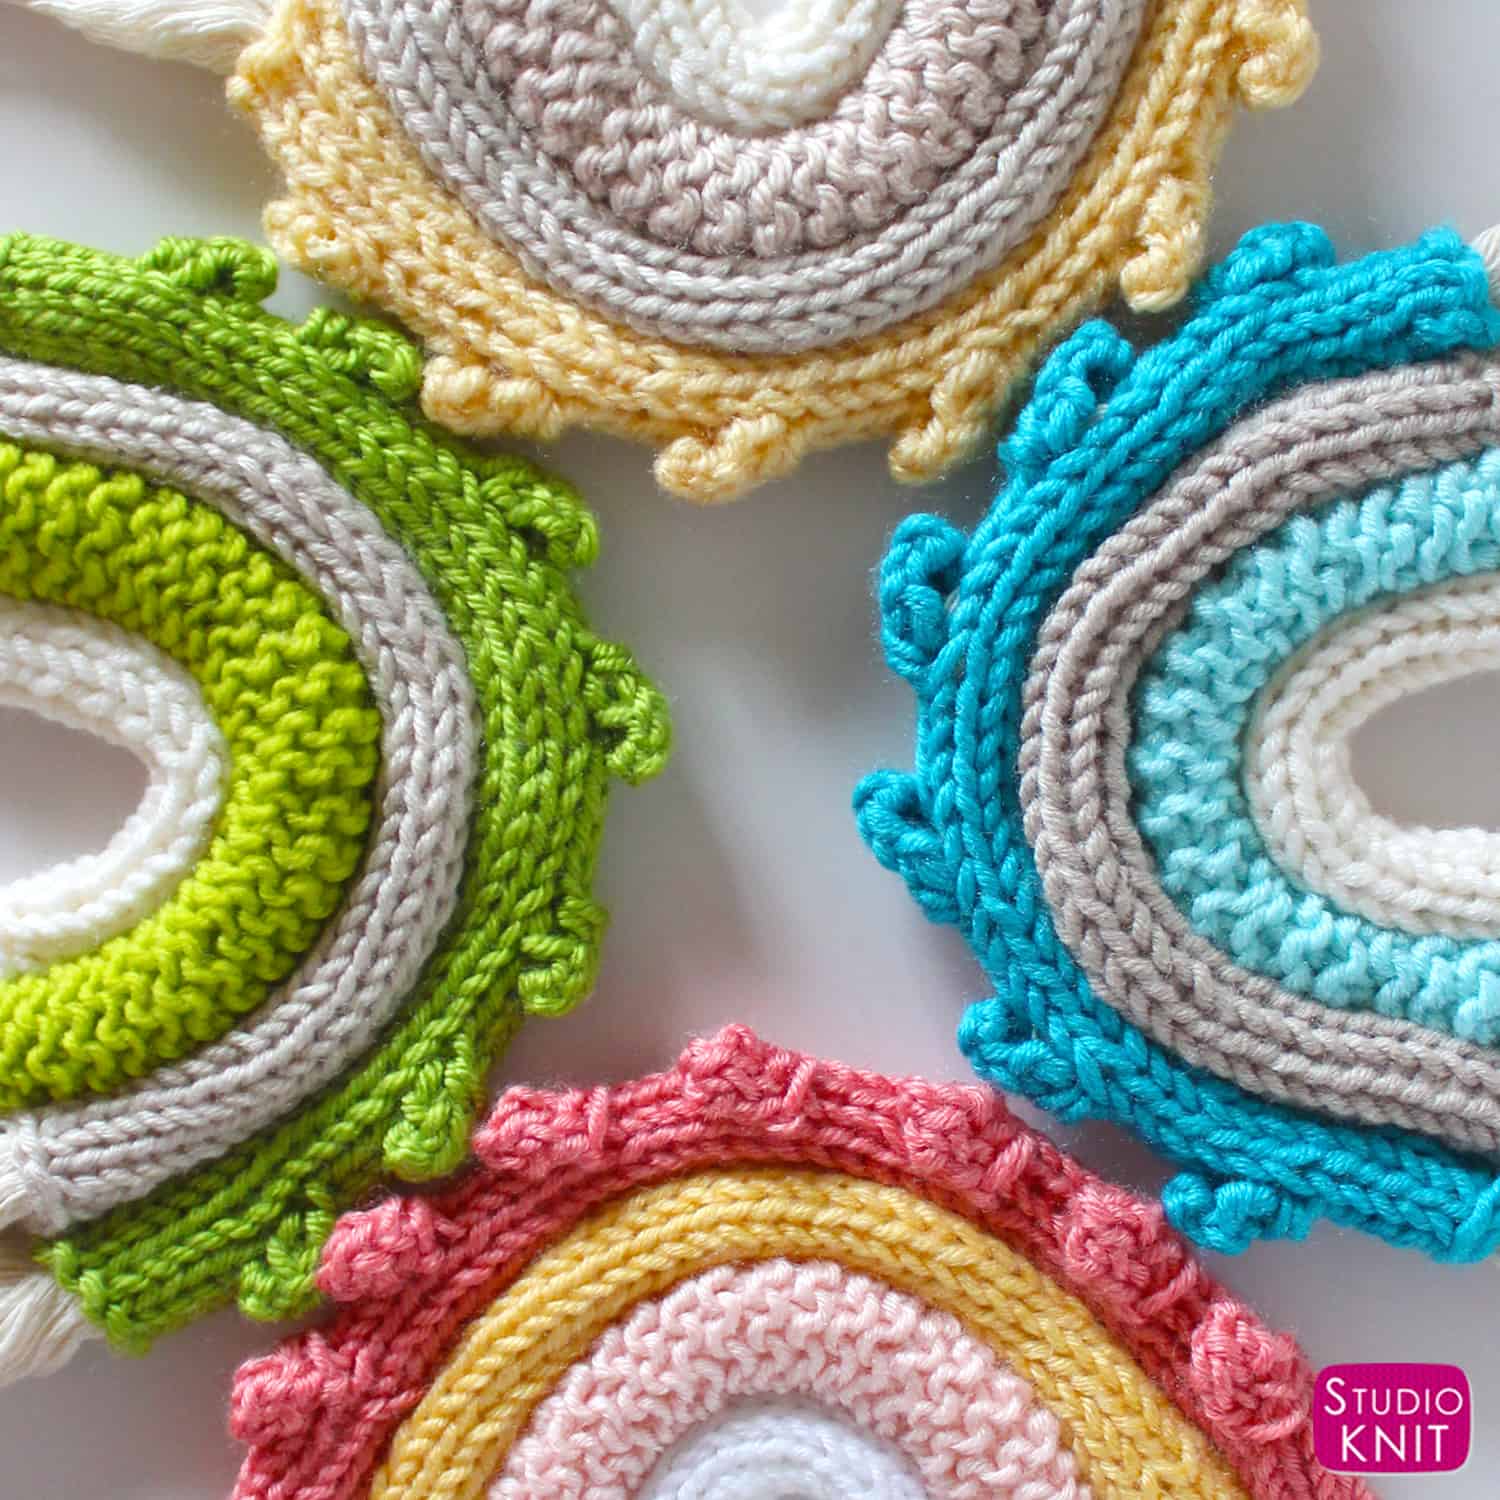
Enjoy knitting a variety of color combinations, textures, and mixing them up to create your own designs. It’s a fun quick knit project for experienced beginners who enjoy knitting flat on straight needles.
I love changing textures and colors, which this pattern allows us to do frequently. These boho rainbows look sweet in baby nurseries and kid’s bedrooms. Great gift idea for Birthdays and Baby Showers!
Rainbows of Hope Trend
The rainbow trend has gone viral with children and families hanging cheerful homemade creations in their windows. Decorating outside the home expresses your positivity to your neighbors while lifting your mood, too.
These Rainbows of Hope are believed to have originated in Italy to spread optimism for a better tomorrow during the time of social distancing in 2020. In Montreal, the French phrase “Ca va bien aller” (translation: “It’s going to be okay”) is often accompanied with these colorful creations.
Finished Sizes
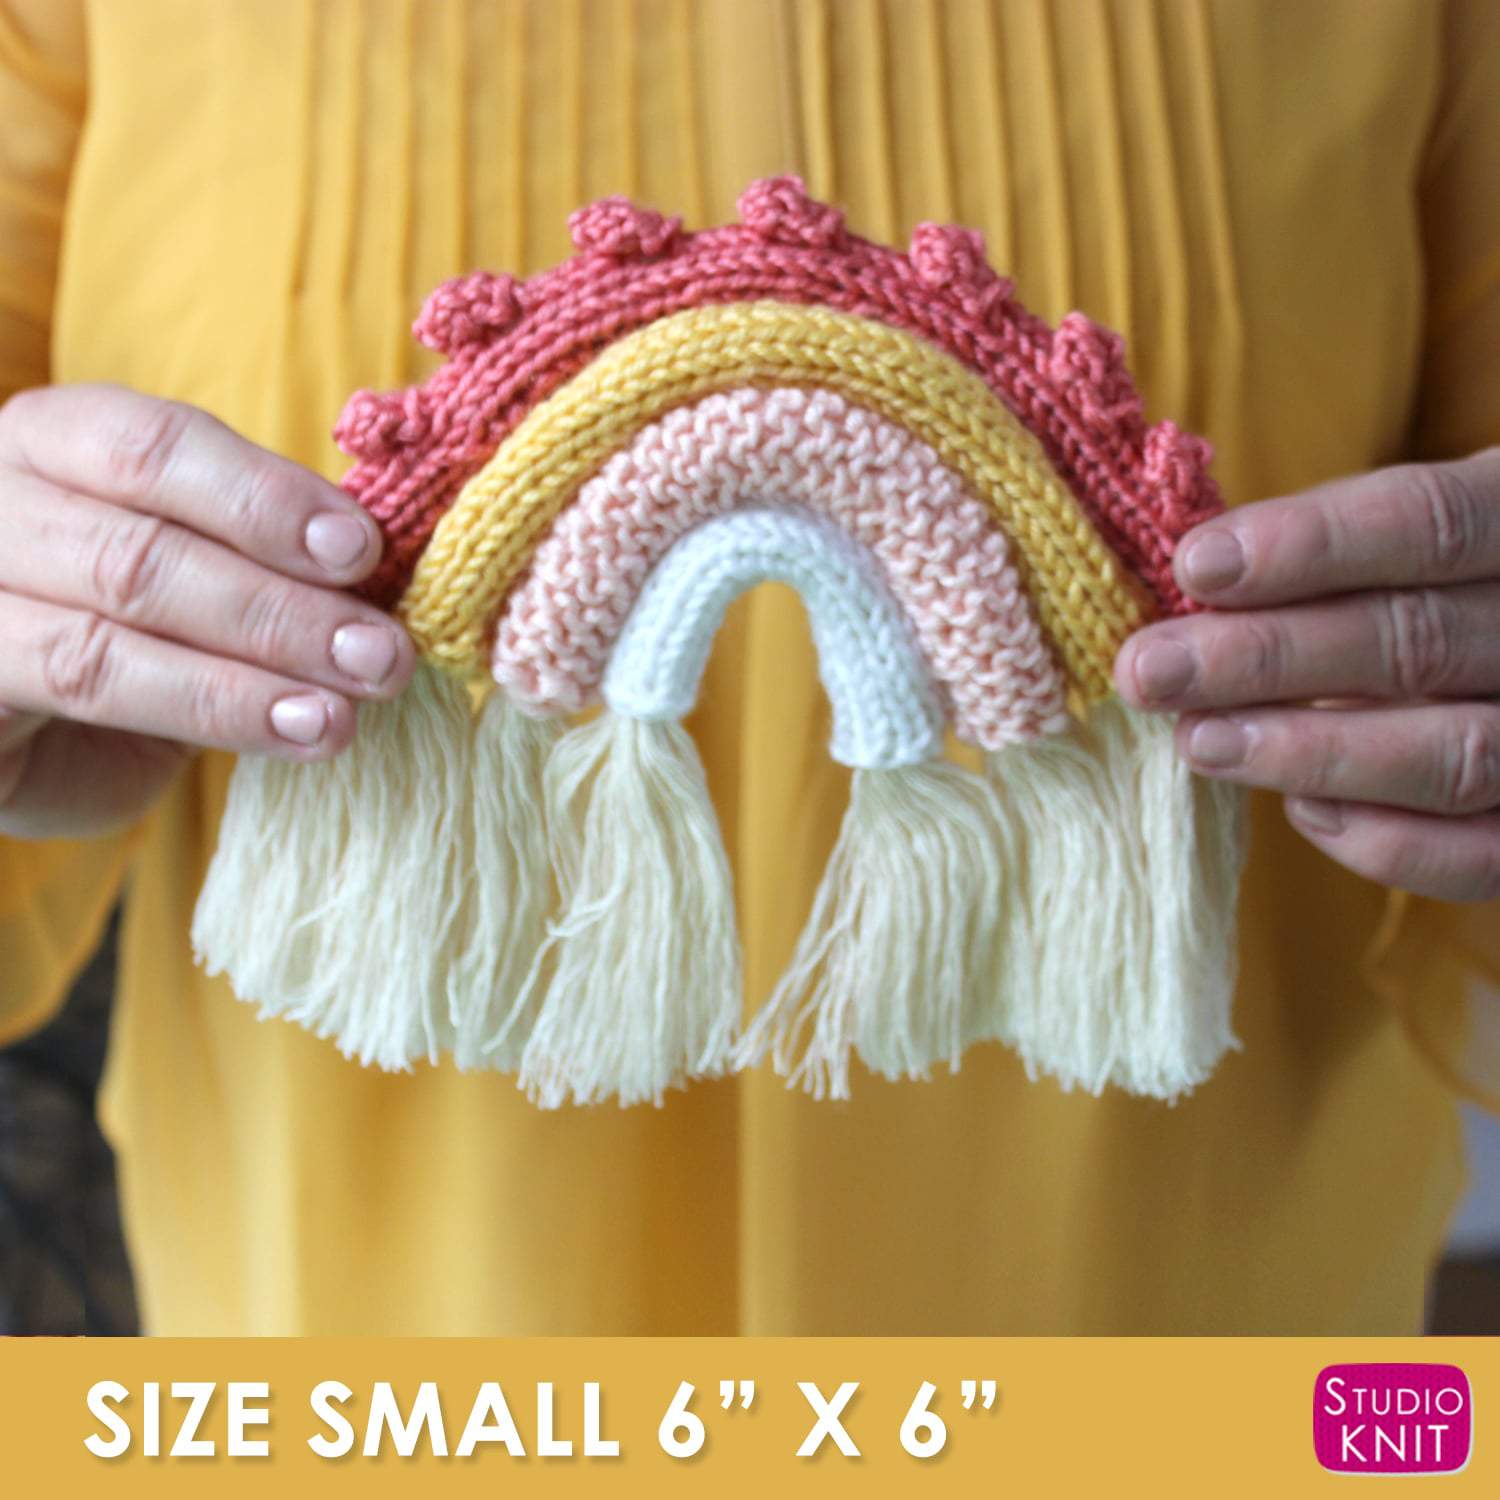
Finished Rainbow Size: 6″ x 6″
This cute, small-sized decoration’s finished size is 6 inches by 6 inches when knitting with 4 layers. Want to make a bigger rainbow? You can continue to add longer rows to make this as large as you’d like. As you can see, I really had fun with this project and made one for our home that’s 3 feet wide!

Knitting Supplies
As an Amazon Associate I earn from qualifying purchases.
RAINBOW MATERIALS
Yarn – Bulky Weight #5
My Rainbow Sample was knit in Pantone X Caron Yarn
Total Yarn: 40g/1.40 oz, 48 meters/52 yards
4 Colors: 10g/0.35 oz, 12 meters/13 yards per color
This is a great yarn buster! Feel free to use any fiber and colors of your choice.
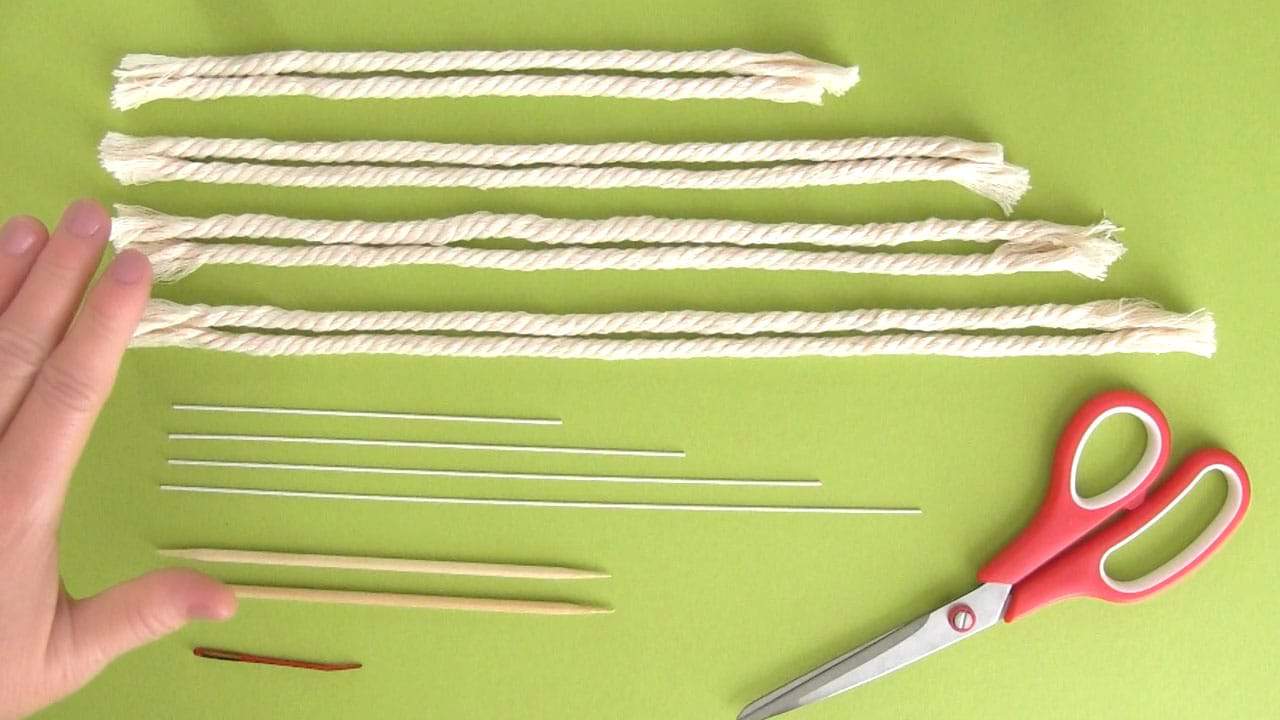
100% Natural Cotton Rope
My Rainbow was made with rope from PYJTRL
5mm (⅕ inch)
Total Rope Length: 80 inches
Craft Wire – 18 gauge wire
My Rainbow was created using wire from Mandala Crafts
KNITTING TOOLS
Straight Knitting Needles – Size 7 US (4.5 mm)
Watch Video Tutorial
Knitting Techniques
Need to brush up or learn a new technique? Check out my entire library of Knitting Techniques.
- How to Cast On Without a Slip Knot
- Cast On
- K = Knit Stitch
- P = Purl Stitch
- KFBF = Knit Front, Back, Front (optional for bobbles)
- K3Tog = Knit 3 Stitches Together (optional for bobbles)
- Cast Off
- Weave-in Yarn Ends
Purchase Printable Pattern
WANT THE FREE PATTERN? Keep scrolling, it’s up next!
PRINTABLE DOWNLOAD: Purchase the ad-free printable pdf pattern in my Studio Knit Pattern Shop.
How to Knit in 5 Steps
Getting Started: To begin, gather all of your knitting tools and materials. Have fun designing with different yarn color combinations. When knitting with more than one yarn color, it’s advisable to write down your design plans for Colors A, B, C, and D in your notes or the printed knitting pattern.
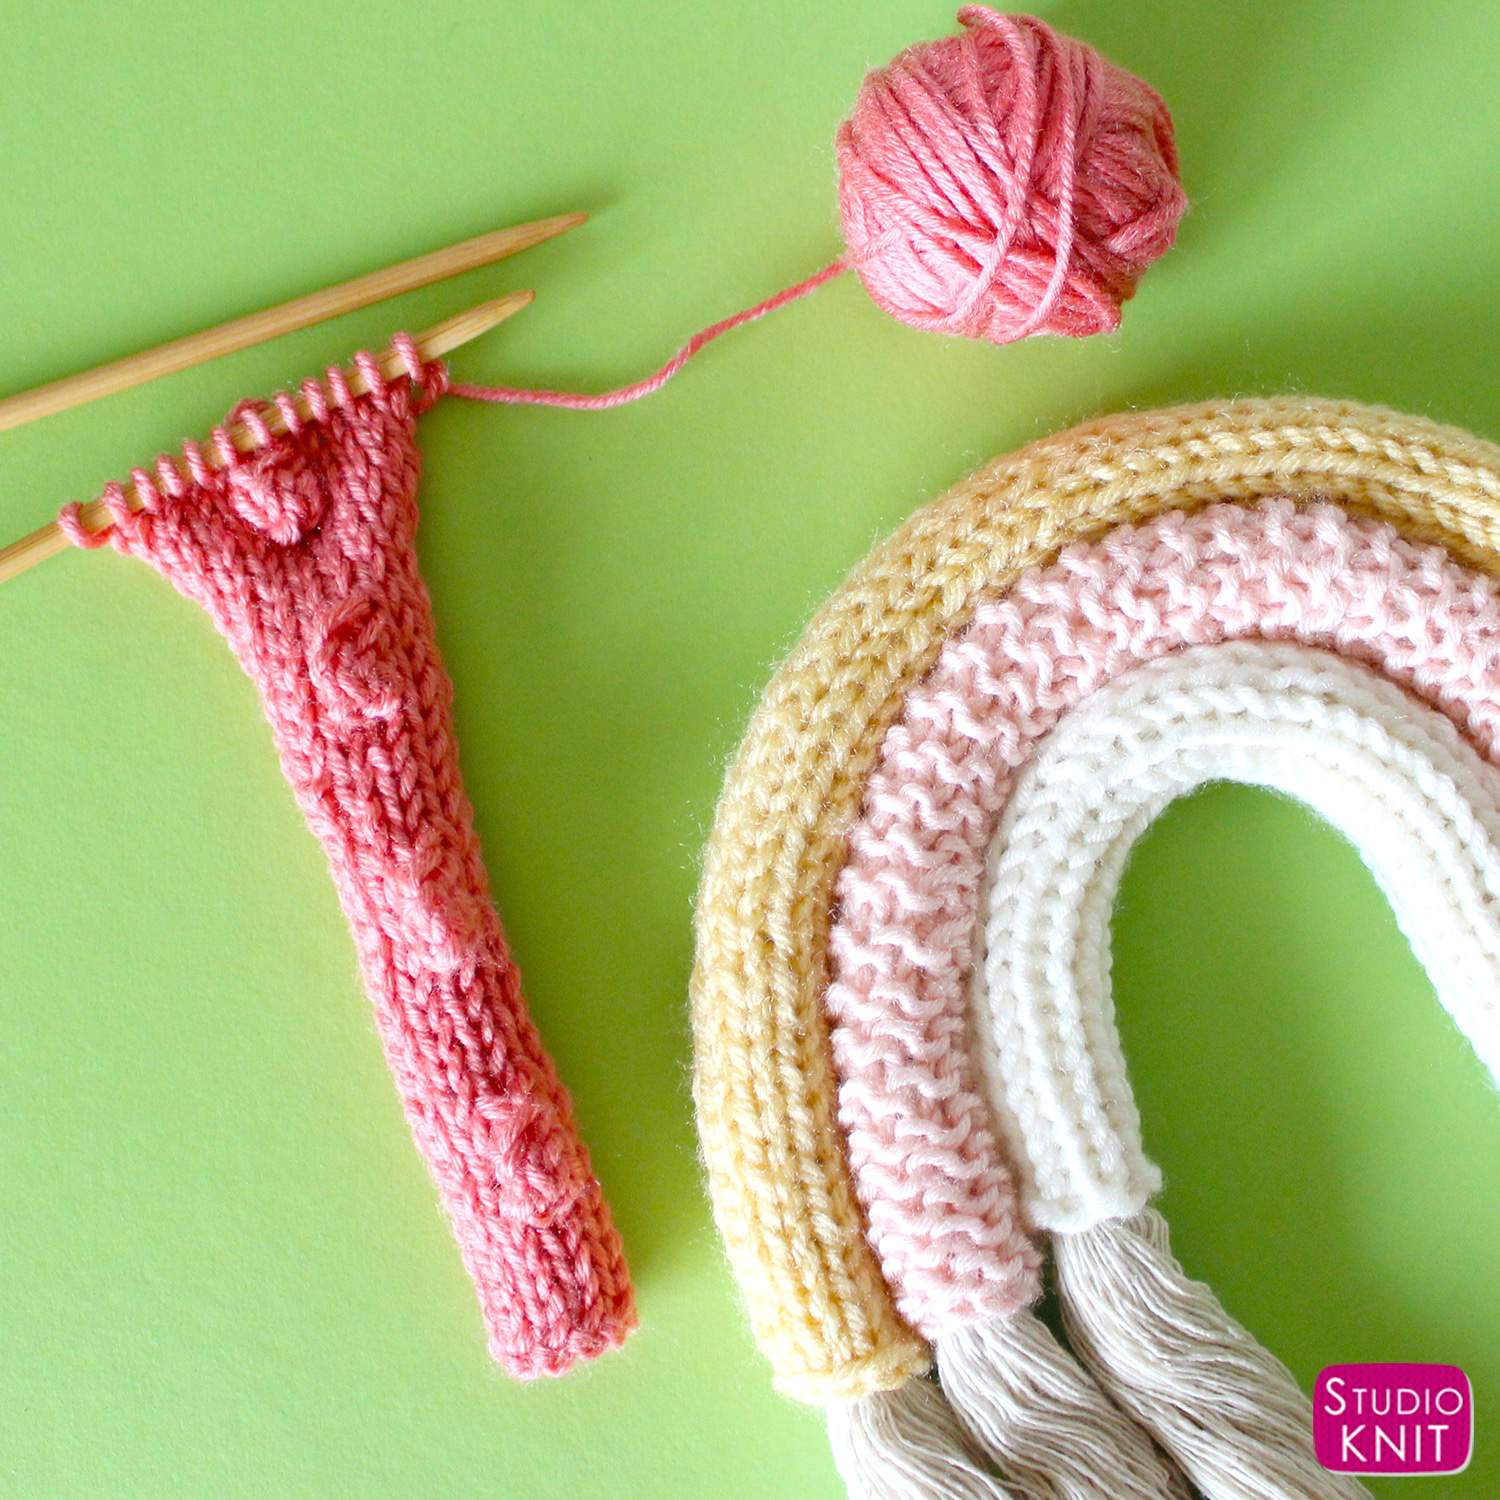
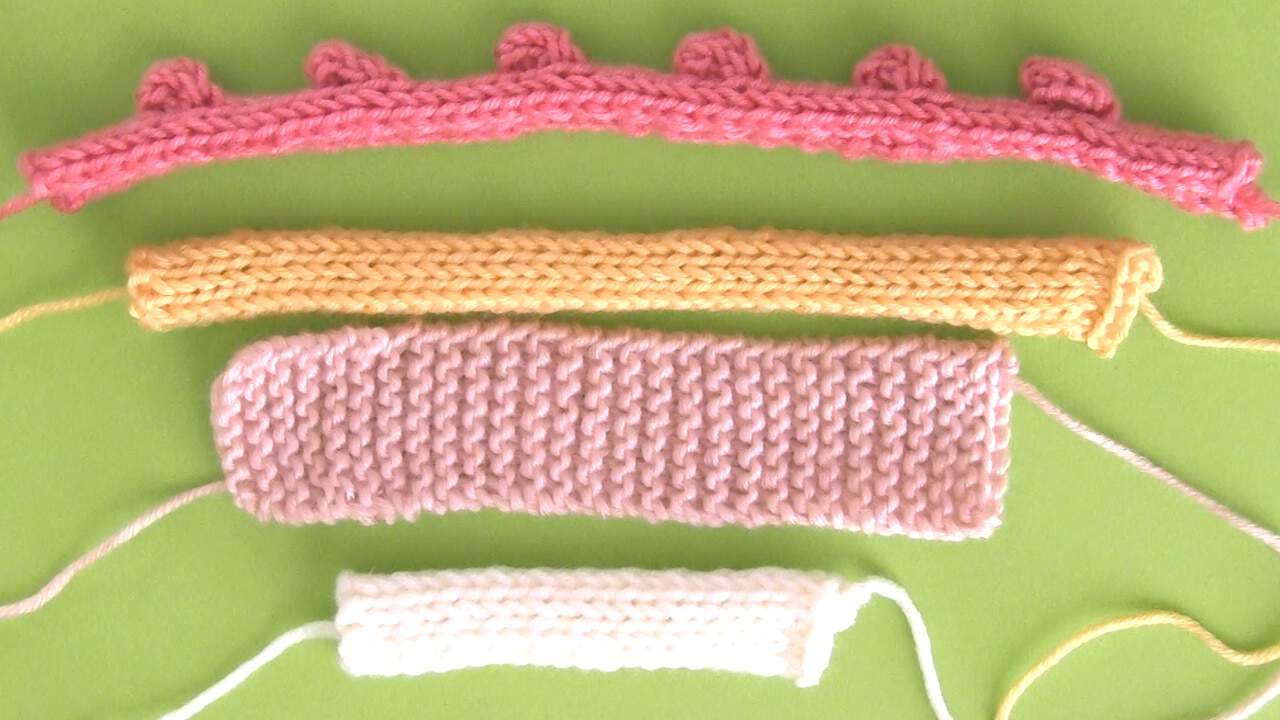
STEP 1: KNIT 4 SWATCHES
Feel free to make each layer in any of the Knit Stitch Patterns of your choice. In this example, I knitted each of my layers in the following lengths, starting with the smallest:
Layer A: 4 inches in length (Stockinette Stitch)
Layer B: 6 inches in length (Garter Stitch)
Layer C: 8 inches in length (Stockinette Stitch)
Layer 5: 9 inches in length (Bobble Stitch)
_____
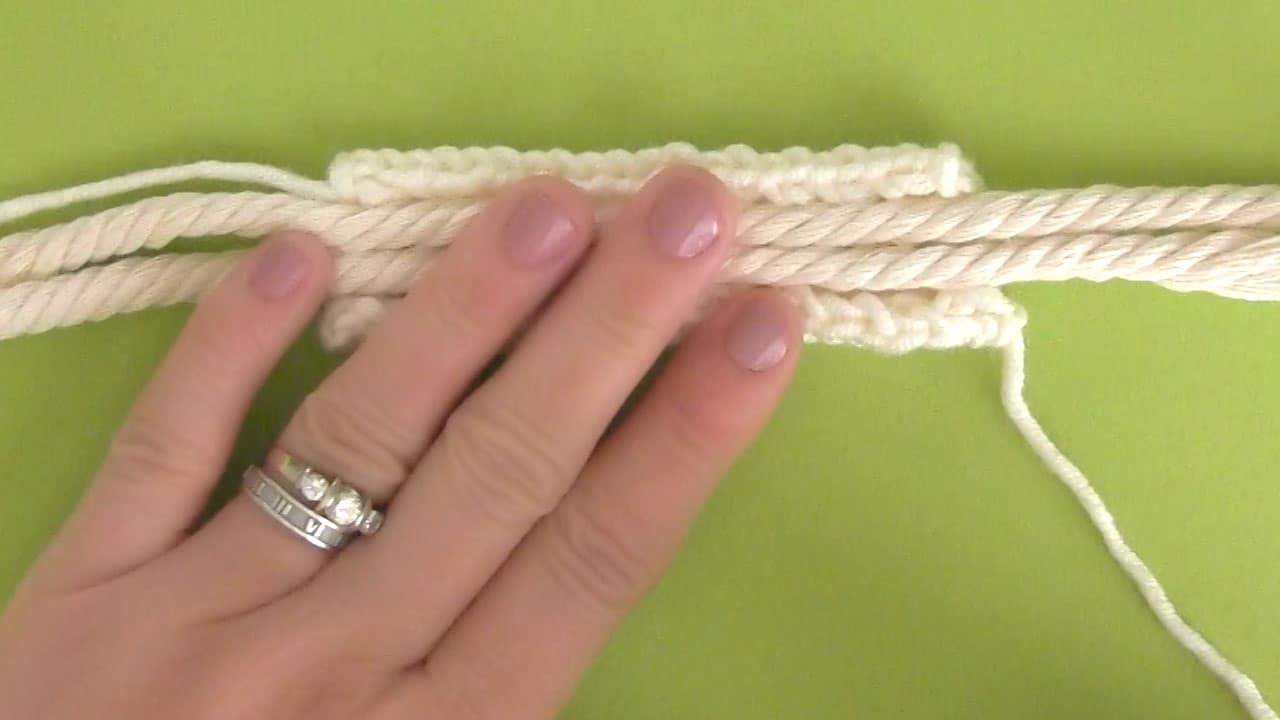
STEP 2: INSERT ROPES
- Place 2 rope strands within swatch.
- Use a tapestry needle to sew seams together.
- Weave in ends and cut yarn.
_____
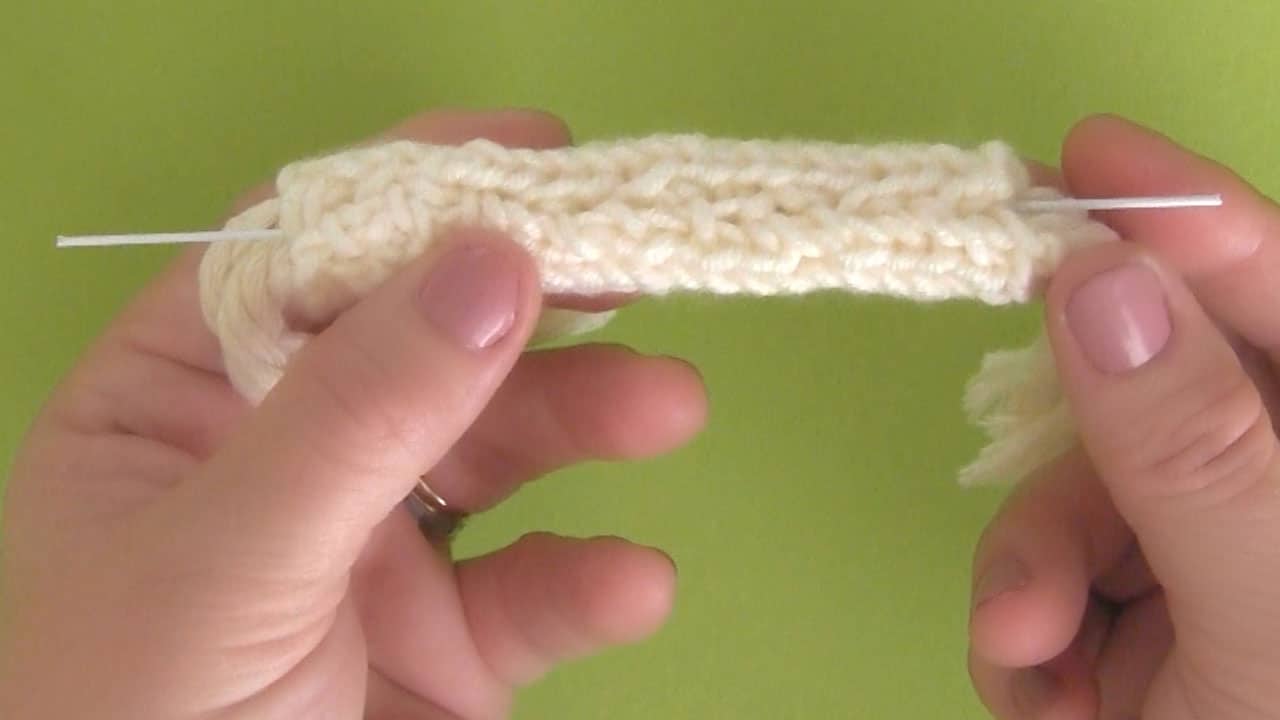
STEP 3: INSERT WIRE
- Insert craft wire into your rainbow layer.
- Cinch wire ends around knitted seams.
_____
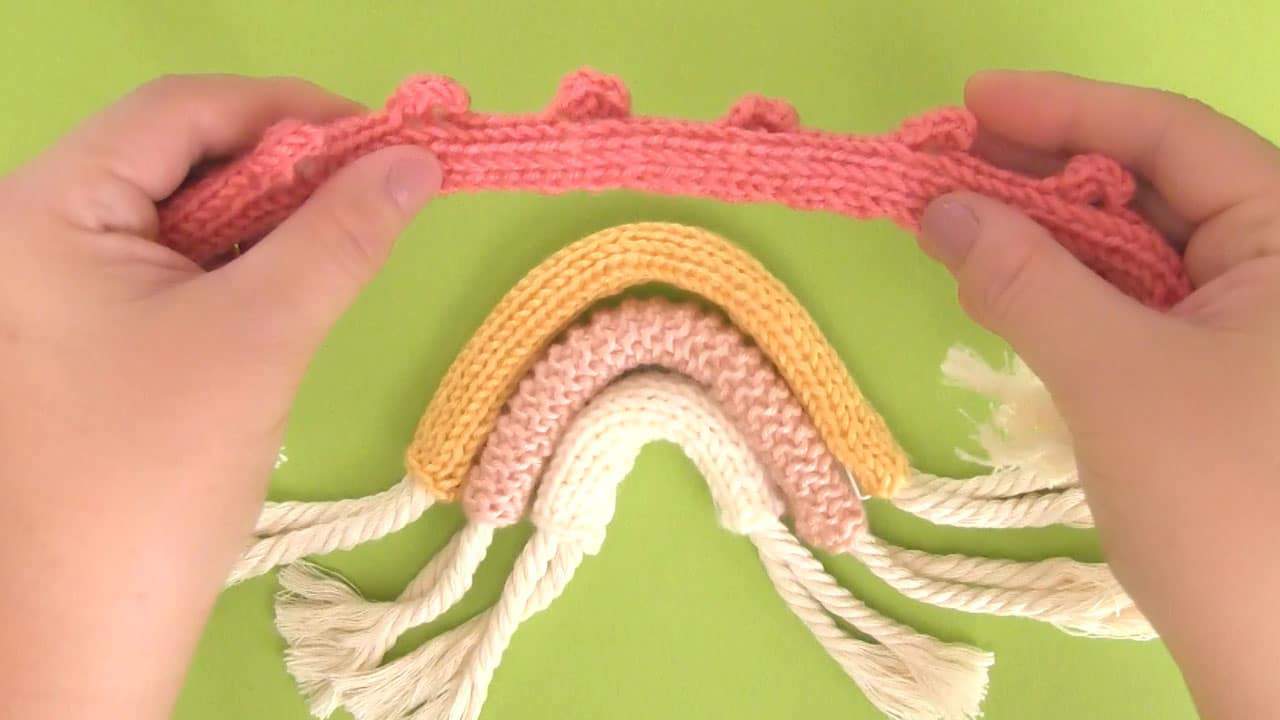
STEP 4: CREATE LAYERS
- Bend knitted piece into a rainbow shape.
_____
STEP 5: FINISHING
- Attach layers by tacking together on the wrong side of work.
- Unravel rope.
- Cut rope ends as desired.
- Add a hanger by sewing a strand of yarn at the top.
Knitting Pattern
Cast On 8 Stitches
Row 1 (Right Side): Knit All
Row 2 (Wrong Side): Knit All
Repeat Rows 1 and 2 until your piece is the length you desire.
_____
Cast On 8 Stitches
Row 1 (Right Side): Knit All
Row 2 (Wrong Side): Purl All
Repeat Rows 1 and 2 until your piece is the length you desire.
_____
Cast On 8 Stitches
Row 1 (Right Side): Knit All
Row 2 (Wrong Side): Purl All
Row 3: Knit All
Row 4: Purl All
Row 5: Knit All
Row 6: Purl All
Row 7: K3, KFBF into 4th Stitch + Turn, P3 + Turn, K3 + Turn, P3 + Turn, K3Tog, K last 4 Stitches
Row 8: Purl All
Repeat Rows 1 – 8 until your piece is the length you desire, ending with Row 6.

Kristen McDonnell
Author • Designer • Teacher
Kristen from StudioKnit LLC produces knitting video lessons and pattern designs from her vibrant production studio on Half Moon Bay’s California coast.
Kristen McDonnell is the author of the highly acclaimed book Knit Stitch: 50 Knit + Purl Patterns featuring vintage and unique designs.