Two-Row Bind Off with Knitted Eyelets for Fringe

This Two-Row Bind Off gives your knitted edge eyelets to easily add fringe! It’s also a great option when finishing a 1×1 Rib Stitch Pattern, as it binds off in pattern.
We begin binding off on the right side of our work, then finish by doing so on the wrong side, as well. This technique gives a really pretty stockinette finish on the top and has a moderate stretch.
Consider using this technique the next time you want to add a little extra flair to your knitted scarves or cozy blankets.
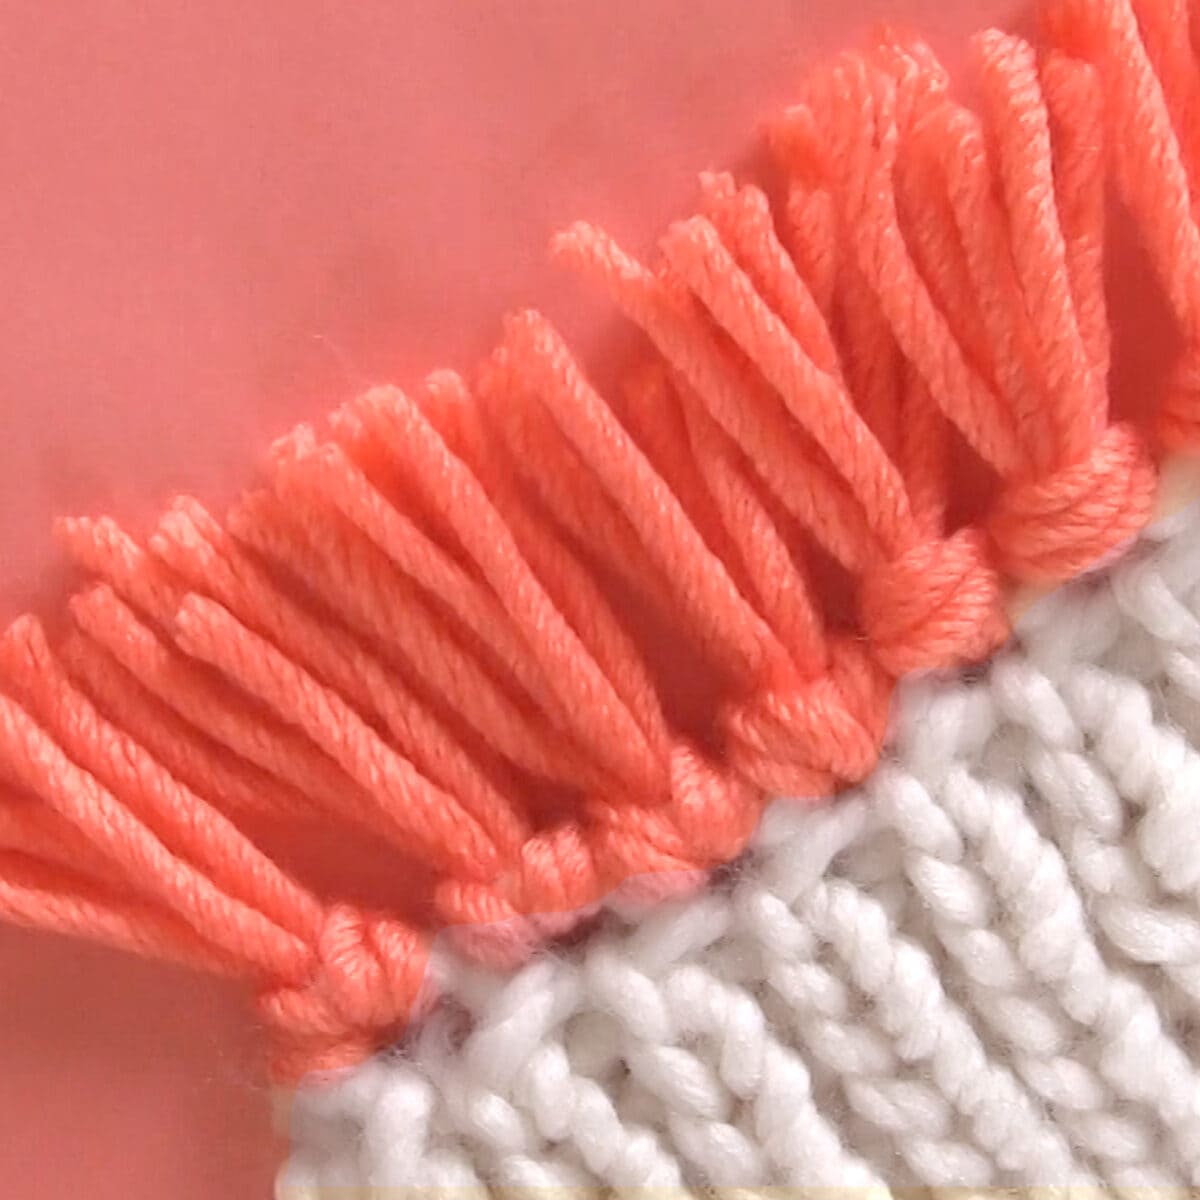
Table of Contents
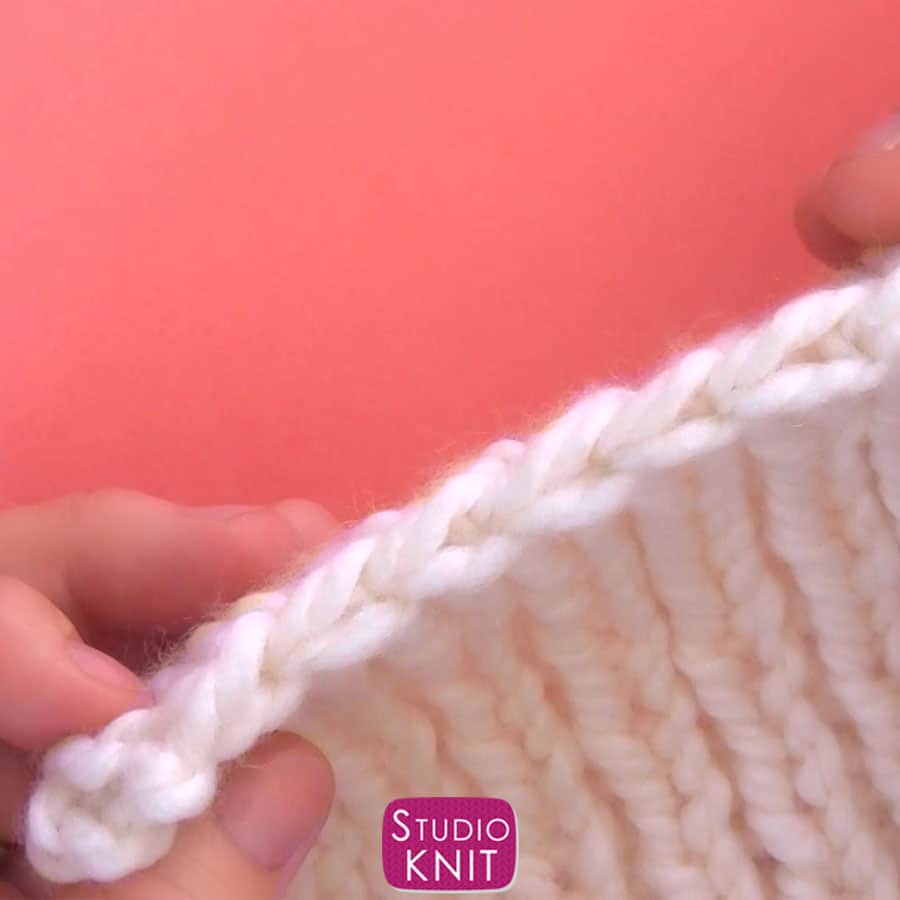
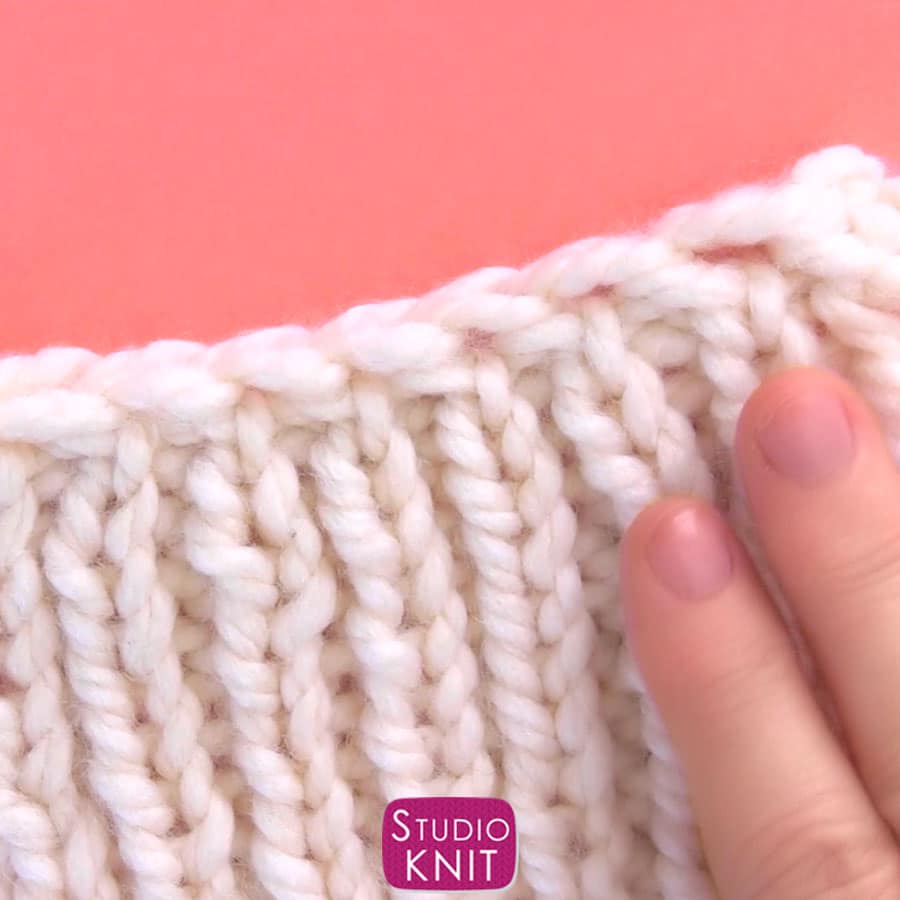
LOOK AND FEEL OF THIS 2-ROW BIND OFF
The top of our bind off is really pretty. It looks like the stockinette stitch on top, and there is a moderate stretch to it… not too tight and not too stretchy.
The next time you’d like to add fringe to a blanket or a scarf, consider this bind off technique. It is very easy and makes adding fringe quite simple. And we have our little eyelets at the top as well.
FINISHING 1X1 RIB STITCH EDGE
This technique is also a great option when you’re finishing the 1×1 Rib Stitch, because we are binding off in pattern with the K1, P1 stitches.
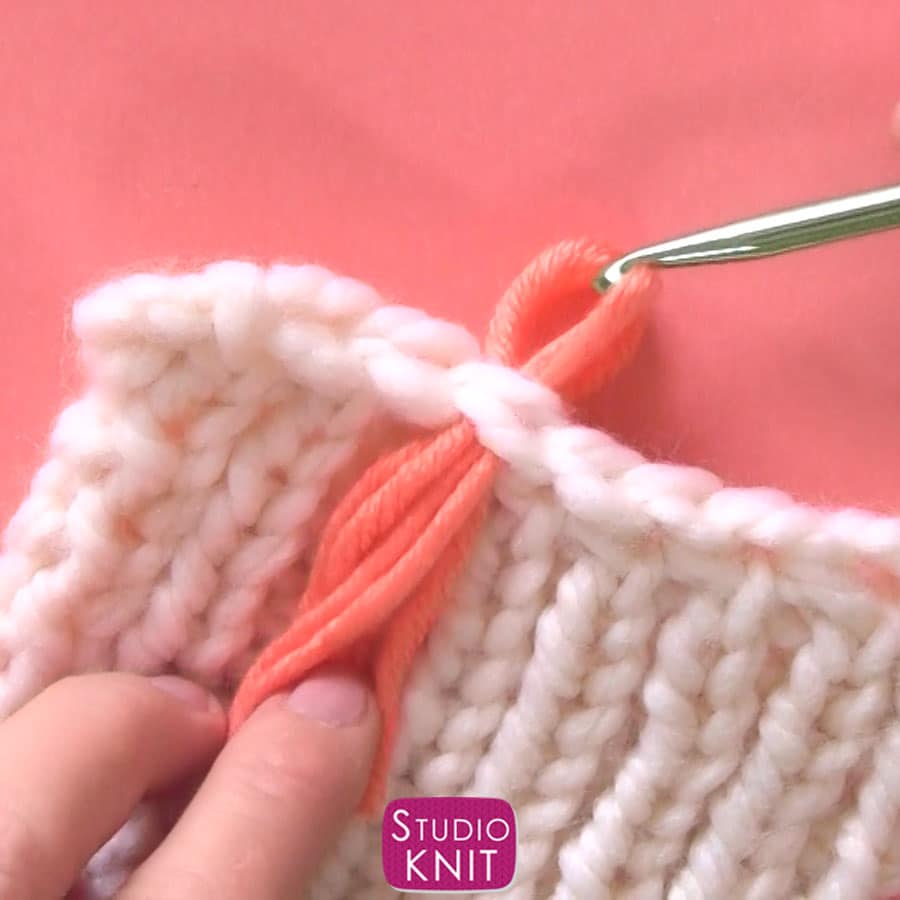
BIND OFF ADDING EYELETS FOR FRINGE
The eyelets created along the edge provide the perfect little opening where you can insert and tie yarn fringe. Knitted work like blankets and scarves always look a little more polished and fun with those yarn tassels.
Either with your fingers or crochet hook, fold your yarn fringe and slide it through the eyelets. Then you just take the ends of the yarn, and insert them through the loop, tie it up, and you have your fringe!
STEPS TO BIND OFF WITH TWO-ROW TECHNIQUE
This technique uses any even number of stitches on your needle. To begin, we’re beginning on the front side of our work, then we are going to turn it and finish the bind-off on the wrong side of our work.
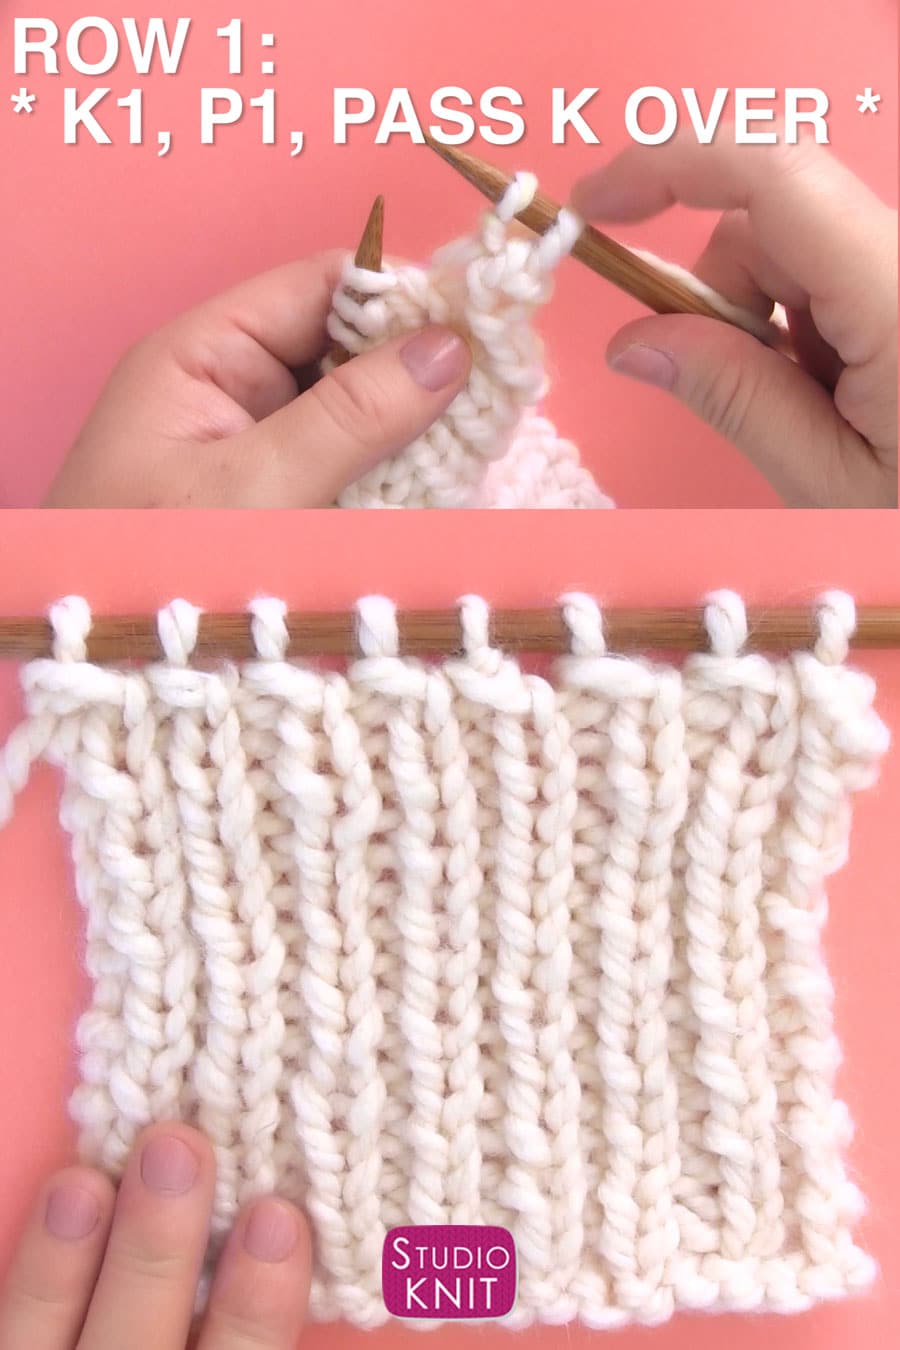
ROW 1: RIGHT SIDE
K1, P1, Pass K Over *
- Knit one stitch, and then bring our yarn to the front to one purl stitch.
- Bring yarn to the back and bind-off one stitch. The knit stitch, the first stitch, gets passed over the purl. Take your left needle, pick up that first stitch, and pass it over the second.
- The purl stitch remains on our right needle.
Continue this pattern while keeping those purls stitches on your right needle, until the end of the row.
 _____
_____
ROW 2: WRONG SIDE
Slip 2 Stitches Purlwise, Pass 1st Stitch Over
Slip 1 Stitch, Pass 1st Stitch Over. Continue until you have 1 loop remaining on your needle.
- We still need to bind off those stitches, so we are turning our work, and finishing on the wrong side.
- Begin by slipping two stitches purlwise.
- Then continue passing the first stitch over the second until you reach the end of the row.
 _____
_____
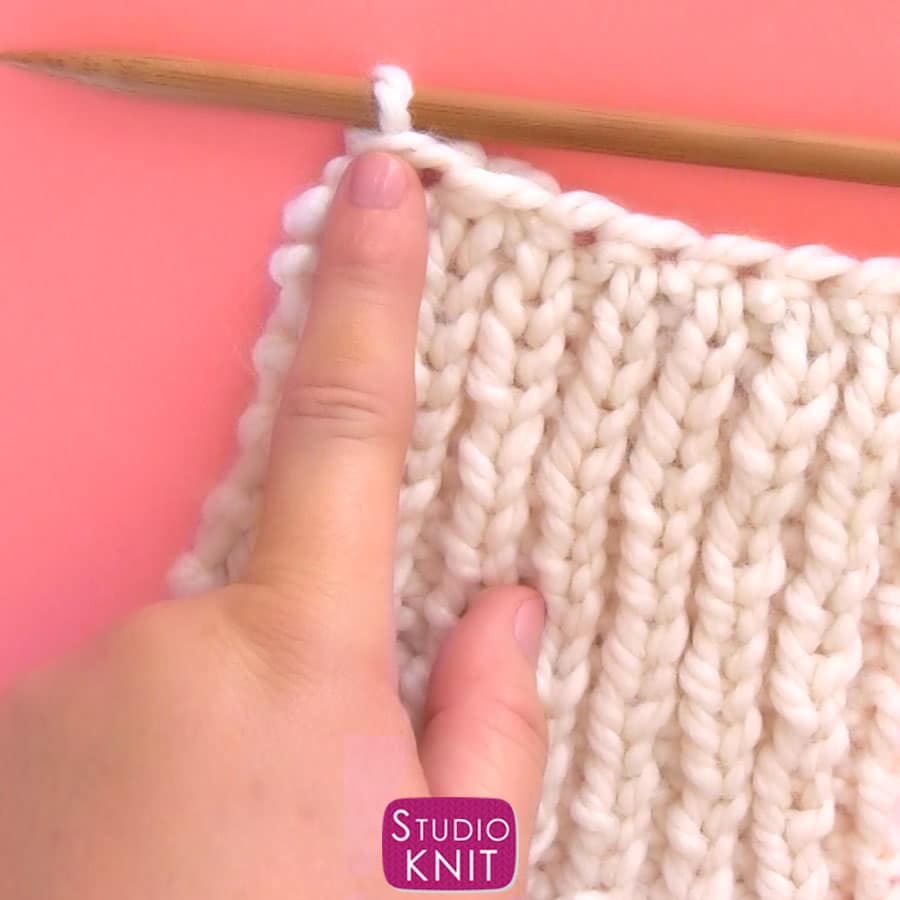
SEW DOWN THE LAST REMAINING LOOP
Once you have one stitch remaining on your needle, you’ll have to sew down that loop. Take a little scrap of yarn to actually sew down that last stitch.
 _____
_____
WEAVE IN YARN TAIL
And of course, the yarn tail that remains on the right side will also need to be woven in, and then just cut off your yarn tails.
THANK YOU FOR VISITING STUDIO KNIT
I hope you are inspired to give the Two-Row Bind Off a try the next time you are finishing up a scarf or blanket. Find more knitting help with all of my technique tutorials. My lesson on the Stretchy Bind Off is another really helpful technique to check out!
